Installation & setup
This page gets the POS running on your own hosting. You'll check your server meets a few simple requirements, upload the files, then follow a friendly on-screen wizard that does the hard parts for you. Most installs take about 10 minutes — no coding required.
Installation is a one-time setup. If someone already installed the POS for you, you can skip straight to Getting started.
Before you start: what you'll need
Have these ready. If you're not sure about the server details, your hosting provider's support team can confirm them in a minute.
Web hosting
Any standard web host works — including cheap shared hosting (cPanel, Plesk). A VPS is fine too.
A database
One empty MySQL database, with its name, username and password. Create it in your hosting panel.
Your purchase code
The license / purchase code you received when you bought the POS — needed to activate it.
Server requirements
The installer checks all of this for you automatically (see Step 2 below) and shows a green tick or a red cross with a fix for each item. Here's the short version:
| Requirement | Needed | Notes |
|---|---|---|
| PHP version | 8.2 or newer | Most hosts let you pick the PHP version in the control panel. |
| MySQL | 8.0+ | MySQL 5.7 also works as a fallback. |
| PHP extensions | Standard set | bcmath, ctype, curl, dom, fileinfo, gd, json, mbstring, openssl, pdo_mysql, tokenizer, xml, zip, intl — almost always already on. |
| Memory limit | 128 MB+ | 256 MB recommended for smooth imports. |
| Writable folders | Yes | The installer needs to write to storage/, bootstrap/cache/ and public/uploads/. |
| Internet access | Recommended | For license activation and update checks. An offline activation path exists if your server is firewalled. |
You don't need Node, Redis, Composer, or any background services. The POS is built to run on ordinary shared hosting out of the box.
Installing, step by step
-
Create an empty database
In your hosting control panel (cPanel/Plesk), create a new MySQL database and a database user, and give that user access to the database. Write down the database name, username and password — you'll type them in shortly.
-
Upload the files
Unzip the product download and upload its contents to your website folder (usually
public_html) using your host's File Manager or an FTP app. Point your domain at this folder. -
Open your website
Visit your domain in a browser. The first time, it automatically opens the installer wizard instead of the app. Pick your language and click Continue.
-
Pass the requirements check
The wizard checks your server. Green ticks mean you're good. For anything red, it shows exactly what to change (and your host can apply it). Click Recheck, then continue.
-
Activate your license
Paste your purchase / license code and continue. (Behind a firewall? Use Activate offline and follow the on-screen instructions.)
-
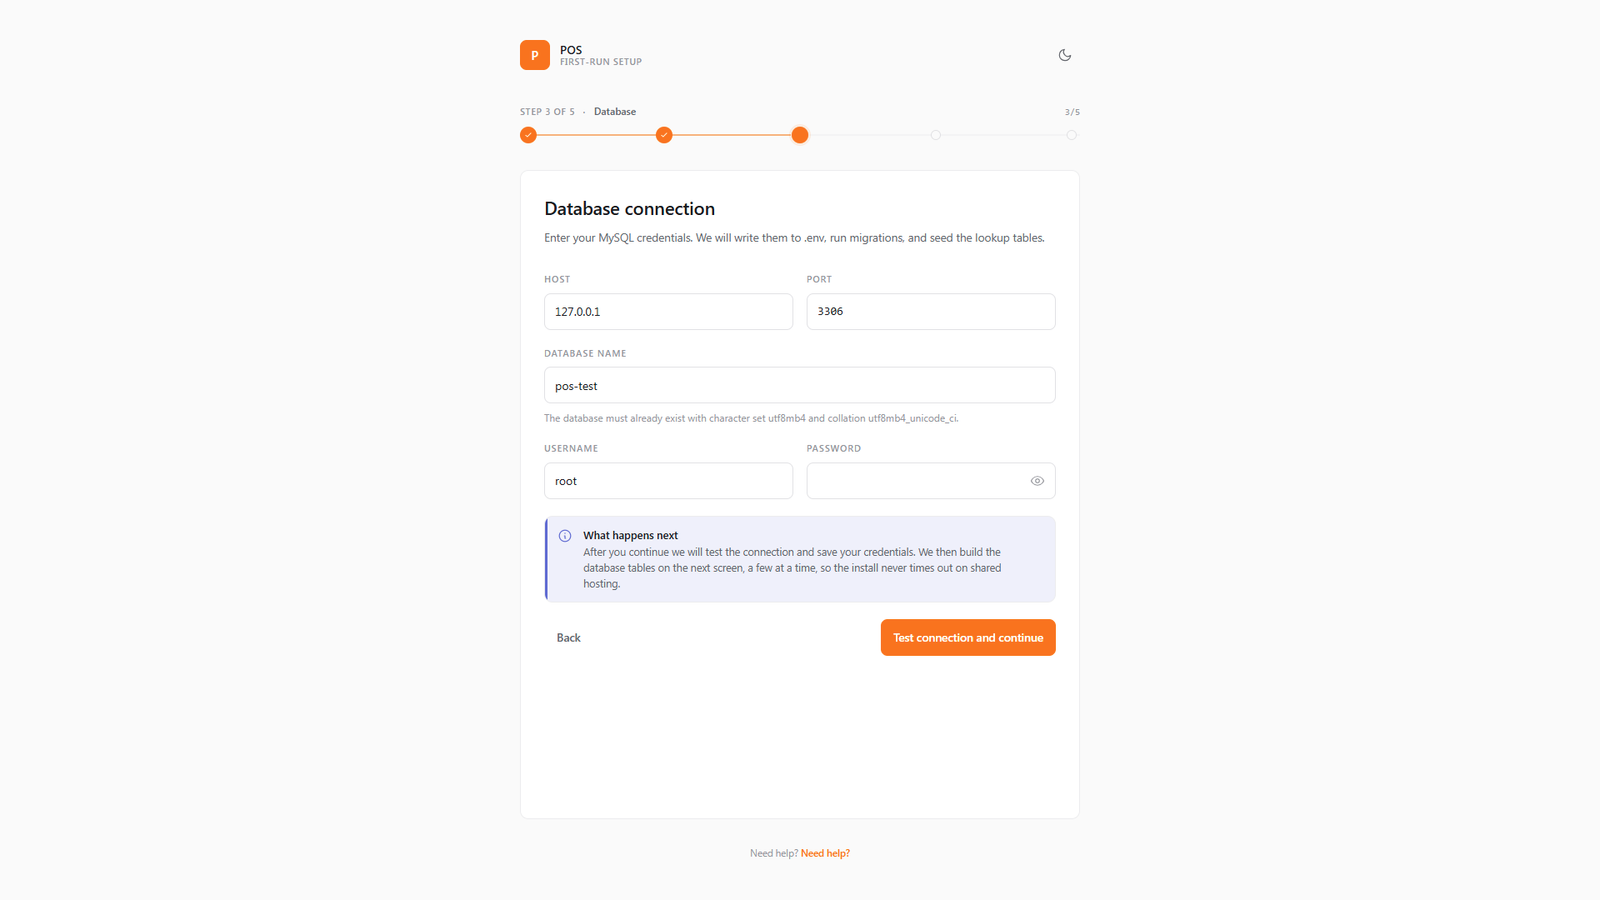
Connect the database
Enter the database name, username and password from Step 1. The wizard tests the connection and then sets everything up — you'll see a short progress bar.
-
Create your admin account & company
Enter your name, email and a password for the main administrator, then your company name, country, currency, time zone and industry (Retail, Pharmacy or Supermarket). This also creates your first store.
-
Choose demo data (optional) & finish
Decide whether to load sample products and sales so you can explore — or start empty. Click finish, and you'll land on the login page, ready to go.
The installer can't add it for you. Adding one scheduled task in your hosting panel is what lets the POS take automatic backups, email your scheduled reports and check for updates on its own. It takes two minutes — see Setting up the cron job.
Pick the right industry
During setup you choose a primary industry. It tailors the system (and the optional demo data) to how your shop works:
| Industry | What you get |
|---|---|
| Retail | A general catalog with variants — clothing, electronics, general goods. |
| Pharmacy | Medicine catalog with batches & expiry and drug schedules. |
| Supermarket | Large catalog with weighed items and scale barcodes. |
After installing
Once you're in, a few minutes in these areas gets you selling:
Cron job setup
Add the one scheduled task that runs the POS's background work.
Getting started
Your first-day checklist to set up and make a test sale.
Settings
Confirm your currency, receipt and email settings.
Backups
Turn on automatic backups so your data is always safe.
Tips & best practices
- Use a fresh, empty database. Installing into a database that already has tables can cause conflicts.
- Pick PHP 8.2 or newer first. If the requirements check flags the PHP version, switch it in your hosting panel before continuing.
- Install on a real domain with HTTPS if you can — card payments and some features prefer a secure address.
- Keep your purchase code safe. You'll need it for activation and for support.
Notes & warnings
The installer locks itself after setup. Once finished, the wizard won't run again (for security). To reinstall from scratch you'd remove the install lock and start over — only do this on a fresh, empty database.
One install = one company. The POS runs your business on its own server; it isn't a shared multi-company service. Multiple shops are handled as stores within the one install.
Stuck during install? Each wizard step explains any error and how to fix it. If you're still stuck, the Troubleshooting page covers the most common hosting hiccups.
Next: Cron job setup · Getting started · Related: Settings · Updates & license · Backup & restore