Taking payments
When the basket is ready, you press Pay and collect the money. The POS handles cash with change, cards, store credit, custom offline methods, split payments, and scan-to-pay QR codes.
Overview
Pressing Pay opens the payment window. It shows the amount due and a row of payment methods — the ways your shop accepts money. Which methods appear depends on what the owner has switched on in Settings, but the common ones are Cash and Card.
You pick how the customer is paying, the POS works out any change, and the sale finishes. One sale can also be paid with more than one method (this is called split tender), and customers can pay by scanning a QR code if your shop has set up an online payment provider.
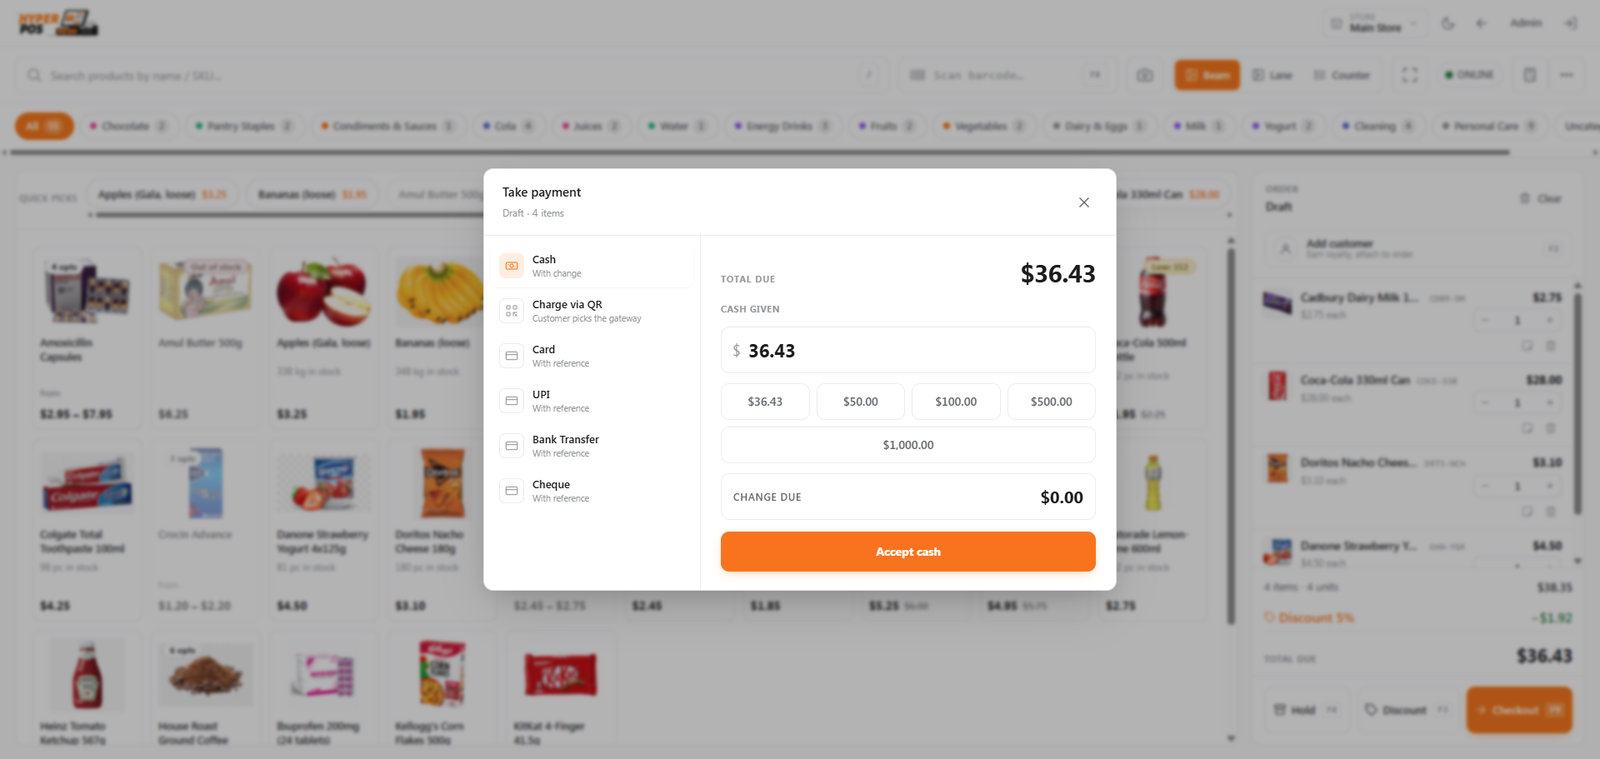
Paying by cash
Cash is the simplest. You enter how much money the customer hands you, and the screen tells you the change to give.
-
Choose Cash
In the payment window, tap Cash.
-
Enter the amount tendered
Type the cash the customer handed over — for example
50.00on a43.50sale. Quick buttons for common notes may also be shown. If they pay the exact amount, you can confirm straight away. -
Read the change due
The screen shows the change to give. Hand it over and confirm — the drawer pops open (if connected) and the receipt prints.
Always type the real amount the customer gives you, even when it's the exact total. This keeps the change correct and makes your end-of-day cash count match. See Shifts & cash drawer.
Paying by card
For card payments, choose Card in the payment window. In most shops the customer taps or inserts their card on a separate bank card machine; the POS simply records that a card payment of that amount was taken. You may be asked to note a reference (such as the last four digits) depending on how your shop is set up. Once the bank machine approves, confirm in the POS to finish the sale.
Custom offline payment methods
An owner can create manual tender types for local payment options such as Mobile Money, a bank app or a shop-specific voucher. Open Settings → Payment methods, click Add payment method, enter its customer-facing name and type, then keep it active so it appears as a payment tile at checkout.
These methods are record-only: the customer completes the payment outside POS, and the cashier records the customer-provided transaction reference before completing the sale. POS does not contact a payment provider, wait for a callback or open the cash drawer for that amount. The reference is kept with the payment for authorized receipts, sale details and reports.
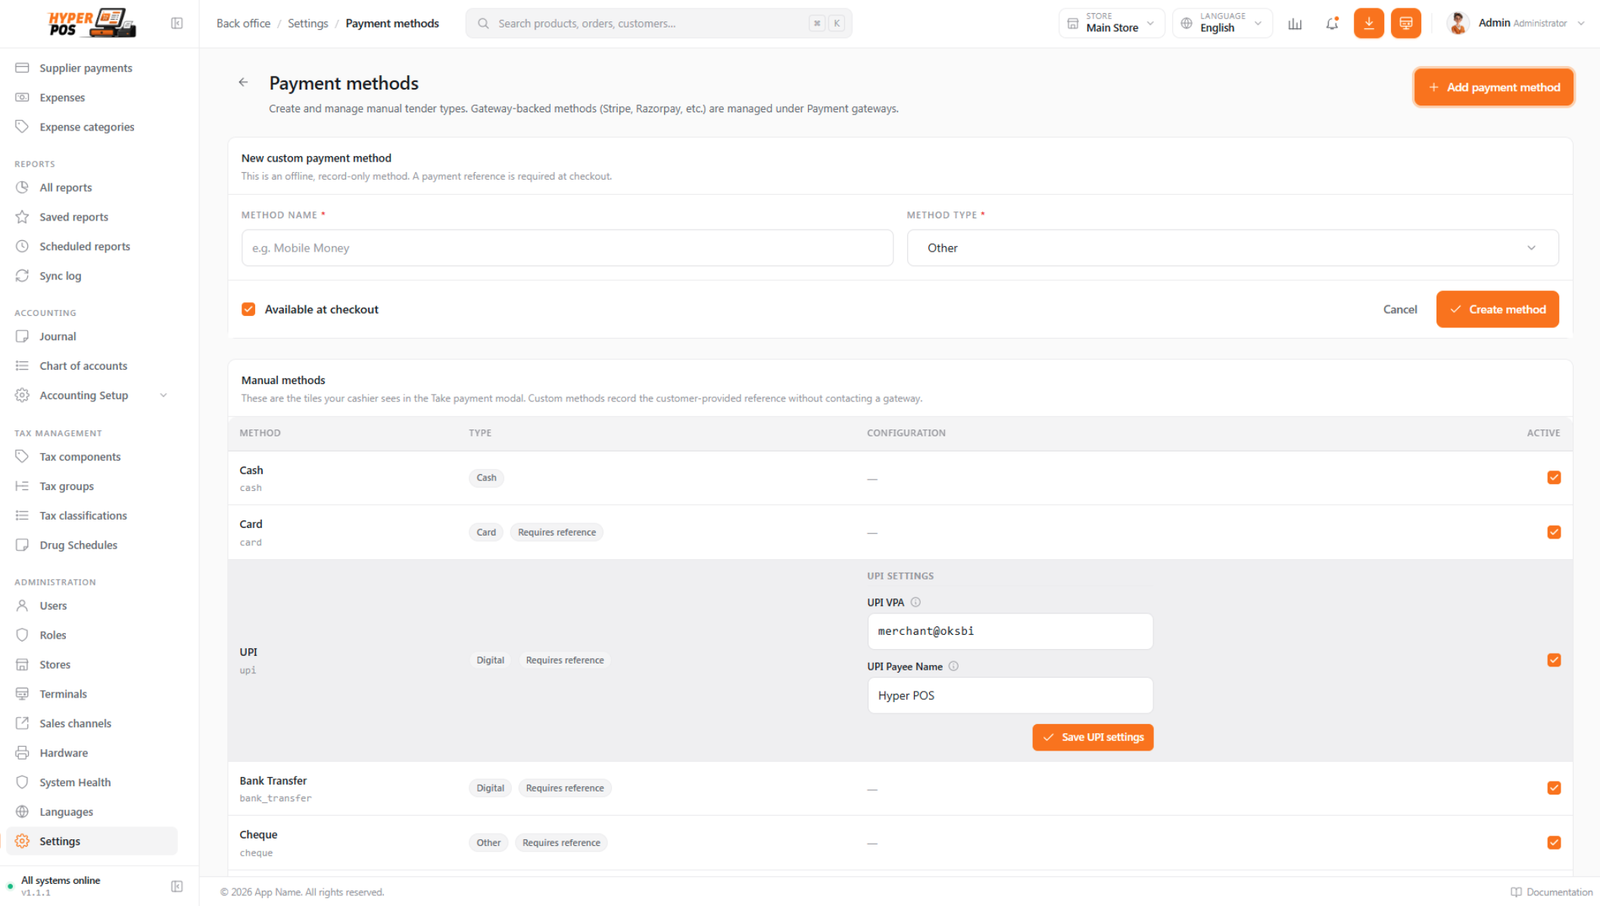
Turning a custom method off removes it from new checkouts without changing historical payments. Turn it on again whenever the shop starts accepting it.
Splitting one sale across several payments
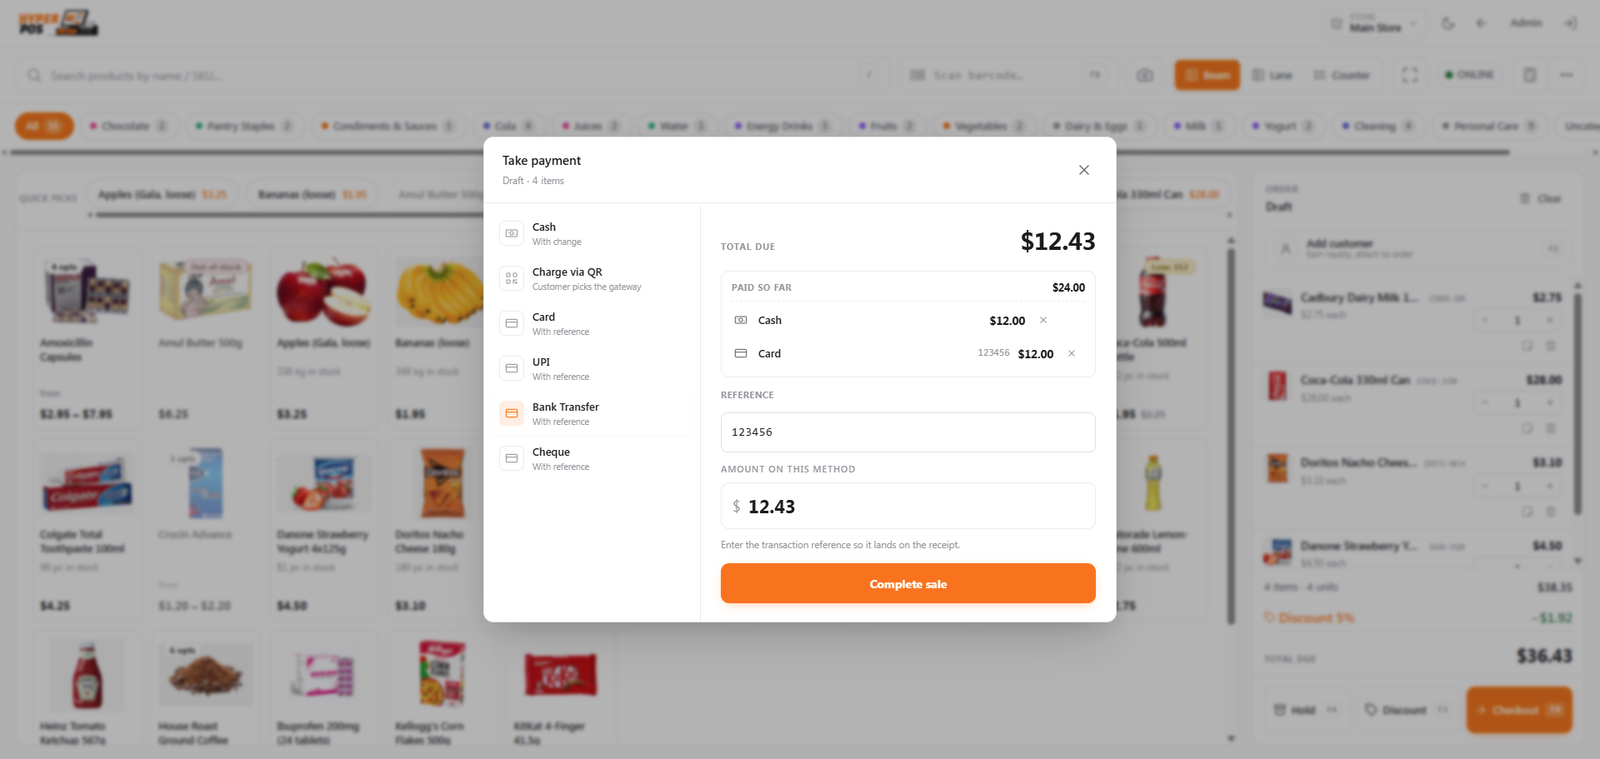
Sometimes a customer pays part in cash and part by card — or uses two cards. This is split tender: you add more than one payment row to the same sale until the whole amount is covered.
-
Add the first payment
Pick a method and enter an amount that's less than the total — for example
30.00in cash on a50.00sale. -
Watch the tally strip
A strip shows the total paid so far and the amount remaining. While money is still owed, the button reads Add payment.
-
Add the next payment
Choose another method (for example Card) for the rest. A handy "pay the remaining amount" shortcut fills in exactly what's left so the figures balance.
-
Complete
Once the remaining amount reaches zero, the button changes to Complete. Press it to finish the sale.
A normal single-method sale still works in one tap — you only ever see the extra steps when you choose to split.
Online & QR payments
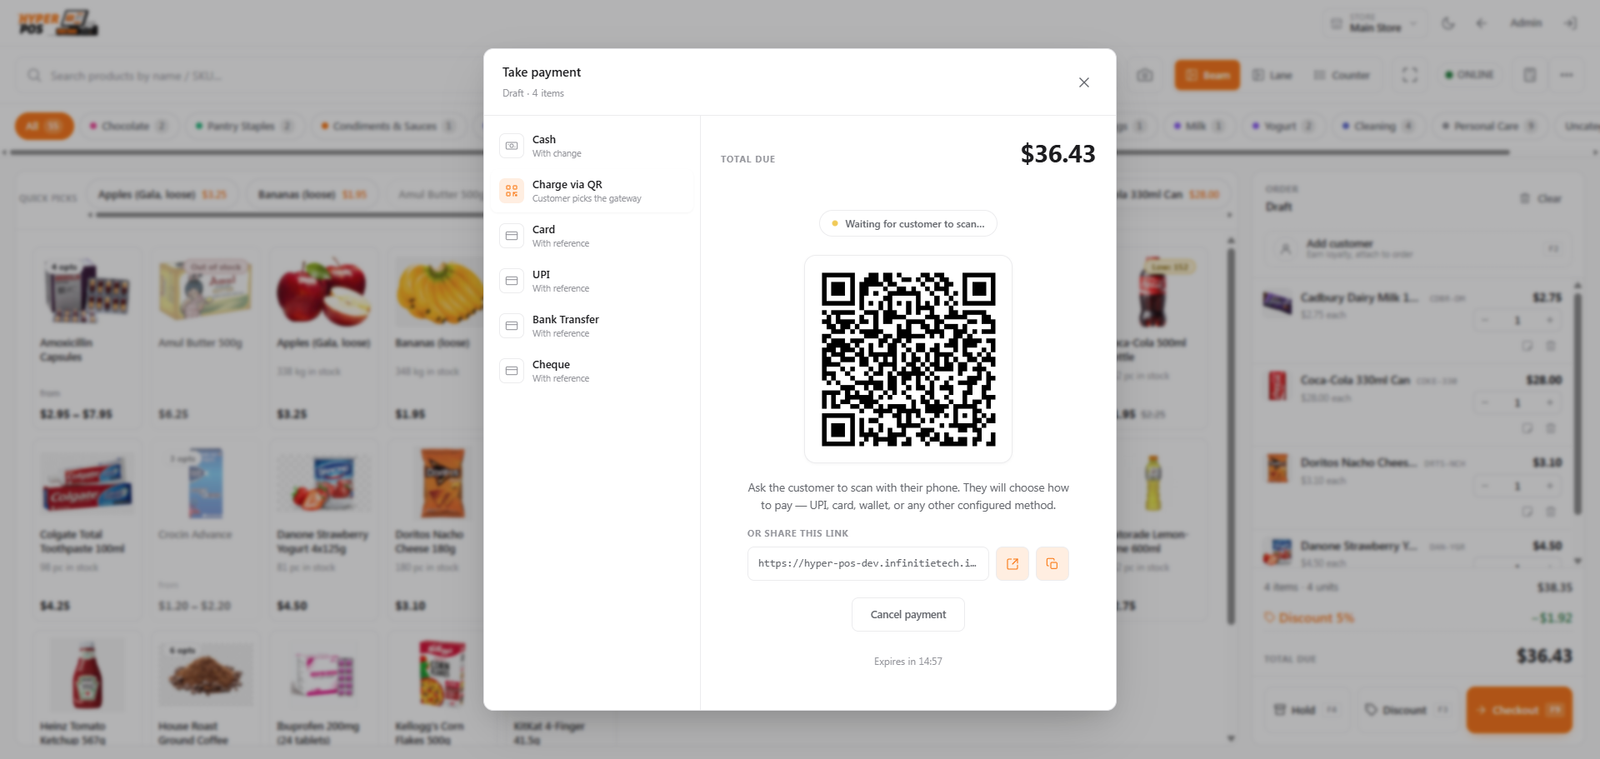
If your shop has set up an online payment provider, the payment window shows a single Charge via QR tile. You don't pick the provider — the customer does.
-
Choose "Charge via QR"
The POS shows a QR code for this exact sale amount.
-
The customer scans it
Using their phone camera, the customer opens a small page that lets them pick how to pay — card, wallet, or whatever providers you've enabled.
-
They pay on their phone
The customer completes the payment securely with the chosen provider. Nothing card-related is typed into the POS.
-
The POS confirms automatically
When the payment goes through, the POS sees it, marks the sale paid, and prints the receipt.
Which providers are supported
The owner can connect one or more payment providers in Settings. Supported providers include:
These are optional and bring-your-own: you sign up directly with the provider and enter your own account details in Settings. The POS never sees or stores card numbers. Because the customer chooses the provider from the QR page, adding a new provider later never changes how the cashier works — the same single Charge via QR tile keeps doing the job.
Letting a customer pay later (credit)
If a sale is attached to a saved customer, you can leave part of it unpaid — the customer owes the balance. Their outstanding balance goes up, and they settle it later (see Customer payments). A walk-in sale with no customer must always be paid in full.
Using a customer's store credit
Store credit is money the business already holds for a customer, usually because they paid more than they owed. Select that customer before opening the payment panel. Their available credit appears separately from the amount they owe you.
- Apply the amount they want to use
Enter any amount up to the available balance, or use Max. POS caps it at the sale total, so it cannot create change or make the amount due negative.
- Pay any remainder normally
Credit can cover the full sale, or you can combine it with cash, card or a custom manual method.
- Complete the sale
The used amount is deducted once from the customer's store-credit balance and is identified on the receipt and payment history.
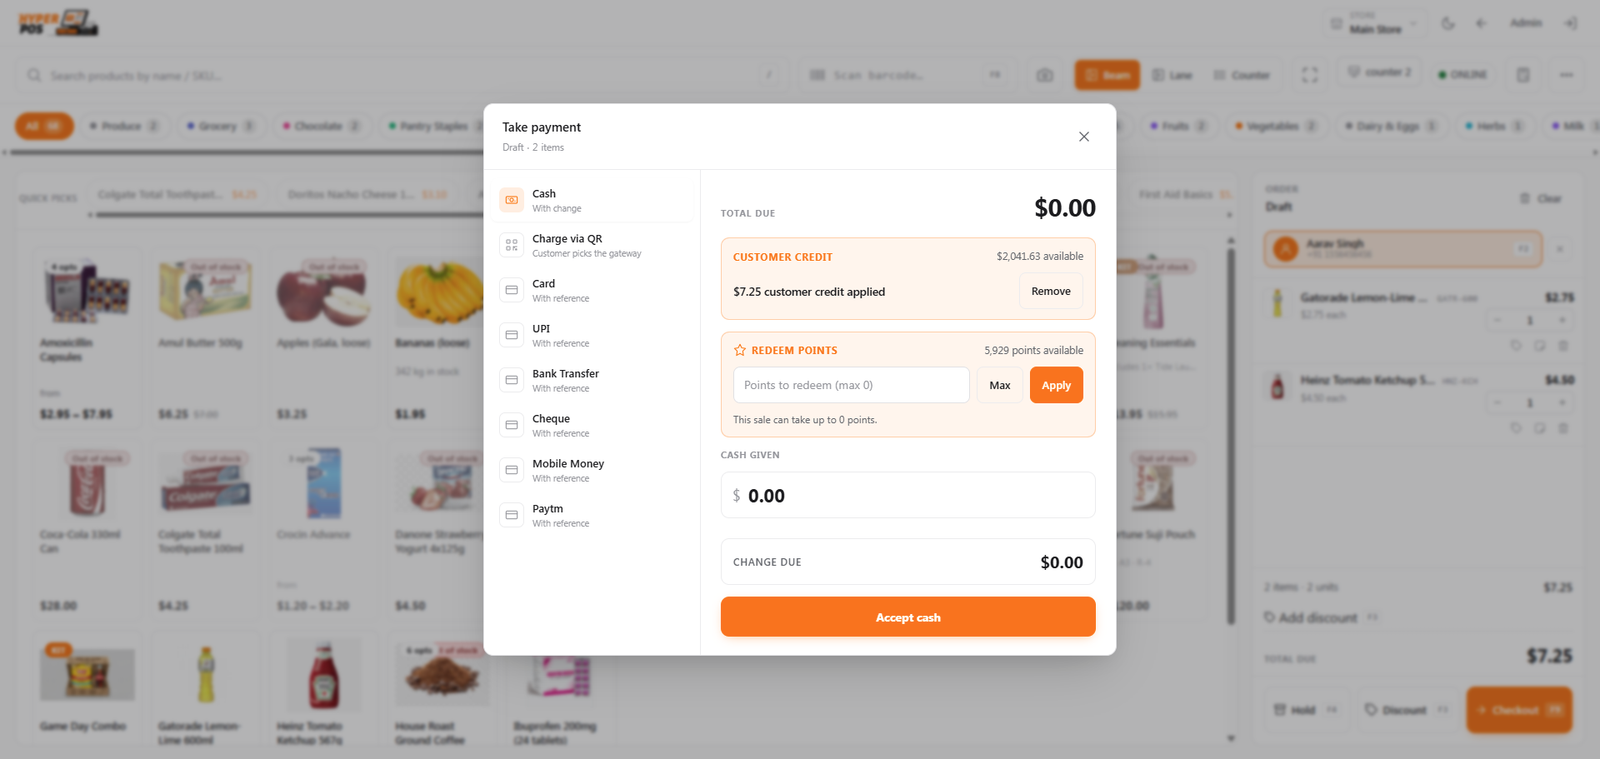
Store credit needs the saved customer and an online balance check. Changing or removing the customer clears the applied credit. It cannot be spent by a walk-in customer or while the POS is offline.
Refunding a card or online payment
Payments taken by card or an online gateway can be sent straight back to the customer's card or account when you refund — no cash from the drawer. In the refund flow, leave the method on "Use original method" and the POS reverses the charge through the same provider. Full details are on the Returns & refunds page.
Tips & best practices
- Use the "pay remaining" shortcut when splitting — it fills the exact balance so you never mistype.
- Let the QR do the typing. Scan-to-pay means no card details touch the till, which is safer and faster.
- Confirm the card on the bank machine first, then confirm in the POS — the POS is recording the payment, not processing it.
- Wait for the green confirmation on QR sales. Don't hand over goods until the POS shows the payment succeeded.
Notes & warnings
QR payments need an internet connection. If you're selling offline, online providers won't be available — take cash or record a card instead.
Online providers are optional. If your shop hasn't connected one, you simply won't see the "Charge via QR" tile — cash and card still work as normal.
Never finish a sale before the money is actually received. For cards and QR, confirm the provider approved the payment first. Once a sale is completed you'd have to refund it to undo it.
Related: The POS screen · Customer payments · Discounts & pricing · Returns & refunds · General settings