Products
A product is anything you sell — a tin of beans, a shirt, a box of medicine, a haircut. Your product list (called your catalog) is the heart of the system: it feeds the checkout screen, your stock counts, your reports and your receipts. Get it right and everything else just works.
/admin/products.Overview
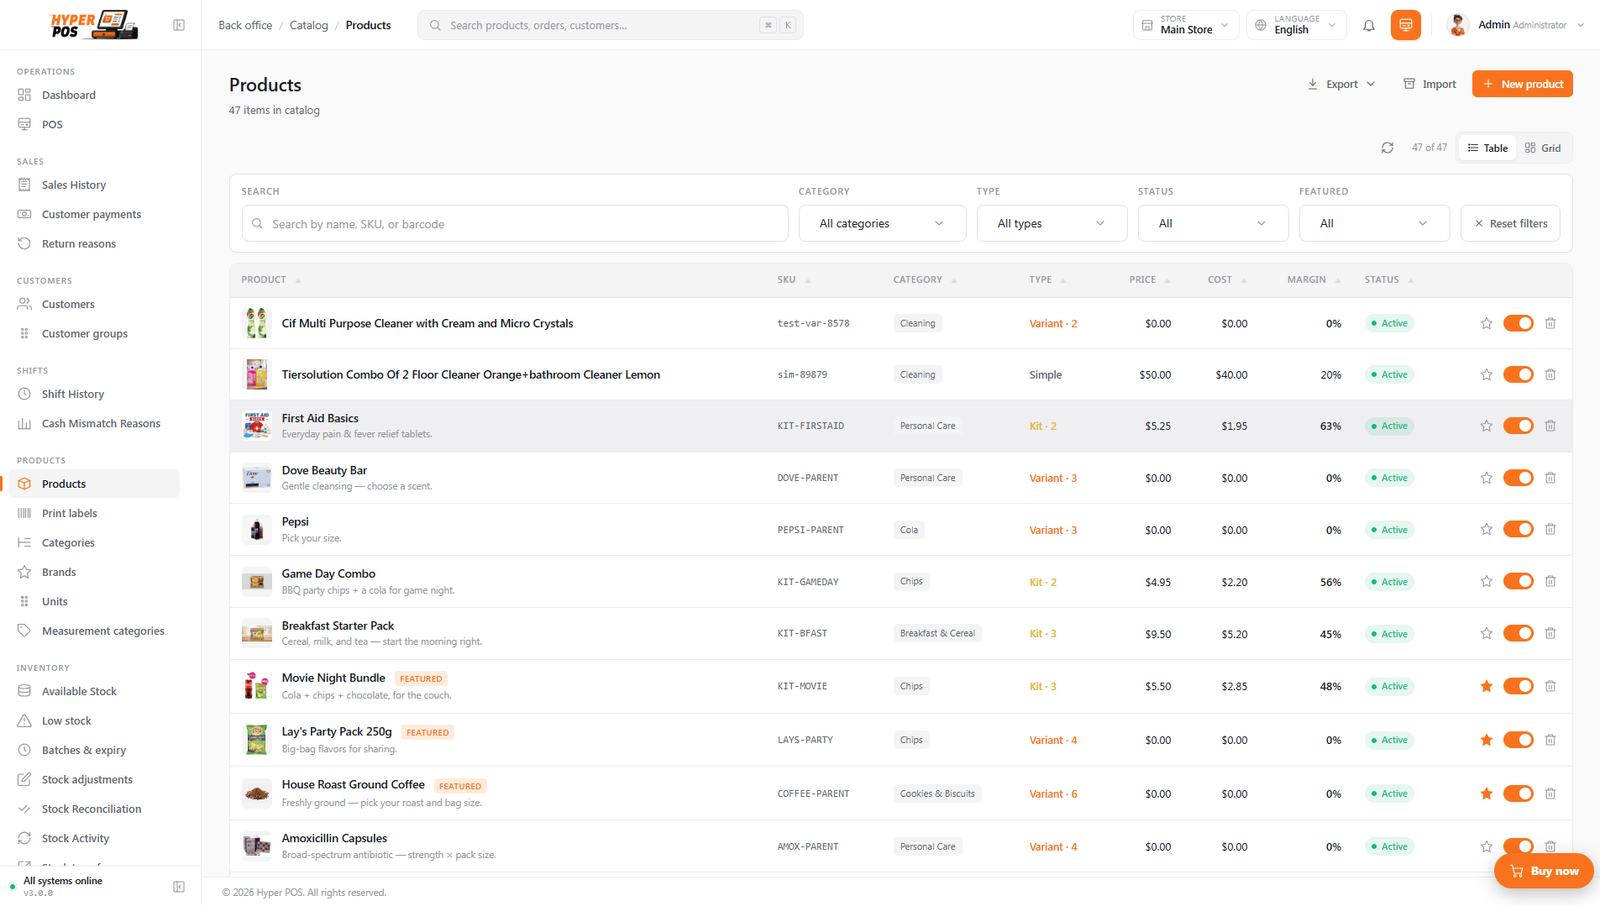
The Products screen shows everything you sell in one searchable table — with the product's picture, code, category, current stock, price and an on/off status switch. From here you add new products, edit existing ones, print barcode labels, and import or export your whole catalog as a spreadsheet.
Every product carries the details the rest of the system needs: its name, a unique code (its SKU), an optional barcode for scanning, the selling price, what it cost you, which category, brand and unit it belongs to, and the tax that applies. You only have to fill in a few of these to start selling — the rest you can add whenever you're ready.
Why it's useful
- It powers the till. Anything in your catalog can be scanned or tapped into a sale instantly. Nothing sells that isn't a product first.
- It keeps prices consistent. Set a price once and every sale uses it — no more guessing or sticky notes.
- It tracks your stock. Because each sale knows which product left the shelf, your stock counts stay accurate automatically.
- It scales to thousands of items. Bulk import and export mean you never have to type a big catalog by hand.
Adding a product, step by step
-
Open the products list and click "Add product"
Go to Products in the sidebar, then click the Add product button at the top of the list. A form opens.
-
Give it a name and a code
Type the product's name (this is what staff and customers see). The SKU — a short unique code used internally — is optional: leave it blank and one is created for you when you save. If the item has a printed barcode, type or scan it into the Barcode field. For loose or own-made goods with no barcode at all, click Generate to mint one. See Product codes below.
-
Set the prices
Enter the selling price (what the customer pays) and the cost price (what you pay your supplier). The cost is used to work out your profit in reports — it never shows to customers.
-
Choose category, brand and unit
Pick a category and brand to keep the product organised (see Categories & brands), and a unit — for example piece, kg or litre (see Units of measure). The unit shows on the cart, receipts and reports.
-
Set the tax
Choose the tax group that applies (for example VAT or GST). The till then adds the right tax to every sale automatically. See Taxes if you haven't set up your tax rates yet.
-
Add a picture and stock details (optional)
Upload a photo so the product is easy to spot on the touch screen. If you keep stock, switch on Track stock and set a reorder level so you're warned before you run out. You can enter your opening stock here too.
-
Save
Click Save. The product appears in the list immediately and is ready to sell at the counter.
To save a product you just need a name, a selling price and a unit. The SKU fills itself in if you leave it blank, and everything else can wait until you have time.
Product codes: SKU and barcode
Two codes identify a product, and they do different jobs. The SKU is your internal reference — the one you use in spreadsheets and stock counts. The barcode is the number printed on the packet that a scanner reads. Neither has to be typed by hand any more.
SKUs fill themselves in
Leave the SKU field blank and the system generates one the moment you save — following the pattern you set, and continuing from the highest number already in use. The default pattern is SKU-00001, giving SKU-00001, SKU-00002 and so on.
- A SKU you type is always kept exactly as entered. Nothing is ever renamed behind your back.
- Click Generate next to the field if you'd like to see the suggested code before saving. Previewing doesn't reserve it — you can click it twice and get the same answer.
- Change the pattern under Settings → Numbering, where a live preview shows what the next code will look like. See Settings.
- Products with variants get sensible codes too — a blank variant SKU becomes the parent's code plus the variant's options, such as
SKU-00007-RED-S. - Deleted codes are never reused, so an old spreadsheet can't suddenly point at a different product.
One exception: importing products still requires a SKU in the file. It's the column that decides whether a row updates an existing product or creates a new one — without it, re-importing the same sheet would make duplicates. See Importing & exporting in bulk.
Barcodes for items that don't have one
Most goods arrive with a barcode printed on them — scan it into the field and you're done. But loose produce, repacked goods, home-made items and services have nothing to scan. For those, click Generate next to the Barcode field and the system mints a proper EAN-13 barcode: thirteen digits with a correct check digit, so any scanner and any label printer will read it back perfectly.
- It never happens automatically. Save a product with an empty barcode and it stays empty — a barcode is only ever created when you ask for one. (That's deliberate: an invented number printed on a label would disagree with the box.)
- It can't clash with a real product. Generated codes start with the in-store prefix
20by default, a range the worldwide barcode standard reserves for shops' own use. You can change the prefix under Settings → Numbering. - Each one is unique, including across the variants of a single product, and codes belonging to deleted products are skipped.
- Print it and go. Send the product to Barcode labels, stick the label on, and it scans at the till like anything else.
Using weighing-scale labels too? Keep the in-store barcode prefix different from your scale's prefix, so the till can always tell a priced-by-weight label apart from a shop-generated barcode. Both are set in Settings — see Weighed & scale items.
Other things you can do here
Editing a product
Click any row in the list to open that product and change anything — its price, picture, category, tax and so on. Save your changes and they take effect on the next sale.
The active / inactive switch
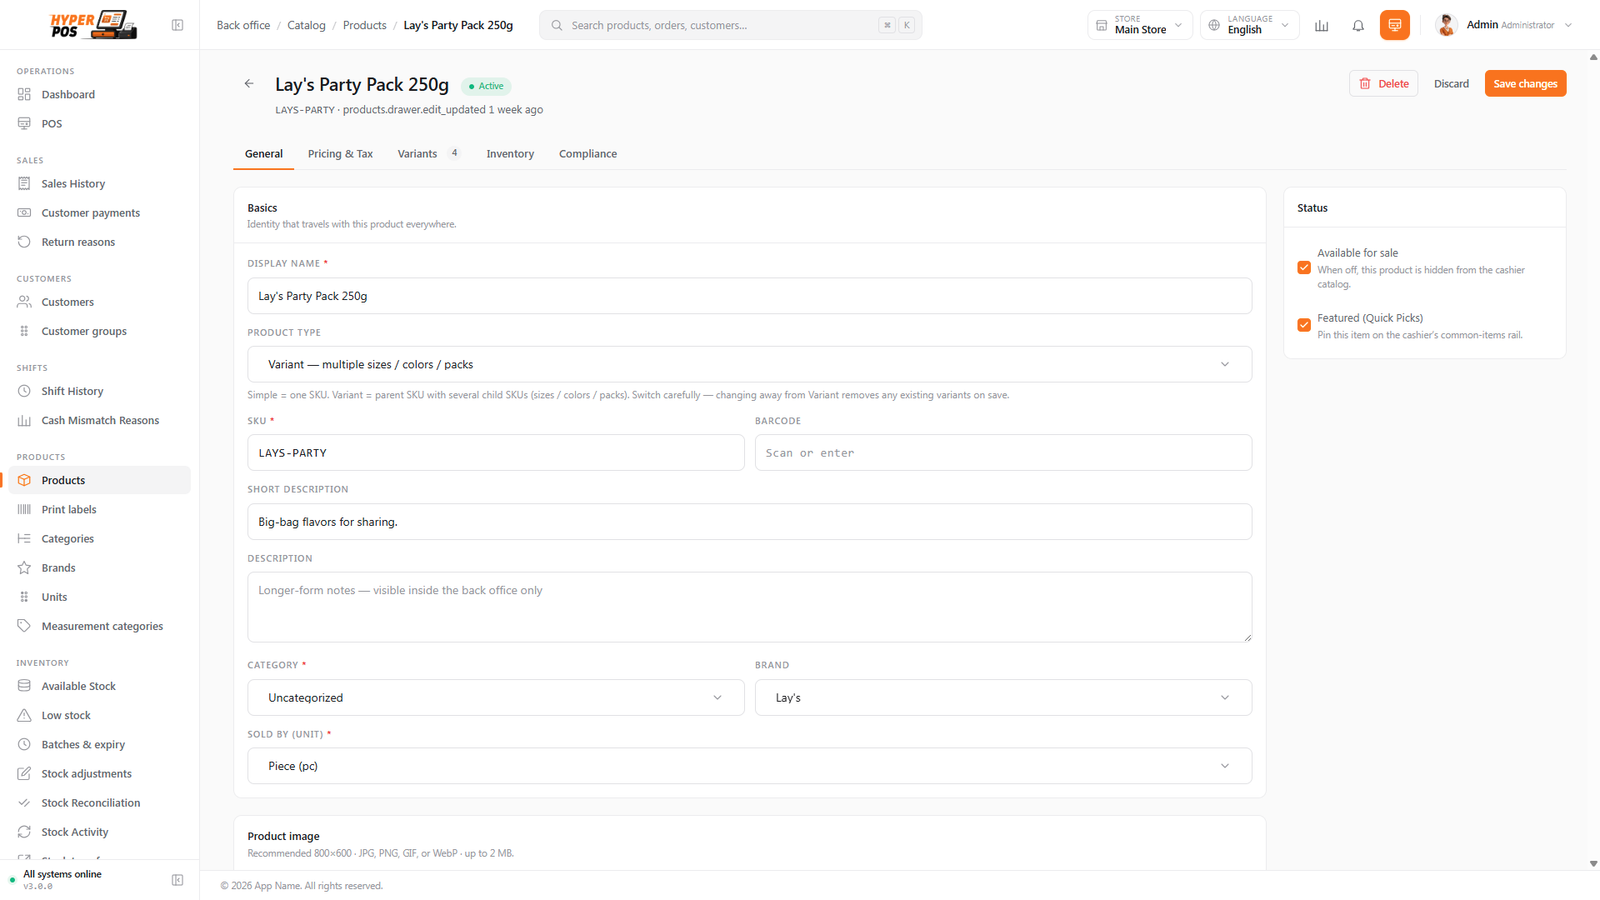
Every row has a status switch. An active product can be sold and shows on the till; an inactive one is hidden from checkout but kept on file with all its history. Use inactive for items you've stopped selling but don't want to delete — a seasonal line, say, or a product you may bring back. Deleting is for genuine mistakes only.
Searching & filtering
The search box at the top finds products by name, code or barcode as you type. You can also filter the list — by category, brand, whether it's in stock, low or out, and active or inactive — to zero in on exactly the items you want.
Deleting several products at once
If test items, duplicate entries or other products were added by mistake, you can remove several of them together from the Products list. Bulk delete is available to users who have permission to delete products.
-
Switch to the table view
Open Products and use the table view. The selection checkboxes are not shown in the card view.
-
Tick the products you want to remove
Tick each required row, or use the checkbox in the table heading to select every product on the current page. The bulk action bar appears above the table and shows how many rows are selected.
-
Click "Delete" and review the warning
Click Delete in the bulk action bar. Check the number in the confirmation message, then click Delete products to continue.
-
Check the result
A message tells you how many products were deleted. If your selection included products that already have sales, those products are kept and the message tells you how many were blocked.
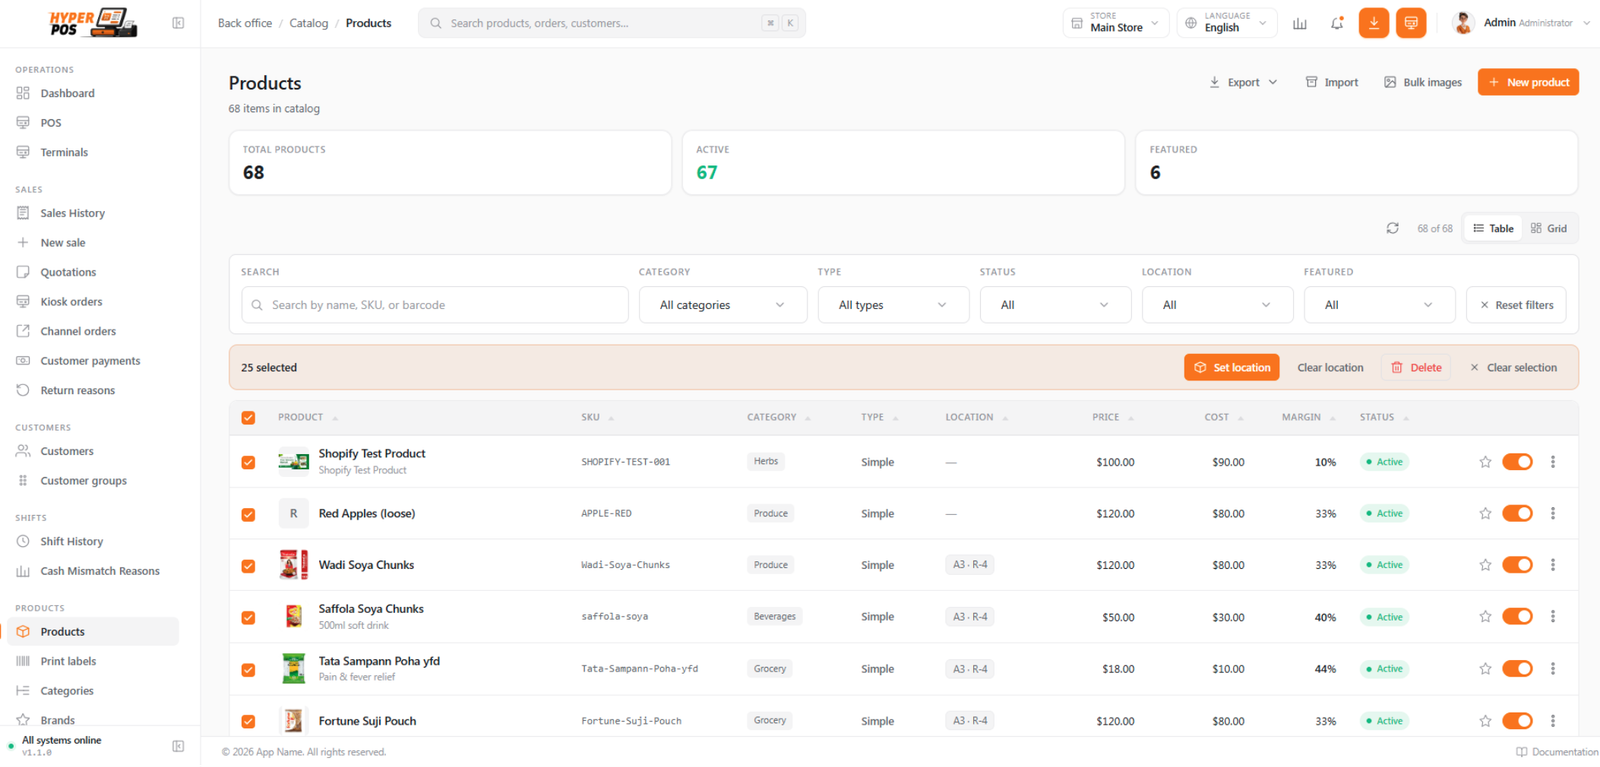
The Select all matching option can cover products across many result pages, so it cannot be used for deletion. Clear that selection and tick the exact rows you want to remove on the current page.
Products with sales cannot be deleted because they are needed for receipts and reports. Make those products inactive instead.
Batches, expiry & weighed items
Some products need a little extra. Medicines and perishables can track batches and expiry dates so older stock sells first and expired stock is blocked — see Batches & expiry. Loose goods like fruit or grains can be sold by weight, with the price worked out from what's on the scale — see Weighed & scale items. Turn these on per product when you need them.
Kits & bundles
A kit is a single product made up of other products — a gift hamper, a starter pack, a "buy the whole set" bundle. On the product form, choose the Kit type, then add each component (the products inside the bundle) and how many of each the kit contains.
You don't have to work out the price yourself. As you add components, the kit's selling price and cost price fill in automatically as the sum of every component's price times its quantity. Add a component, change a quantity or swap in a different variant, and the total updates on the spot. If a component has variants — a particular size or colour — that variant's own price is the one used.
Want to set your own bundle price instead, perhaps a discount for buying the set? Just type your figure into the price field — from that moment the system stops overwriting it, so your price stays put. Changed your mind, or added more components afterwards? Click Recalculate to snap the price back to the current sum of the components.
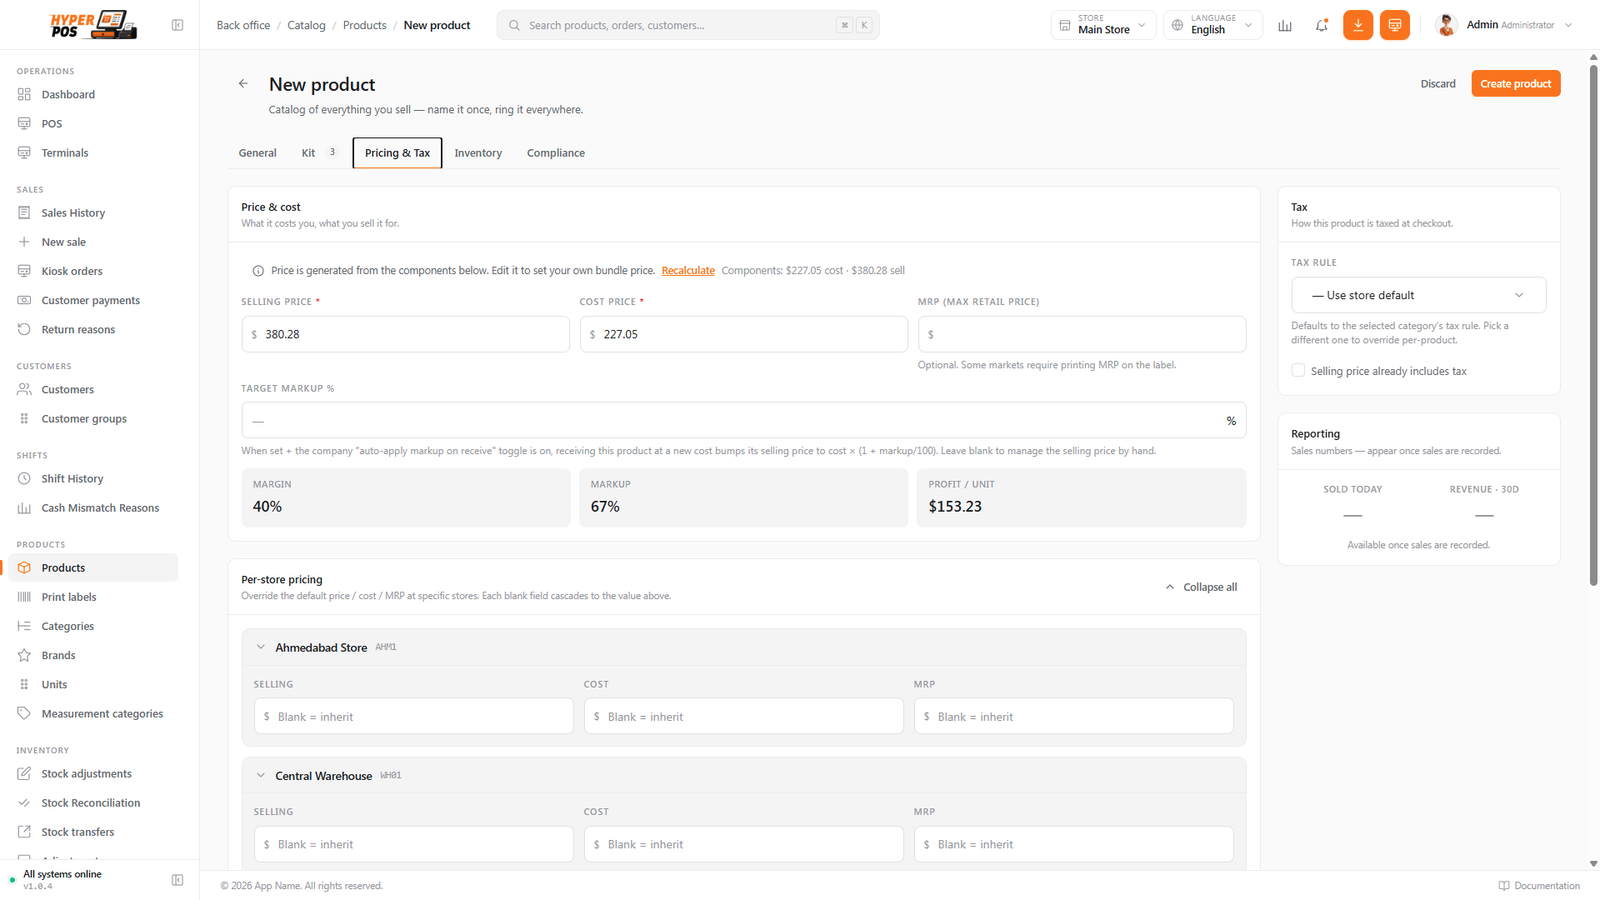
The moment you type your own selling or cost price, the system stops updating that field from the components — so changing a component afterwards won't move your price. Use Recalculate if you want it back to the components total.
Importing & exporting in bulk
For big catalogs, typing every product by hand isn't practical. Use the Export button to download your whole catalog as a CSV or Excel spreadsheet, and the Import button to upload one.
Import walks you through it in a few steps:
| Step | What happens |
|---|---|
| Upload | Pick your CSV or Excel file. You can download a template that matches the right column layout. |
| Match columns | The system lines up your spreadsheet's columns with its own fields automatically; you can adjust any that don't match. |
| Preview | See the first rows with any problems flagged before anything is saved. You can skip bad rows or create missing categories and brands on the fly. |
| Import | The file is processed in the background. You get a summary of how many were created, updated and skipped — with a downloadable report of any that failed. |
Existing products are matched by their SKU, so importing the same file again updates rather than duplicates. This makes import handy for bulk price changes too.
The importer only changes the columns you actually mapped. A narrow update sheet with just SKU and Selling price touches the price and nothing else — descriptions, tax settings, shelf locations and flags are all left exactly as they are.
Where each product sits — shelf locations
Every product can record where it physically lives in your shop: aisle A3, rack R-12, the fridge, the locked cabinet. Open a product and scroll to Shelf locations to add as many places as the item actually occupies, and mark one as the main spot people pick from.
From this list you can also do it in bulk. Filter to the products you're placing, tick them (or select all matching to take every product behind your filter, not just this page), and choose Set location or Clear location. There's a Location column and a filter for products that don't have one yet, and the location columns come along in both import and export.
It's a feature with its own guide — see Shelf locations for the full picture, including naming the fields to match how your team talks and printing a count sheet in walk order.
Bulk product images
Adding a photo to every product one at a time is slow when you have hundreds of them. The Bulk product images screen lets you attach pictures to lots of products in a single pass — you drop in a whole folder of photos and the system files each one to the right product for you. Find it under Products → Bulk images, or open /admin/products/bulk-images.
It works hand in hand with import. Rather than matching photos by SKU or barcode, the system matches each picture to a product by the filename you put in the import's Image column. So the photo apple-front.jpg goes to whichever product had apple-front.jpg in its Image column — you never have to rename your files to codes.
-
Name each photo in your import
In your product spreadsheet, fill the Image column with each product's photo filename — for example
apple-front.jpg. Then import as usual (see Importing & exporting in bulk above). -
Open Bulk images and drop your photos
Drag your folder of pictures onto the drop zone, or click to choose them. Accepted types are JPG, PNG and WEBP, up to 4 MB each. Anything that isn't a supported image, or is too big, is skipped.
-
Check the matches
Before anything uploads you get a summary — "X matched · Y unmatched" — with the matched photos lined up against their products and any leftovers listed separately. Products that already have a photo are flagged so you know theirs will be replaced.
-
Upload
Click Upload. The photos go up in small batches so it works on any hosting, even shared hosting; you can leave the tab open while it runs and each row ticks off as it finishes.
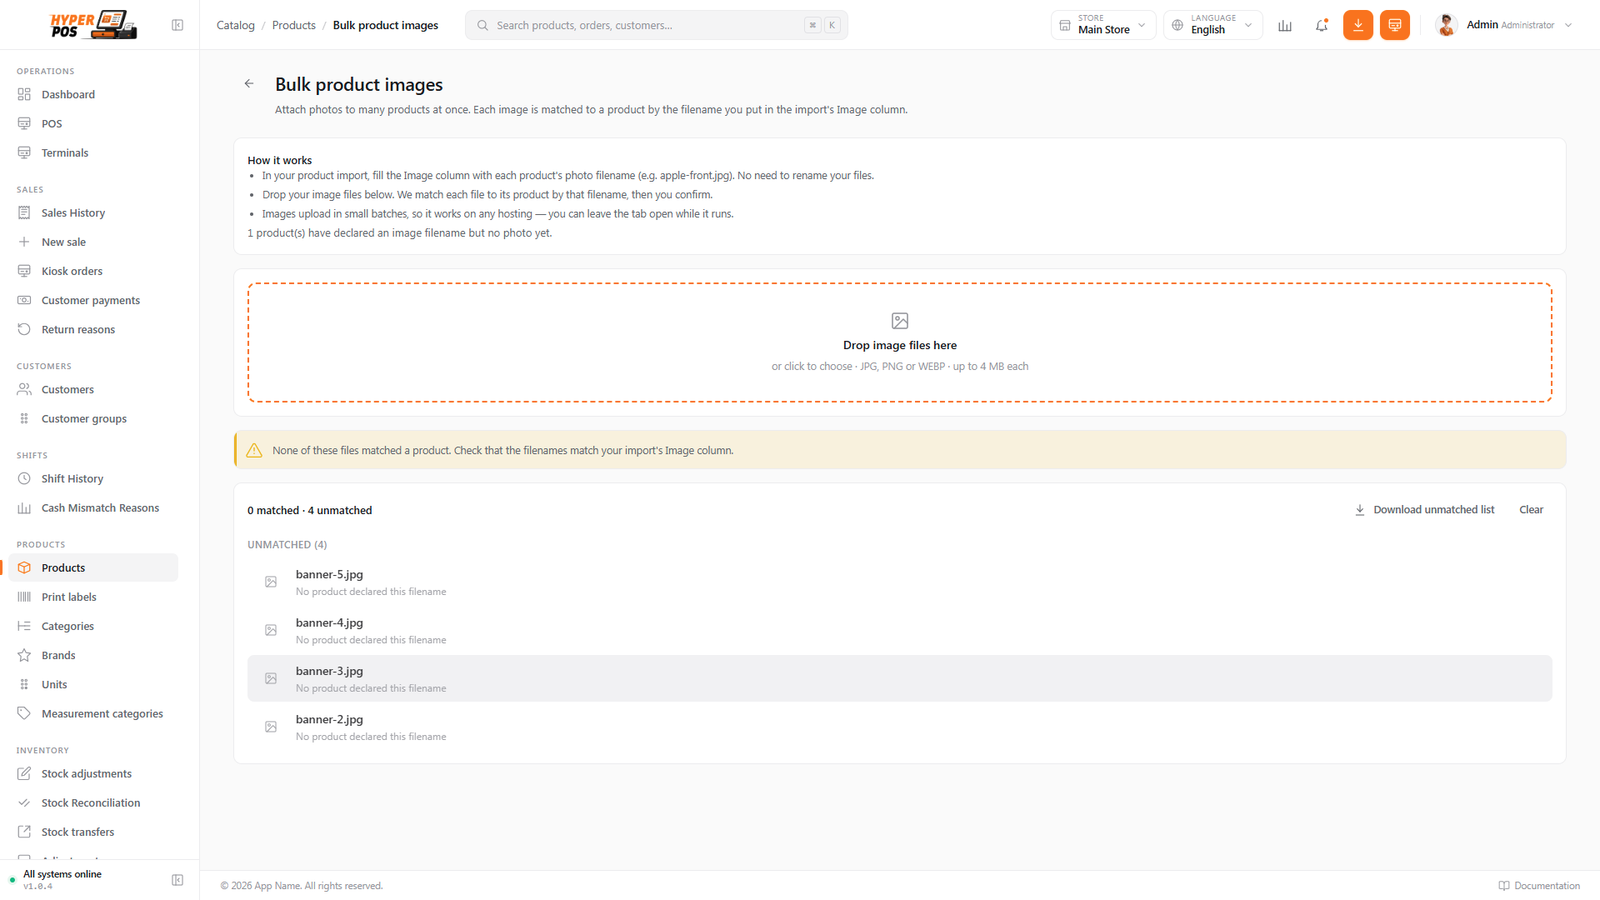
Any photo that couldn't be placed appears in an Unmatched list, for one of two reasons: no product declared that filename, or more than one product claimed it — in which case the system can't tell which you meant, so it leaves it alone. You can download the unmatched list as a spreadsheet, fix the names, and try again.
A photo only lands on a product if its filename matches what's in that product's Image column, including the .jpg / .png ending. Upper- or lower-case doesn't matter (Apple.JPG and apple.jpg are treated the same), but a stray space, a typo or a different extension will leave the photo unmatched.
Fetching product images from URLs
The Products → Bulk images screen has a Fetch from URLs tab for catalogs whose pictures already live online. Product import can supply an Image URL, or you can paste SKU, URL rows copied from a spreadsheet.
- Open the URL tab
After a product import, follow its image link to load pending URLs, or open Bulk images and choose Fetch from URLs.
- Paste SKU and URL rows
Use one product per line. Tab-separated spreadsheet rows are accepted, and a signed URL containing commas remains intact when pasted as columns.
- Preview the matches
Hyper POS matches the exact SKU and shows matched, unknown, duplicate and malformed rows before any download starts.
- Fetch the valid images
Public HTTPS JPG, PNG and WebP files are downloaded in small batches. Valid rows continue even when another URL fails, and remaining work can resume.
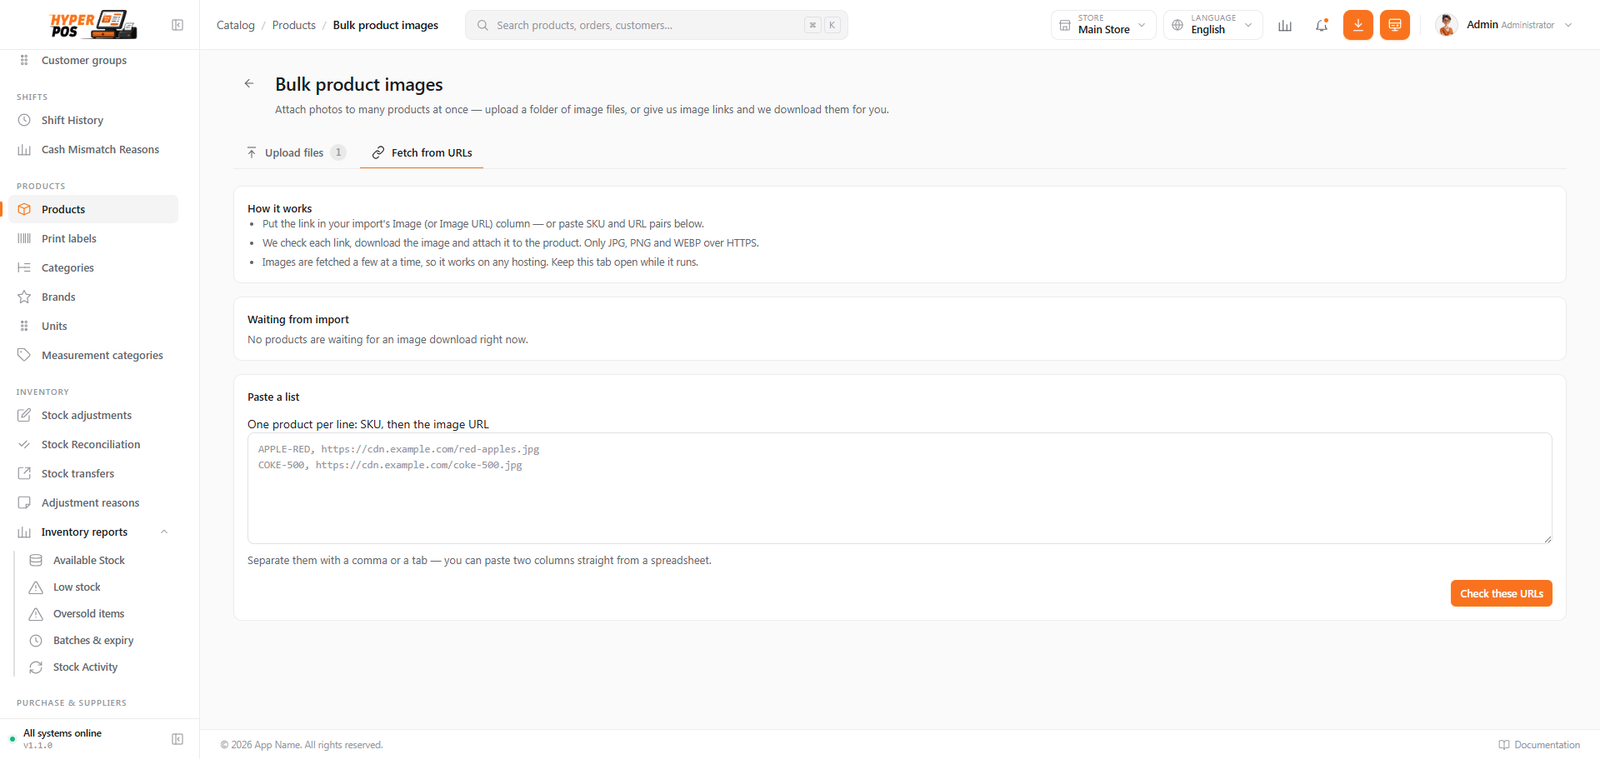
For safety, local/private-network addresses, HTTP links, redirects to private hosts, HTML/SVG/non-image responses and oversized files are rejected. Use a public HTTPS image URL. Re-importing the same successful URL does not download it again; changing the URL makes it pending.
Tips & best practices
- Add a barcode to anything that has one. Scanning is far faster and more accurate at the till than searching by name — and for the items that don't have one, generate a barcode and print a label.
- Let SKUs generate themselves. Set the pattern once in Settings → Numbering and leave the field blank; you'll never have to invent a code or check for clashes again.
- Add a photo for touch-screen items. Pictures make products easy to find when there's no barcode to scan — handy for bakery and produce.
- Keep your cost prices honest. Your profit reports are only as accurate as the cost you enter.
- Build big catalogs with import. Export the template, fill it in your spreadsheet program, and import once — much faster than the form.
- Set reorder levels. They trigger low-stock warnings so you reorder before the shelf is empty.
Notes & warnings
SKUs and barcodes must be unique. Two products can't share the same code — otherwise a scan wouldn't know which one you meant. The form warns you if a code is already in use.
Hide, don't delete, items you've stopped selling. Switch a product to inactive so its sales and stock history stays intact for your reports.
Once a product has been sold, you can't change its type. Decide early whether something is a simple item, has variants (like sizes), is a service, or is sold by weight — this is locked after the first sale to keep your records straight.
Related: Categories & brands · Shelf locations · Units of measure · Barcode labels · Batches & expiry · Weighed & scale items