Categories & brands
Categories and brands are the two simple ways to group your products. A category says what kind of thing it is (Drinks, Snacks, Painkillers). A brand says who makes it (Coca-Cola, Cadbury, Bayer). Good grouping makes products faster to find and your reports far more useful.
Overview
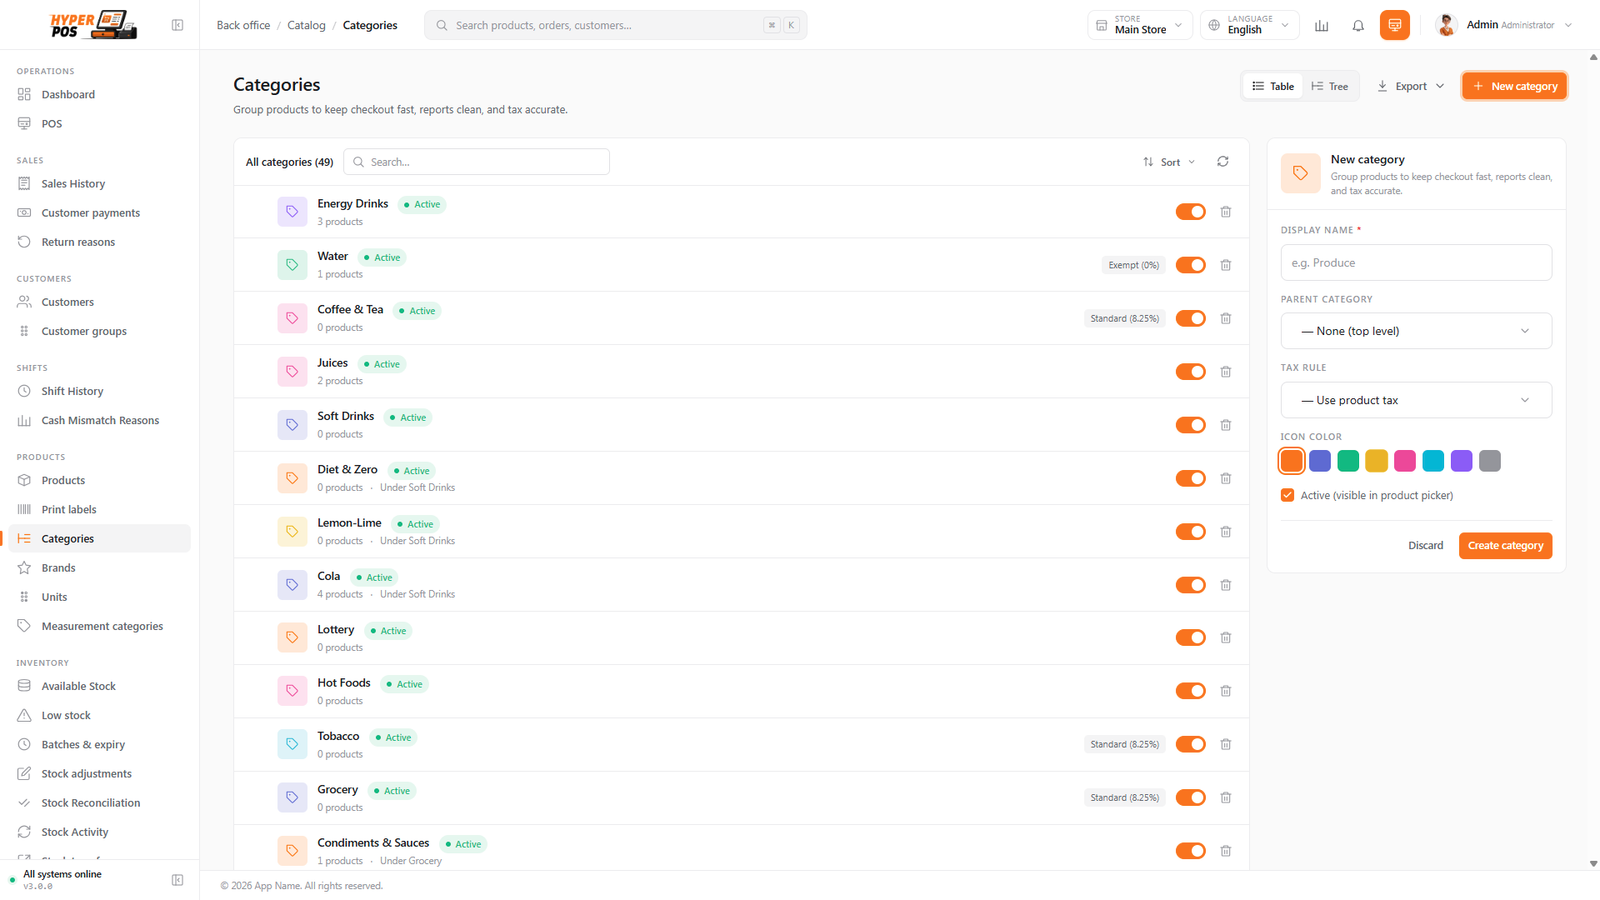
A category is a folder for similar products. Categories can sit inside each other to form a simple tree — for example Beverages → Soft drinks → Cola — so a big catalog stays organised. A brand is a flat label for the maker of a product; there's no tree, just a plain list. A product can belong to one category and one brand at the same time.
You manage them on two screens that work much like the product list: a table you can search, with an Add button, a row to click for editing, and an active/inactive switch on each row.
Why it's useful
- Reports that mean something. Grouping lets you see sales by category and by brand — so you know whether it's the drinks or the snacks paying the rent.
- Faster to find items. Filtering the product list by a category or brand narrows thousands of items down to the handful you're after.
- A tidier till. Categories can group the product tiles on the touch screen, so staff find things quickly when there's no barcode.
- Less clutter as you grow. A small tree of categories keeps a big catalog manageable.
Setting up categories, step by step
-
Open Categories
Under Products in the sidebar, click Categories. You'll see your existing categories as a tree.
-
Add a top-level category
Click Add category, type a name (for example Beverages) and save. A short web-friendly version of the name — its slug — is created for you; you can edit it if you like.
-
Add sub-categories underneath
Add more categories and set their parent to an existing one to nest them — for example Soft drinks inside Beverages. You can go a few levels deep; keep it shallow so it stays easy to navigate.
-
Reorder by dragging
Drag a category up or down to change the order it appears in. Drag it onto another category to move it inside that one. The new order is saved as you go.
-
Assign products
Open a product (see Products) and pick its category. From then on the product is counted under that category everywhere — lists, filters and reports.
Brands
Brands are simpler. There's no tree — just a flat list of makers. Open Brands under Products, click Add brand, give it a name (and optionally a logo), and save. Then choose the brand on each product. Use brands when knowing the manufacturer matters for your reporting — common in pharmacies and electronics shops.
Ask "what is it?" for the category (Snacks, Antibiotics) and "who made it?" for the brand (Lay's, Pfizer). A product usually has both.
Importing & exporting in bulk
If you're setting up a large catalog, you don't have to add categories one at a time. Use the Export button on the categories screen to download your whole list as a CSV or Excel spreadsheet, and the Import button to upload one. Brands have the very same buttons on their own screen.
Importing categories
Import walks you through it in a few short steps:
| Step | What happens |
|---|---|
| Upload | Pick your CSV or Excel file. You can download a ready-made template first — it has the right columns (Name, Parent, Description, Color, Tax rule, Active) with a couple of example rows to copy. |
| Match columns | The system lines your spreadsheet's columns up with its own fields automatically, and shows you a preview of the first rows. Adjust any column that didn't match, or set it to be skipped. |
| Import | The file is read and each row saved. You get a summary counting how many categories were created, updated and skipped, with any rows that couldn't be imported listed underneath, each with its row number and the reason. |
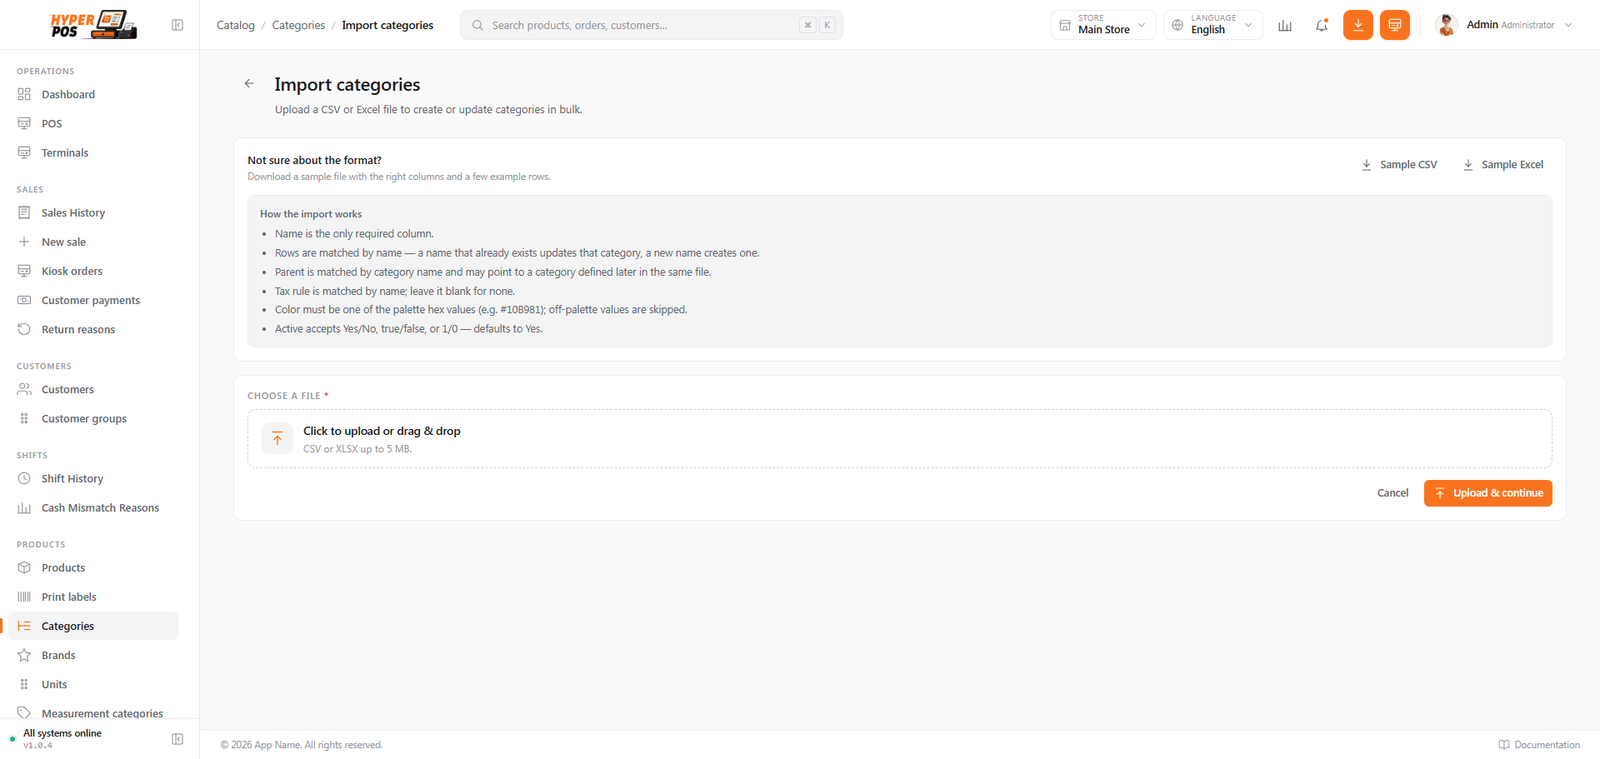
Categories are matched by their name, so importing the same file again updates your existing categories rather than creating duplicates — handy for a bulk tidy-up. A category's parent and its tax rule are matched by name too: just type the parent category's name and the tax rule's name in those columns. If a name you reference doesn't exist, that row is skipped and flagged so nothing is silently lost. The Color column must be one of the app's preset colours.
You don't have to order your spreadsheet so that parents come before their children. Every category is created first, and the parent links are joined up in a second pass afterwards — so a child row can safely name a parent that's further down the same file. (A category can't be its own parent, and you can't create a loop; those rows are flagged.)
Importing brands
Brands (see Brands above) have their own import that works exactly the same way — upload, match columns, import — matching existing brands by name. Because a spreadsheet can't hold a picture, brand logos are handled in two steps: put each logo's filename in the logo column of your file, then afterwards use the bulk logo upload screen to drop in the folder of image files. Each file is matched to the brand that named it — the same two-step approach used for product images.
Fetching brand logos from URLs
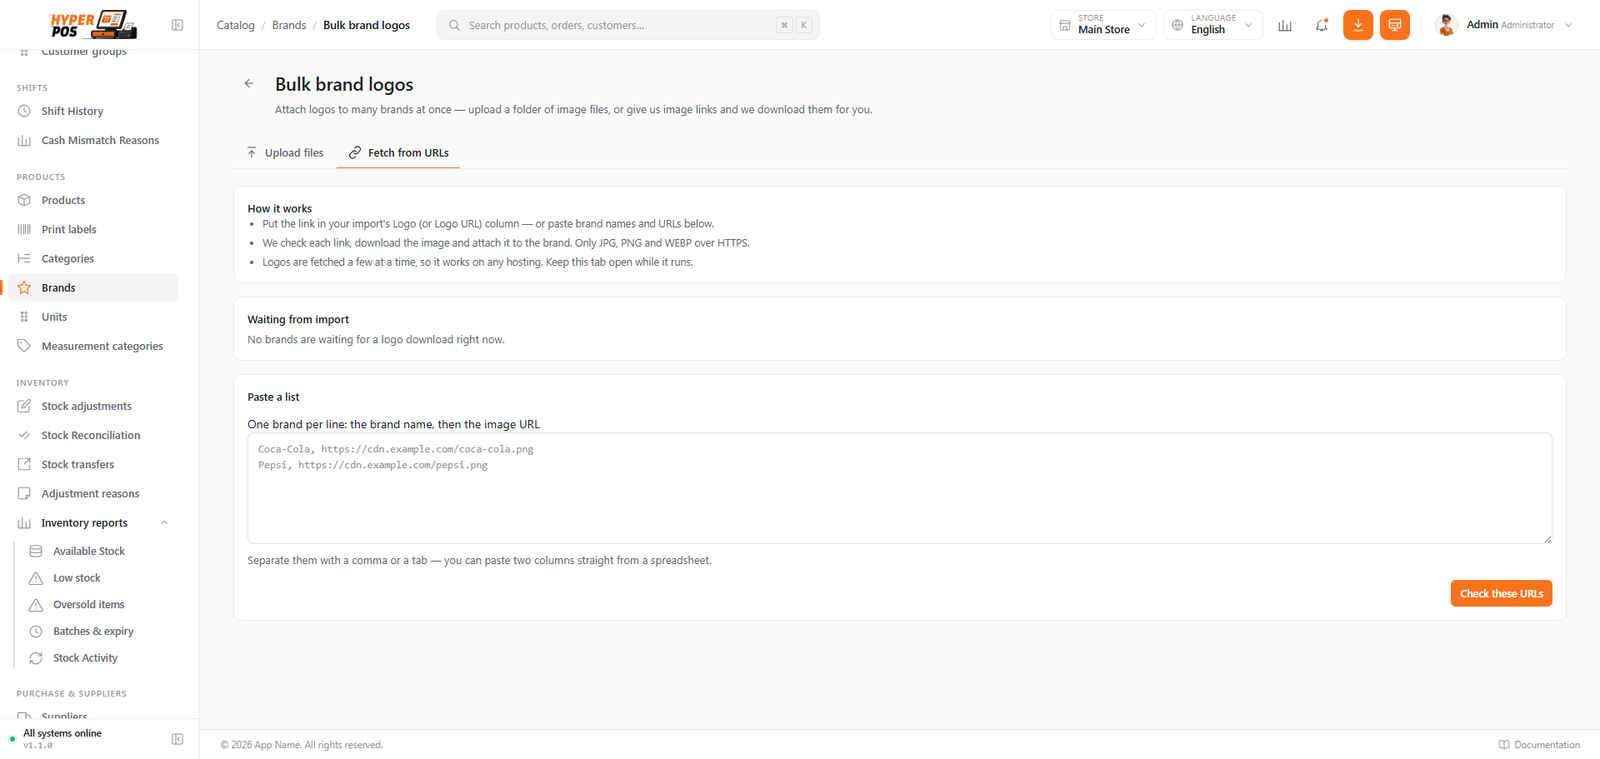
The Brands → Bulk logos screen also has a Fetch from URLs tab. Paste rows copied from a spreadsheet—brand name and public image URL—or import the URL column with your brand sheet. Preview matches before fetching; brand names match case-insensitively but ambiguous names are never guessed.
- Use public HTTPS JPG, PNG or WebP images. Private-network, local, redirected-to-private, non-image and oversized responses are rejected.
- One bad URL is reported without stopping valid rows in the same run.
- Fetches run in manageable browser batches and can resume the remaining rows.
- Replacing a managed logo removes the previous managed file without touching another brand.
Tips & best practices
- Keep the tree shallow. Two or three levels is plenty. Deep trees are slow to click through and hard to remember.
- Set up categories first. Decide your main groups before adding lots of products, so each product has a home from the start.
- Don't over-split. A category with only one product in it rarely earns its place.
- Use brands for reporting, not decoration. Only add brands you'll actually want to filter or report on.
Notes & warnings
Filtering by a category includes everything underneath it. Filter the product list by Beverages and you'll see drinks in all its sub-categories too. There's a "direct children only" option if you want just that one level.
Moving a category moves its products' grouping. Re-parenting Soft drinks changes where those products roll up in your reports — useful, but worth knowing before you drag.
Related: Products · Units of measure · Reports