Taxes
You set up your sales tax once, tag your products with it, and the POS works out the right tax on every single sale — automatically. If you only charge one simple tax, this takes a couple of minutes.
Overview
Most shops have to add a sales tax to what they sell — VAT, GST, sales tax, or whatever your country calls it. Rather than doing that maths yourself on every sale, you describe your tax setup to the POS once. From then on, the till adds the right amount automatically and shows it clearly on the receipt.
There are three building blocks under Tax Management in the sidebar. You won't always need all three — a simple shop uses just the first:
- Tax components — a single tax, like "VAT 15%" or "GST 9%".
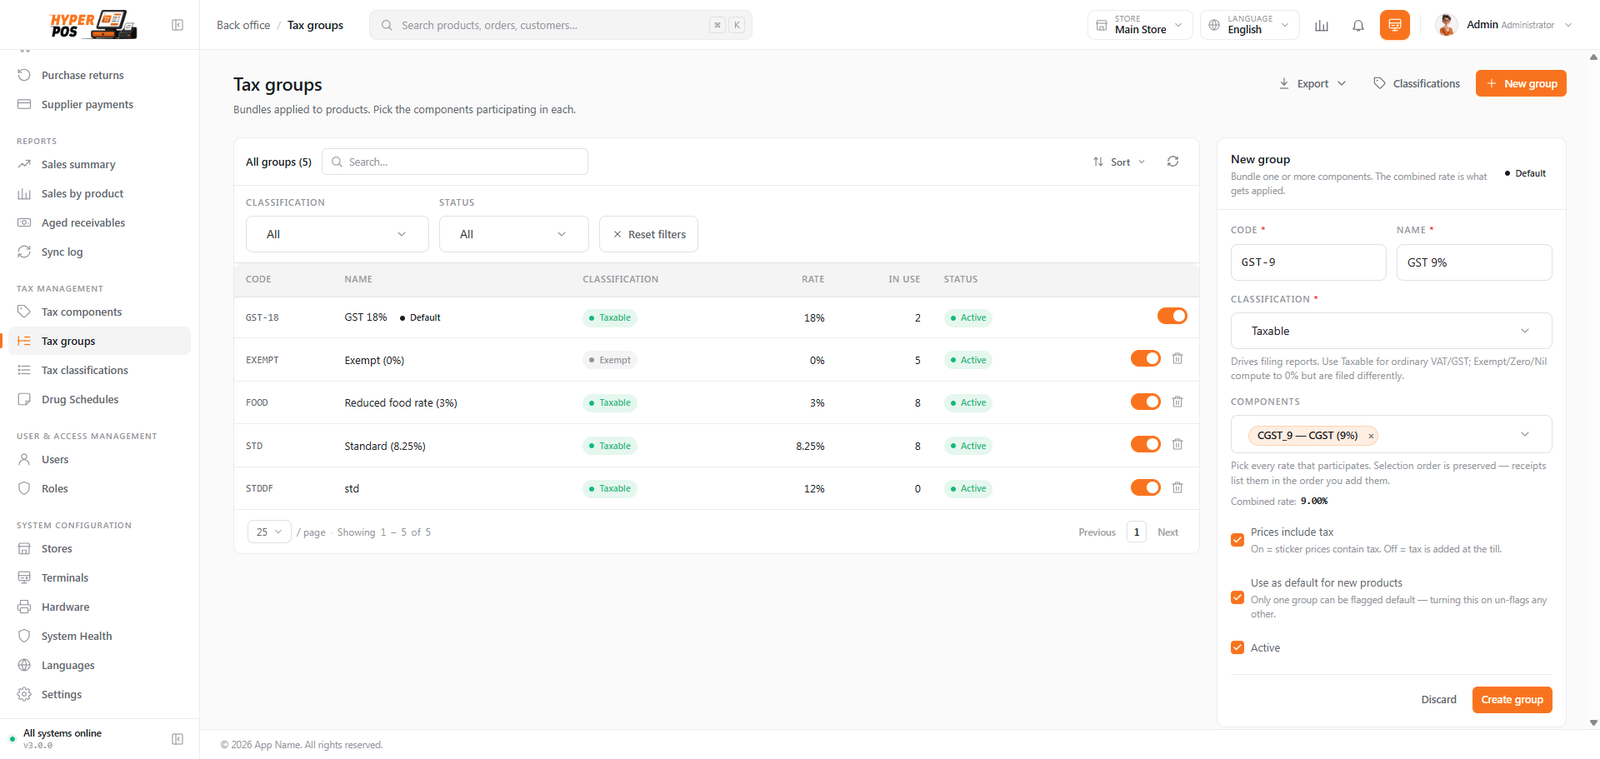
- Tax groups — a bundle of components applied together, for places where one purchase carries two taxes at once (such as India's CGST + SGST).
- Tax classifications — categories of goods that are taxed differently or not taxed at all (exempt).
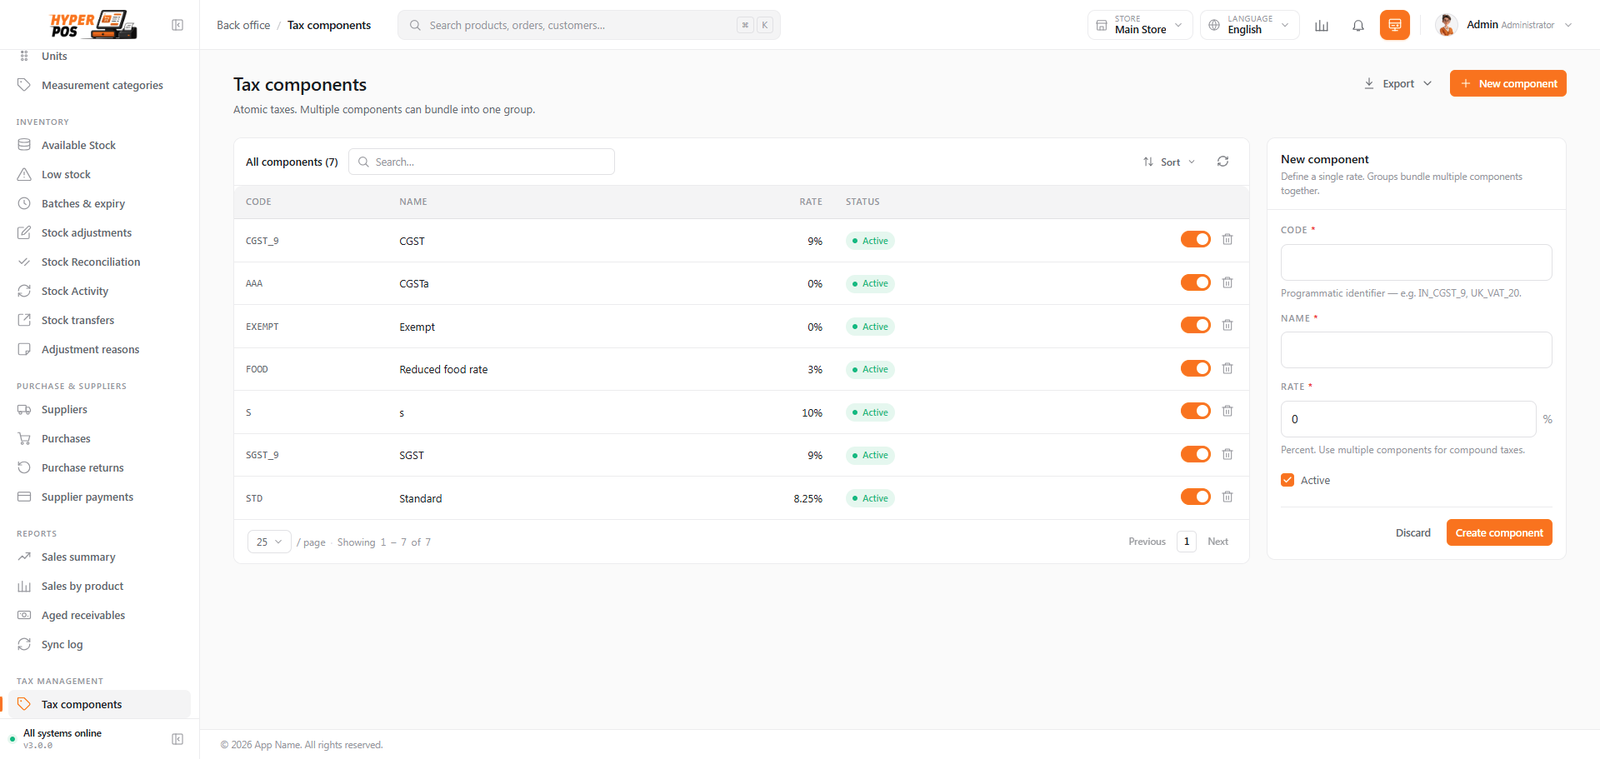
If your shop charges a single rate on everything (say, 15% VAT), you create one component, set it as the default for new products, and that's it. The groups and classifications below are only for more involved tax systems — feel free to skip them.
Why it's useful
- No mental maths at the till. Set the rate once and the POS applies it perfectly on every sale, every time.
- Correct, compliant receipts. The tax is shown clearly so customers and auditors can see exactly what was charged.
- It handles the tricky cases. Two taxes on one item, or goods that are exempt, are all supported without you doing anything special at checkout.
- Your records stay accurate. Because tax is recorded on each sale, your reports and any tax filings line up.
Setting up tax, step by step
-
Create a tax component
Open Tax components under Tax Management. Add a component with a clear name and its rate — for example "VAT" at 15%, or "GST" at 9%. This is the actual percentage that gets charged.
-
Bundle them into a group (only if you need to)
If your country splits one tax into two parts charged together — like India's CGST + SGST — open Tax groups and create a group that includes both components. A product points at the group, and the POS charges both parts at once. If you only have one simple tax, you can skip this.
-
Set classifications for special goods (optional)
If some of what you sell is taxed at a different rate or is exempt (taxed at nothing), use Tax classifications to define those categories. You'll then tag the relevant products with the right classification.
-
Tag your products
On each product's form (see Products), choose its tax. New products can inherit a default, so you usually only touch this for the exceptions. This is the one place you decide how an item is taxed.
-
Sell as normal
That's it — there's nothing extra to do at the counter. When a tagged product is added to a sale, the POS works out the tax and shows it on the total and the receipt.
The three building blocks explained
Tax components
A component is a single, individual tax — one name and one rate. "VAT 20%", "GST 9%", "State Sales Tax 6.25%" are each one component. For most shops in most countries, a component is your whole tax setup.
Tax groups
A group bundles several components so they're charged together as one. The classic example is India, where a single 18% GST is actually made of two parts — CGST 9% plus SGST 9% — that must appear separately on the invoice. A group lets a product carry "GST 18%" while the POS quietly splits it into the two halves on the receipt.
| You set up… | …and it means |
|---|---|
| A component | One tax at one rate, e.g. VAT 15%. |
| A group | Two or more components charged together, e.g. CGST 9% + SGST 9%. |
| A classification | A category of goods that's taxed differently or is exempt. |
Tax classifications
A classification is a category of goods that's treated differently for tax. Some examples: basic foods taxed at a lower rate, books that are zero-rated, or medical supplies that are exempt (meaning no tax at all). You create the classification once, then tag the products that belong to it — and the POS applies the right treatment automatically.
Tips & best practices
- Start simple. Create one component for your main rate, set it as the default, and only add groups or classifications when you actually have a reason to.
- Name taxes plainly. "VAT 15%" beats "Tax 1" — the name shows up on receipts and reports, so make it readable.
- Set the default once. Choosing a default tax means every new product is already correct — you only adjust the rare exceptions.
- If you're unsure of your rates, ask your accountant. The POS applies whatever you enter exactly; getting the numbers right is the one part it can't do for you.
Notes & warnings
A past sale keeps the tax it was charged at. If you change a rate later, old receipts and reports stay exactly as they were — so your history is never quietly rewritten. To change a rate going forward, create a new component at the new rate rather than editing the old one.
Tax setup affects the maths on every future sale. Double-check rates before you start selling, and have someone with the right permissions make changes — these settings are usually limited to managers.
Tax rules differ by country and can carry penalties if they're wrong. This guide explains how to use the tax tools, not which rates apply to your business. When in doubt about the correct rates or categories, check with your accountant or tax authority.
Related: Products · General settings · Reports