Self-ordering kiosk
A spare tablet or touch monitor, stood on the shop floor, that lets customers serve themselves. They browse or scan their own items, build a basket, and then either pay right at the kiosk or take a pickup number to the counter. No cashier drives the screen — it's the queue-buster for busy hours.
Overview
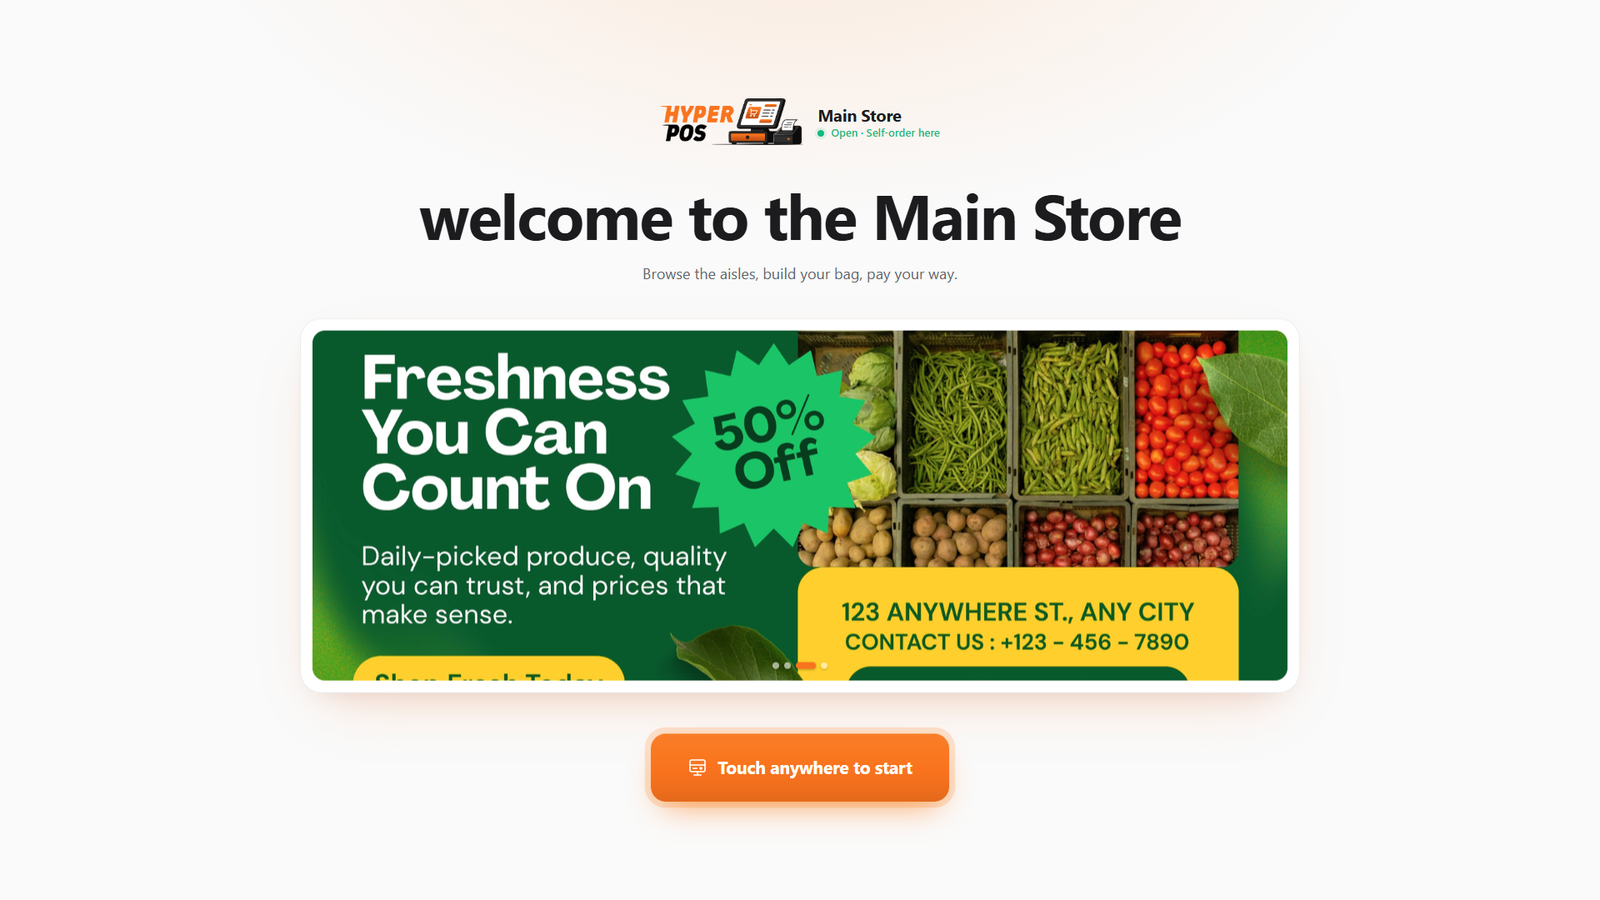
The self-ordering kiosk is your POS screen with the cashier taken out and the customer put in. The shopper walks up to a locked-down screen showing a welcome message, taps to start, then adds items by tapping through the category grid, searching, or scanning barcodes themselves. When they're done they tap Checkout, and what happens next depends on how you configured the station.
Everything the kiosk sells goes through the exact same pricing, tax, stock and bookkeeping as a sale rung up by a cashier. It isn't a separate system — it's another way into the same till.
The customer display is a screen the shopper only watches while your cashier rings up the sale. A kiosk is a screen the shopper uses. They're separate features, and a station is one or the other.
Why it's useful
- Shorter queues. Two or three kiosks absorb the rush while your cashier handles the customers who need help.
- Fewer staff on the till. A single member of staff can supervise several kiosks and take counter payments.
- Nothing new to learn. Kiosk orders land in your normal sales, stock and reports — no separate books to reconcile.
- Keeps working when the internet drops. Pay-at-counter orders are saved on the device and reach the staff queue as soon as you're back online.
- Customers take their time. Browsing at their own pace tends to grow the basket.
The two ways a kiosk can work
Every kiosk is set to one of three behaviours. This is the single most important choice you'll make when setting one up.
| Setting | What the customer does | Where the money is taken |
|---|---|---|
| Order and pay at the kiosk | Builds a basket, then scans a payment QR code with their phone and pays. | At the kiosk, before they leave it. The sale is finished on the spot. |
| Order here, pay at the counter | Builds a basket and gets a pickup number. | At your counter, by any method you normally take — cash, card, split. |
| Let the customer choose | At checkout the kiosk asks "How would you like to pay?" and offers both. | Whichever the customer picked. |
The kiosk never takes cash. There's no note or coin acceptor — payment at the machine is always cashless, by the customer's own phone.
What the shopper sees
The kiosk walks itself through a short loop, and always finds its way home. If a customer wanders off mid-basket, an inactivity timer clears the cart and returns to the welcome screen, so the next person never inherits someone else's items.
-
Welcome
Your logo, a short message and — if you've uploaded them — promo images on a loop. Any touch starts an order.
-
Browse & add
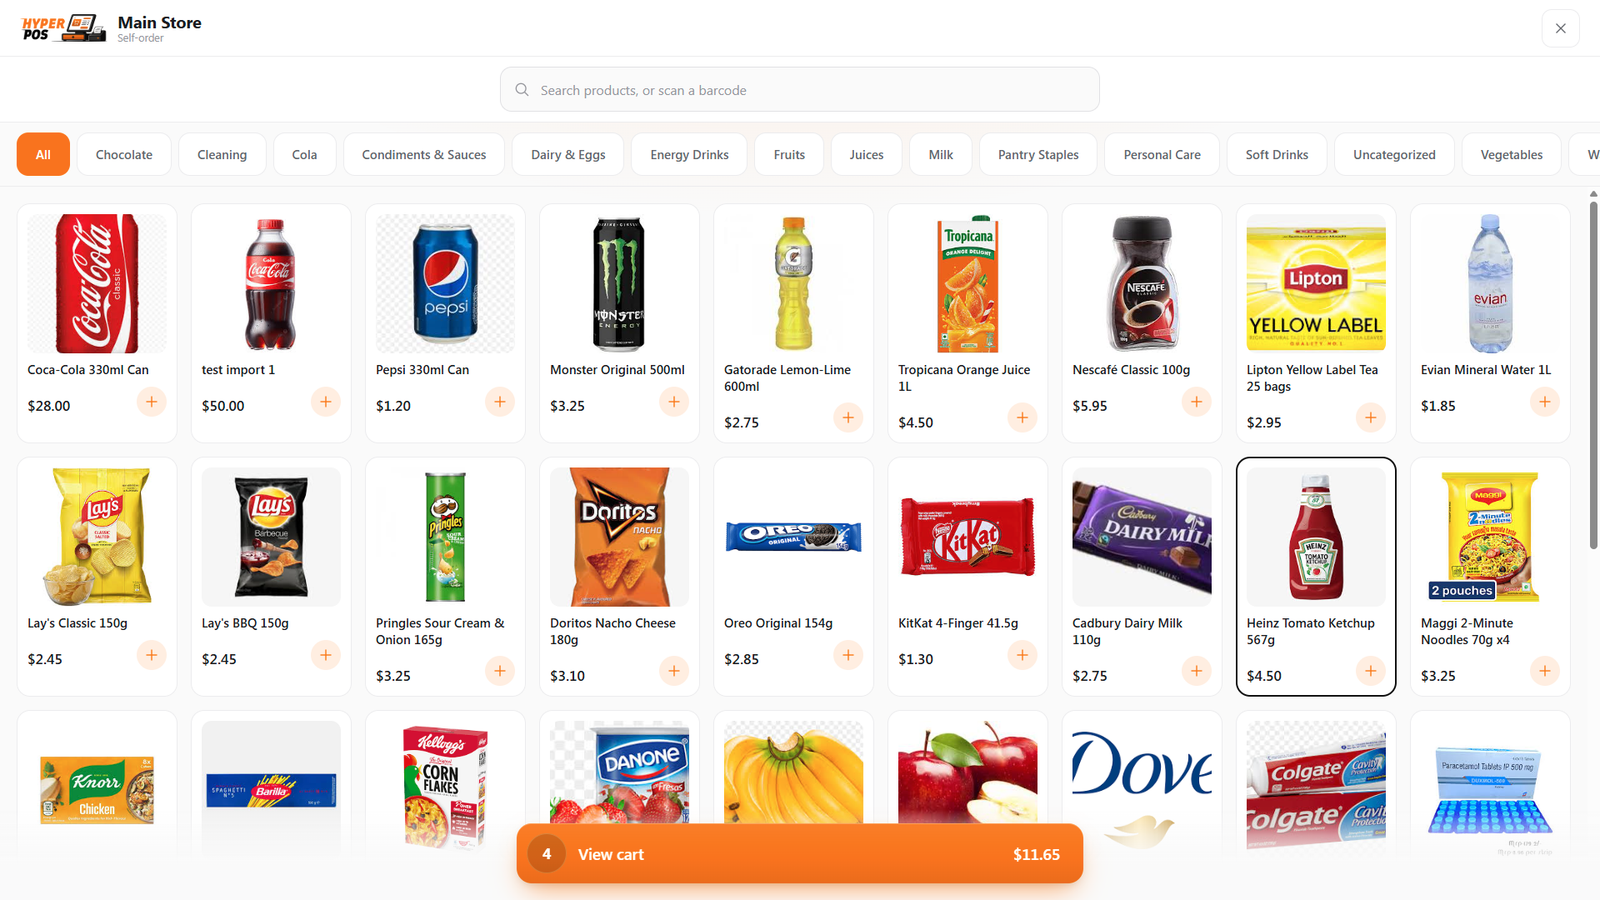
Tap a category, search by name, or scan a barcode. Tapping a tile adds one. Products sold by weight ask for the weight; products with options (sizes, colours) open a chooser; combo products show what's inside before they're added.
-
Review the basket
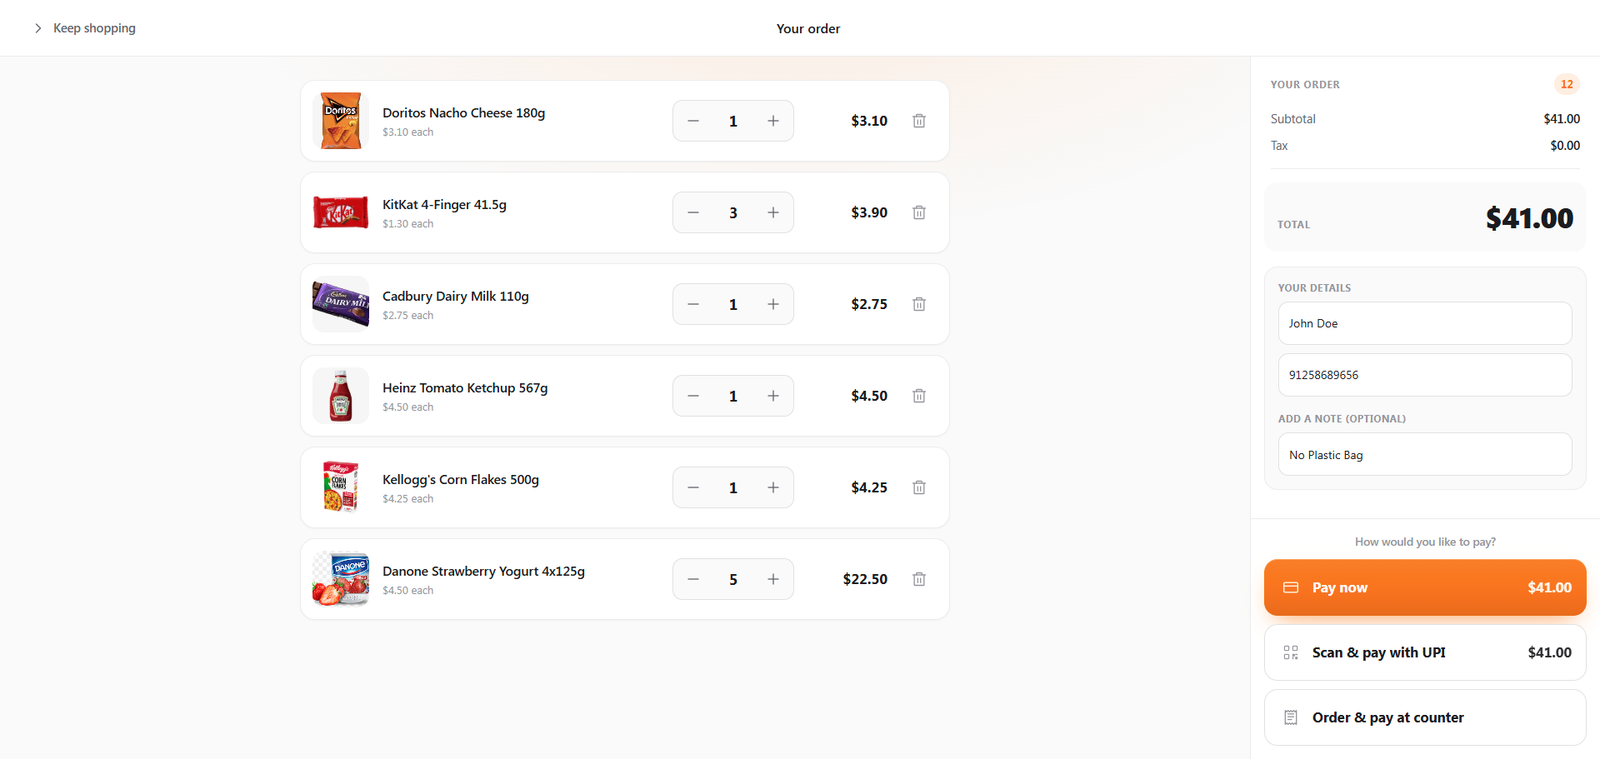
Change quantities, remove lines, and see the subtotal, tax and total. Every line spells out exactly what was chosen — the options picked for a product with variants (size, colour and so on), and the items inside a combo listed underneath it — so the customer can check their order properly before paying. Depending on your settings they may also leave a note, or give their name and phone.
-
Pay, or place the order
Either a payment QR appears for them to scan with their phone, or the order is sent straight to your staff queue.
-
Pickup number
Every order ends on a big pickup number —
K001,K002, and so on. If they paid at the kiosk, a receipt QR is shown alongside it. After a few seconds the kiosk resets and is ready for the next customer.
The pickup number is how staff find the order. It's printed on the kiosk screen at the end, shown in your staff queue, and searchable from Sales history — so a customer who wanders to the till instead of the collection point can still be found.
Setting a kiosk up
-
Add the station as a terminal
Go to Settings → Hardware and add a terminal for the kiosk, exactly as you would for a till. Give it a name you'll recognise, like Kiosk 1. See Stores & terminals.
-
Turn it into a kiosk
Open that terminal and tick "Use this station as a self-ordering kiosk", then tick Enable the kiosk. The kiosk options appear below.
-
Choose what the customer can do
Pick pay at the kiosk, pay at the counter, or let the customer choose. If you allow paying at the kiosk, tick which of your payment gateways it may charge through.
-
Tune the details
Set your welcome and thank-you wording, how long before an abandoned basket is cleared, which categories the kiosk may sell, whether to ask for customer details, and — importantly — turn on "Require a supervisor to exit kiosk mode".
-
Open the kiosk on the device — one tap
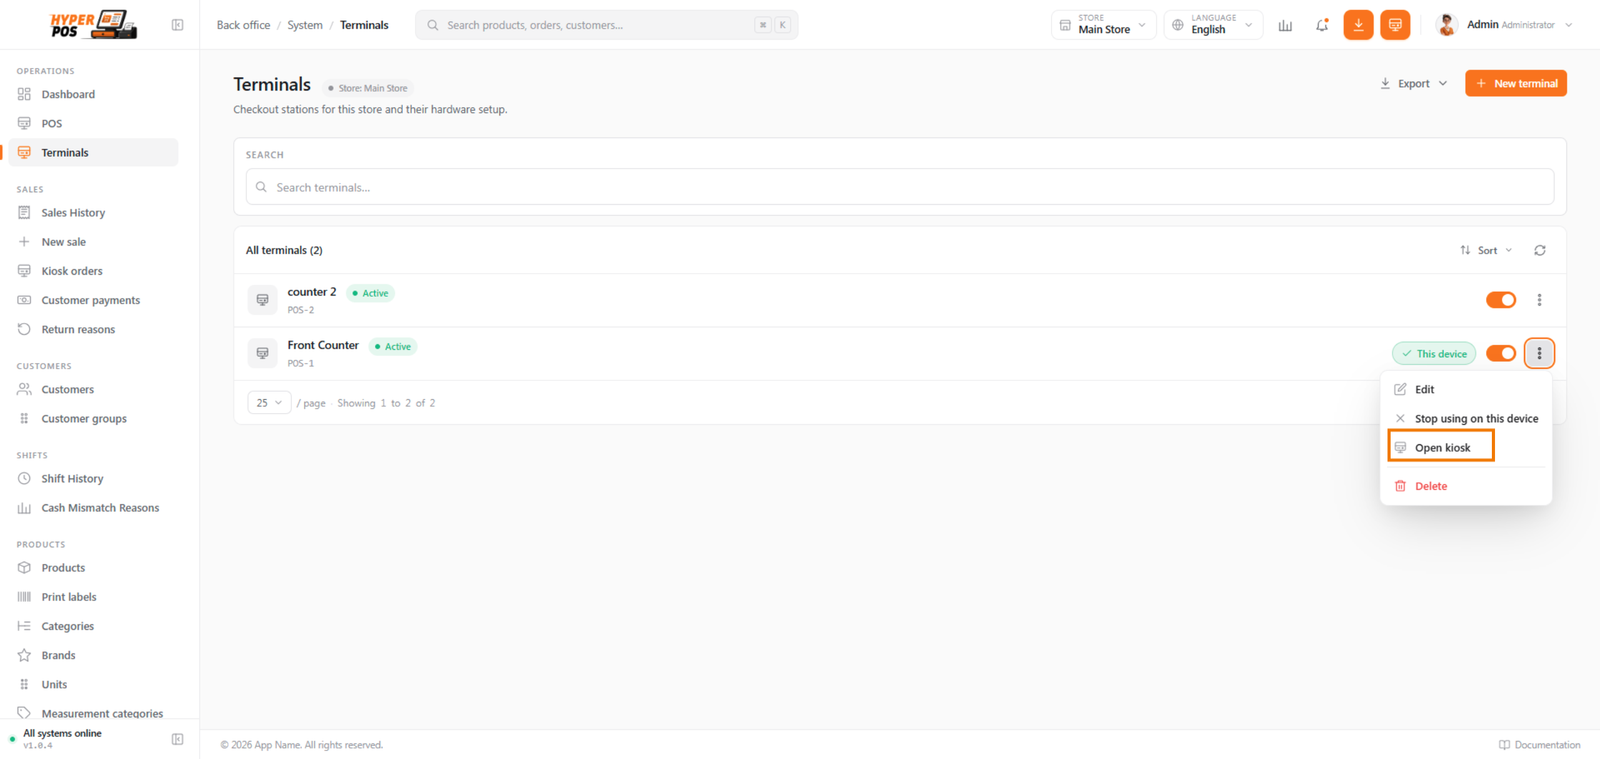
Sign in on the kiosk device, go to Settings → Hardware, and press the Open kiosk button on that terminal's row. That single tap does both jobs at once: it binds this device to the terminal (so the kiosk picks up all the settings you just chose) and launches kiosk mode in a fresh tab. The same Open kiosk button also sits inside the terminal's own settings screen if you're already there. Put the browser into fullscreen (F11) and hand the screen over.
Every kiosk setting, explained
| Setting | What it does |
|---|---|
| What can the customer do? | Pay at the kiosk, pay at the counter, or let them choose. See the two ways a kiosk can work. |
| Welcome / thank-you message | Your own wording on the first and last screens. Leave blank to use the built-in, translated text. |
| Reset after inactivity | Seconds of no touching before the basket is discarded and the kiosk returns to the welcome screen (20–300). 60 is a sensible default. |
| Show only these categories | Tick the categories the kiosk may sell. Leave everything unticked to offer the whole catalog. |
| Ask for customer details? | Don't ask, ask optionally, or require a name/phone before ordering. Useful when you need to call people when their order is ready. |
| Let the customer add a note | Shows a free-text note box on the basket — "no plastic bag", and so on. |
| Gateways for "Pay now" | Which online payment gateways the QR may use. Tick nothing and the customer picks from all of them; tick exactly one and the chooser step is skipped. |
| UPI "scan and pay" method | Shows a plain UPI QR for the total. Read the warning below before you switch this on. |
| Pickup-code prefix | Up to 4 letters/digits. Two kiosks in one store can issue A001 and B001 — the numbering itself is shared store-wide. |
| Thank-you screen (seconds) | How long the pickup number and receipt QR stay up before the kiosk resets (5–120). |
| Play a sound when a product is added | A short confirmation tone on each tap. Turn it off in quiet showrooms. |
| Idle slideshow | Promo images looped on the welcome screen, with the seconds each one is shown. |
| Require a supervisor to exit kiosk mode | Locks the kiosk. Leaving it needs a manager's email and password. Always turn this on. |
Handling kiosk orders at the counter
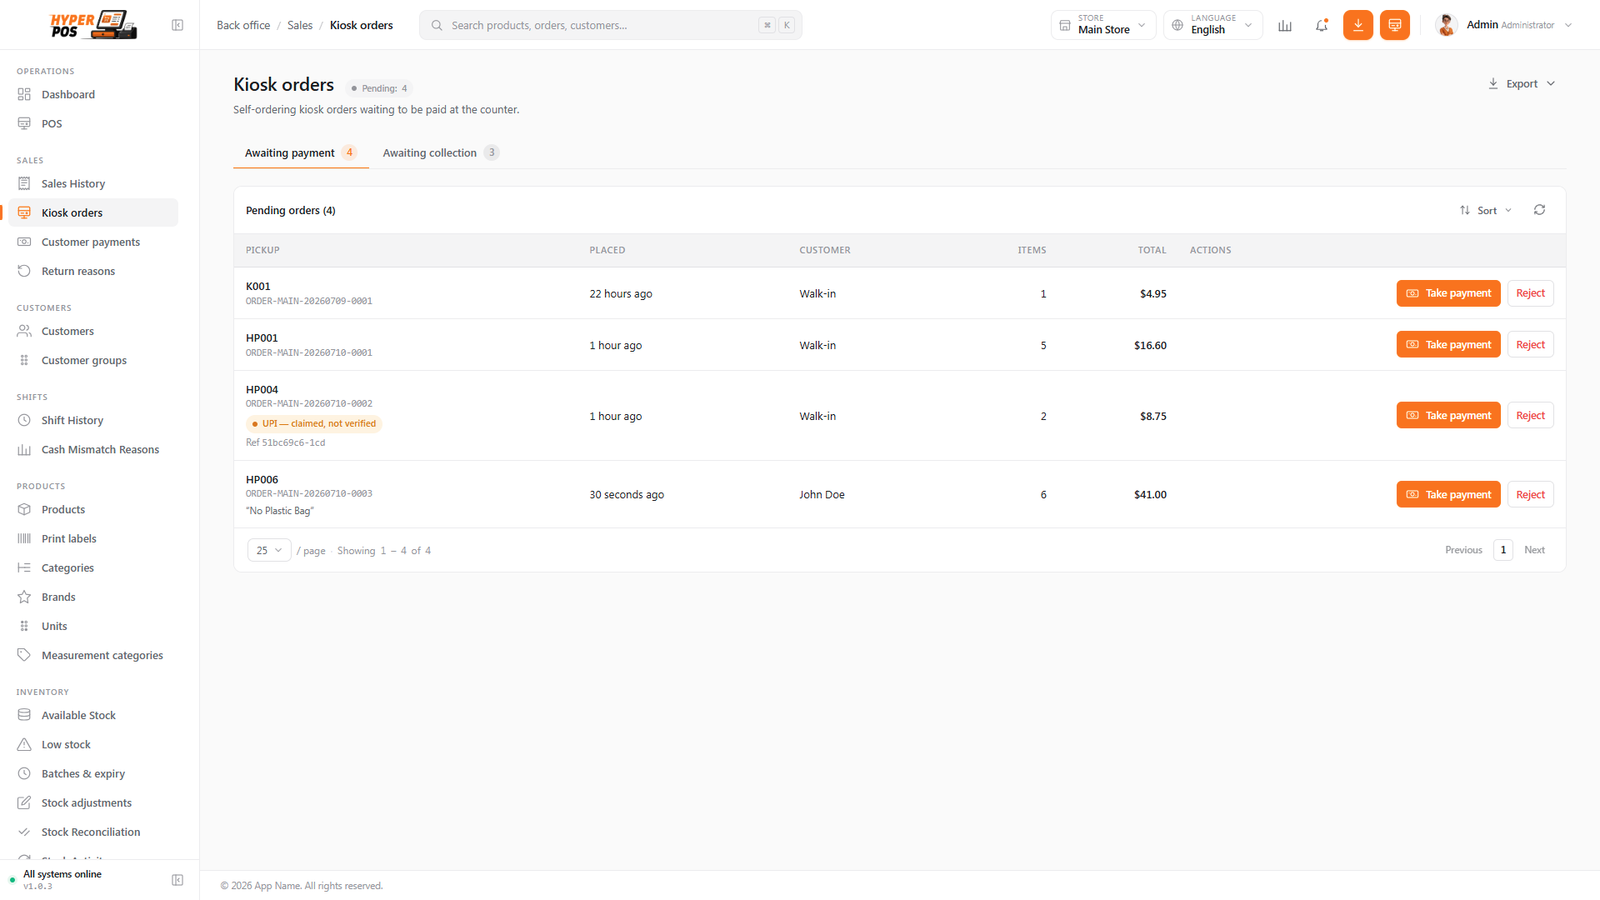
Orders that are set to be paid at the counter appear under Sales → Kiosk orders. The page has two tabs:
- Awaiting payment — orders placed at a kiosk that nobody has paid for yet.
- Awaiting collection — orders already paid at the kiosk, whose goods are still behind your counter.
Press Take payment on a pending order and a full payment panel opens on the same page — you never navigate away, so you can clear the queue order after order. The panel now shows the complete order — every item the shopper chose, each with its quantity and price — not just a total, so you can check the basket against what's actually in front of you. From there you can drop a line or change a quantity if the customer changed their mind, then take the money by any method: cash with change, a card, a split across several tenders, or a QR the customer scans. Confirming turns it into an ordinary completed sale with stock, tax and receipt all handled.
Reject cancels an abandoned order and puts its stock back. When a paid order is handed over, press Handed over to clear it from the collection tab — that moves no money, since the sale is already settled.
Placing an order holds the stock for it, so two customers can't order the last one of something. Rejecting an order releases that stock again — clear out abandoned orders at the end of the day.
Paying with a UPI QR — read this first
If you use UPI, you can show a plain UPI QR code for the basket total instead of a payment gateway. It is convenient, and it is not a verified payment.
Nothing calls back to say the money arrived. So when the customer taps "I've sent the payment", the kiosk does not complete the sale — it places an ordinary pay-at-counter order, marks it "claimed, not verified", and shows the customer a pickup number. The goods stay behind your counter.
Your staff queue shows the expected amount, the time claimed and a short reference that appears in your UPI statement. Check your own UPI app for that transfer before you settle the order and hand anything over — the system deliberately asks you to confirm you've seen it.
If you want payment that's genuinely verified before the customer walks away, tick a payment gateway instead. Several gateways handle UPI and confirm it automatically.
When the internet drops
Like the cashier screen, the kiosk keeps a copy of your product catalog on the device, so browsing and building a basket carry on as normal without a connection.
- Pay-at-counter orders keep working. The order is saved on the device, the customer is told it's been saved, and it appears in your staff queue the moment the connection returns. It can't be placed twice, no matter how the sync goes.
- Paying at the kiosk does not. Payment gateways need the internet. A kiosk set to "pay at the kiosk" can't take money while offline.
See Selling offline for how the queue and sync log work.
Locking the kiosk down
A kiosk sits unattended in front of the public, so treat it that way:
- There's no menu, no back office and no way to reach your admin screens from the kiosk.
- It never shows your costs, margins, other customers, or any staff-only information.
- To leave kiosk mode, staff either press the small close button in the corner or press and hold the store logo for three seconds — the hold works even when the device is locked into a fullscreen browser with no buttons of its own.
- With "Require a supervisor to exit kiosk mode" turned on, either route then demands a manager's email and password.
Tips & best practices
- Add photos to your products. A grid of names is hard to shop; a grid of pictures sells itself.
- Start with pay-at-counter. It needs no gateway, works offline, and lets you learn how customers use the kiosk before you take money on it.
- Limit the categories. A kiosk offering 4,000 products is a worse experience than one offering the 200 people actually browse for.
- Use a distinct pickup prefix per kiosk.
A001andB001make it obvious which machine an order came from. - Turn the supervisor exit on before the kiosk faces the public. Without it, one tap on the close button drops a curious customer onto your cashier screen.
- Give it a stand and a wipe-clean screen. The kiosk is furniture as much as software.
Notes & warnings
Products with no price never appear on a kiosk. If a shopper can't be told what something costs, they can't buy it unattended. Those items still sell normally at the till.
Prices are always worked out on the server. The kiosk only sends which products and how many — never the amounts. Tampering with the screen can't change what you charge.
Expiry rules still apply. Batch-tracked items are picked earliest-expiry-first automatically, and expired batches are blocked exactly as they are for a cashier. The customer never picks a batch.
The kiosk opens no cash drawer and belongs to no shift. If your store requires shifts to be open before selling, the staff account the kiosk is signed in as needs an open shift too.
Related: The POS screen · Customer display · Taking payments · Selling offline · Stores & terminals