Sales history
Every sale you ring up is saved automatically. The Sales history screen is where you look them up later — to check what was sold, reprint a receipt, or reverse a sale that should never have happened (called a void).
/admin/sales.Overview
Sales history is a single, searchable list of every completed sale. Each row shows the sale number, when it happened, who the customer was (or "Walk-in"), how it was paid, the total, and the sale's status. Click any row to open the full sale — its items, taxes, discounts and payments — and from there you can reprint the receipt or void the sale.
Think of it as your shop's paper sales book, but instantly searchable and always up to date. It's also where you can raise a sale by hand — for a phone order or an invoice — without opening the cashier screen.
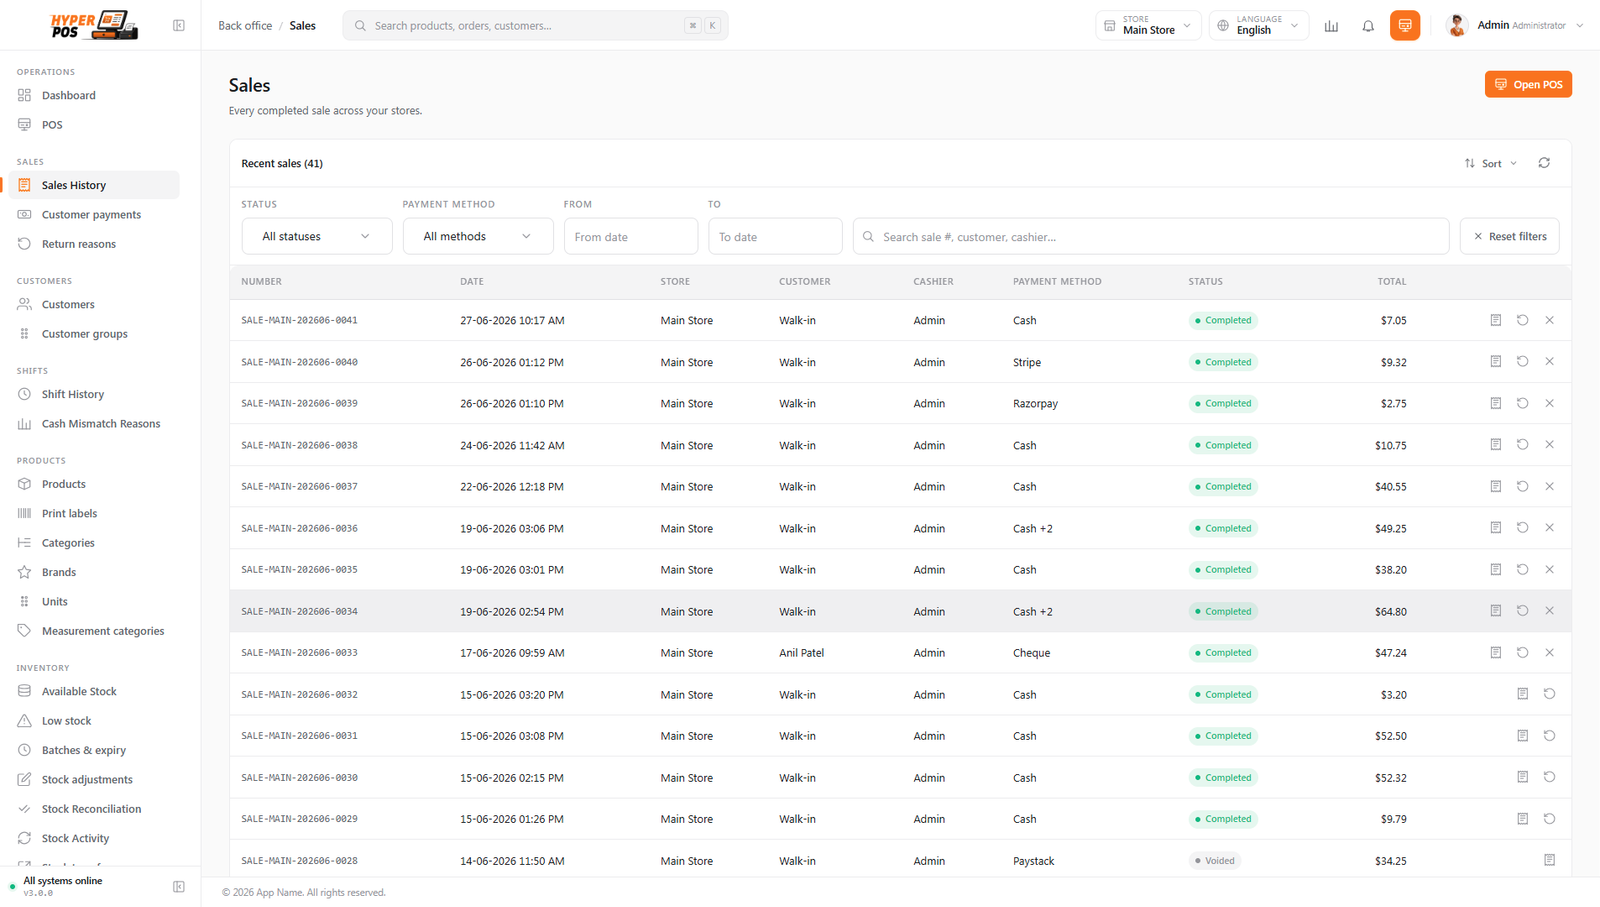
What the status badges mean
Each sale carries one status so you can tell at a glance what state it's in:
| Status | What it means |
|---|---|
| Completed | A normal, finished sale. Paid, stock taken off the shelf, recorded in your books. |
| Partially refunded | Some of the items were returned to the customer. The rest still stand. See Returns & refunds. |
| Refunded | All the items on the sale were returned. |
| Voided | The whole sale was reversed because it was rung up by mistake (see below). |
Why it's useful
- Find any sale fast. Search by sale number, or filter by date range and status instead of scrolling.
- Settle questions. "Did we charge them for the second item?" — open the sale and see exactly what was sold and paid.
- Reprint receipts. A customer lost their receipt? Reprint it in two clicks.
- Fix honest mistakes. Rang up the wrong sale? Void it, and stock and customer balances are put right automatically.
Viewing a past sale, step by step
-
Open Sales history
In the sidebar, go to Sales → Sales History. The most recent sales appear at the top.
-
Narrow the list
Use the date filter to pick a day or range, and the status filter to show only (for example) voided sales. You can also type a sale number into the search box to jump straight to it.
-
Open the sale
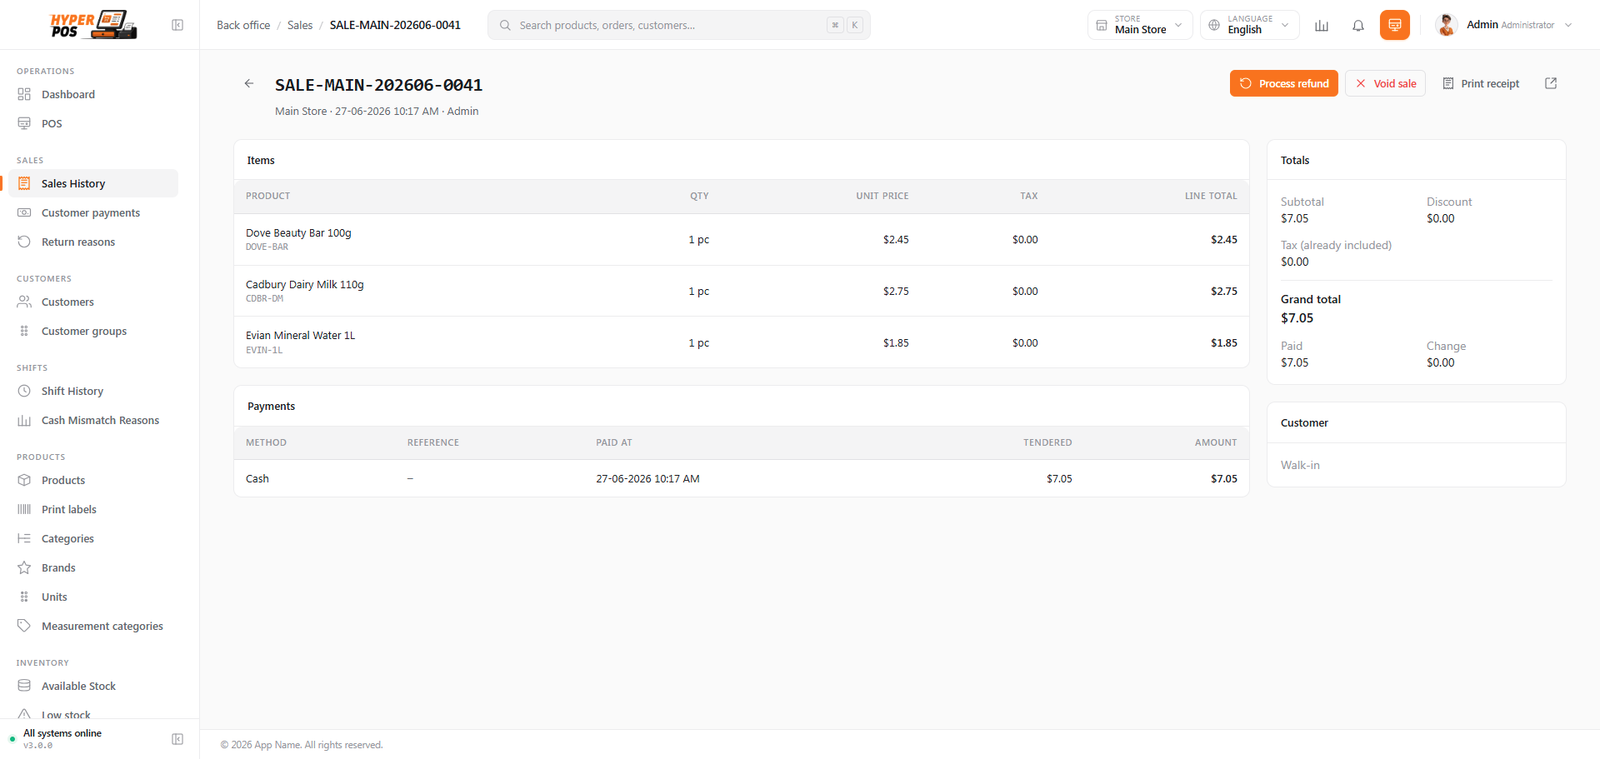
Click anywhere on a row. The sale detail opens, showing the items, quantities, prices, tax, any discount, and the payment(s) taken.
-
Reprint the receipt (optional)
On the sale detail, click Reprint receipt. It prints to your connected receipt printer, or opens your browser's print dialog. Every reprint is logged. To send the secure digital receipt instead, use Send via WhatsApp; see WhatsApp sharing.
Creating a sale from the back office
Not every sale happens at the counter. A customer phones an order through, a rep sells on the road, or you need to write up an invoice for goods that left last week. Sales → New sale lets you raise a complete sale from the admin screens, without opening the cashier at all.
-
Open Sales → New sale
Pick the store the goods came from and the date the sale happened — which doesn't have to be today.
-
Choose the customer (or leave it blank)
Leave it empty for a walk-in. Attach a saved customer if you want the sale on their account or their discount applied — any group or personal discount is worked out here exactly as it would be at the till.
-
Add the items
Search by name, SKU or barcode and pick from the list — or scan a barcode straight into the field, just like the POS screen. Set the quantity, and use the discount column to mark a line down.
-
Check the totals
Subtotal, tax and total recalculate as you type, using the same rules as the cashier — so what you see here is exactly what gets saved.
-
Record the payment
Add one row per payment method, or several if it was split. Pay less than the total and the rest becomes money the customer owes you; leave payment empty altogether to bill the whole thing to their account. A walk-in with no customer attached must pay in full.
-
Save
The sale joins Sales history like any other: stock comes off the shelf, tax is recorded, the customer's balance updates, and points are earned if you run a loyalty programme.
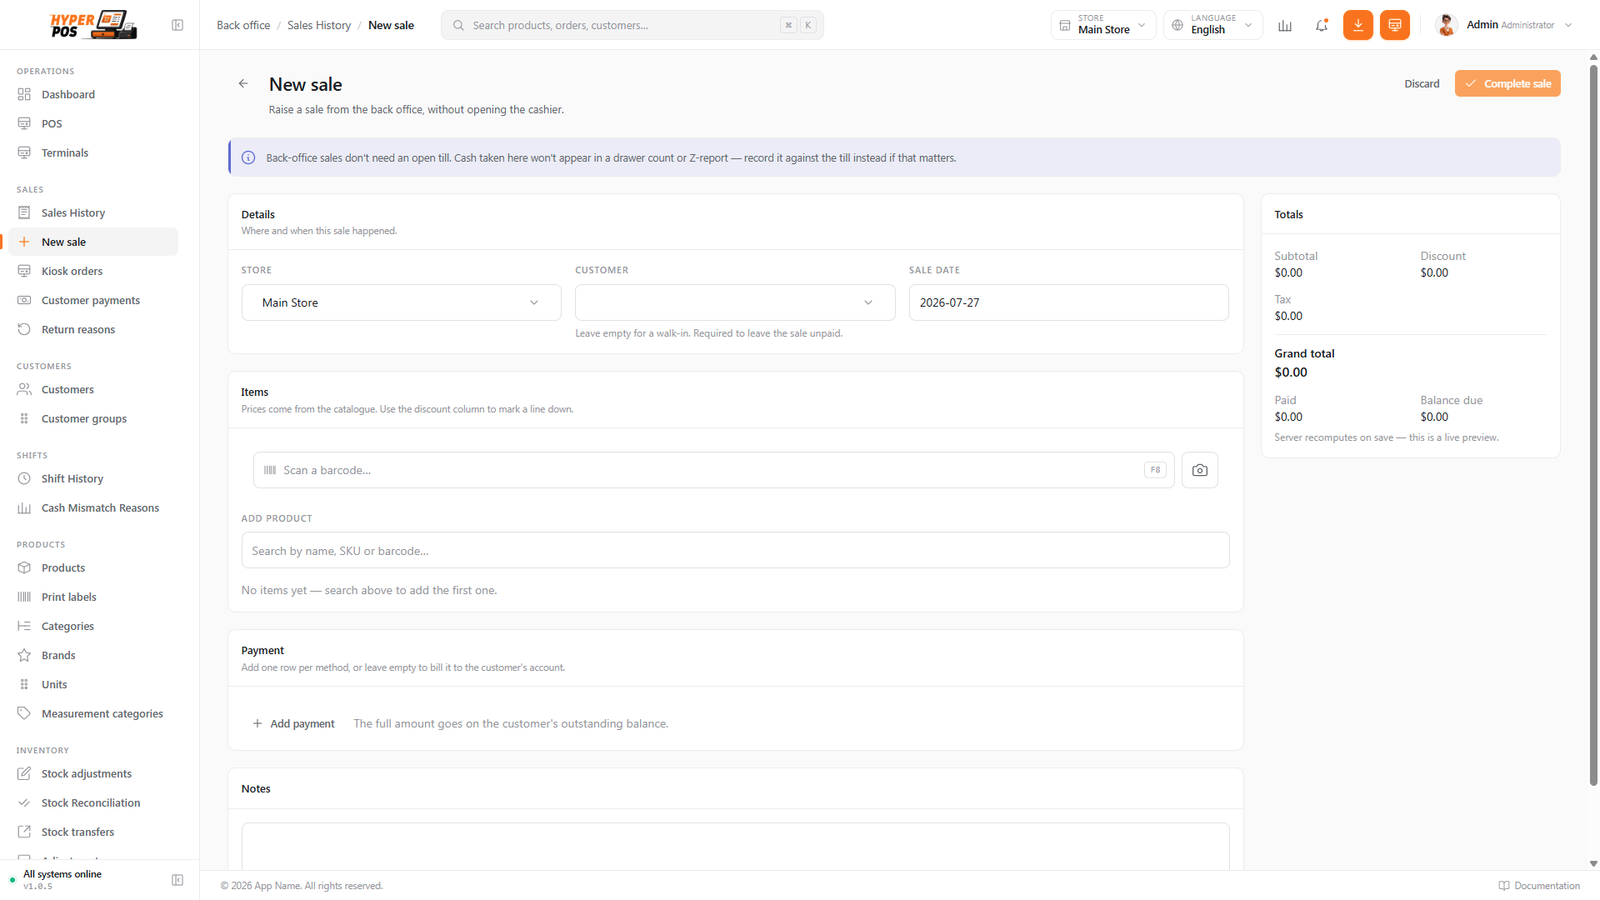
You don't need an open shift to raise one, and cash you record here won't appear in a drawer count or on the Z-report. If the money really did go into the till, ring it up on the POS screen instead — see Shifts & cash drawer.
Voiding a sale
A void reverses an entire sale because it should never have been made — for example, the cashier rang up the wrong basket, or accidentally completed a sale twice. A void is not the same as a return: a return is when a customer brings goods back. For that, use Returns & refunds.
When you void a sale, the system automatically:
- Puts the stock back. Every item on the sale is returned to your shelf count.
- Reverses the customer's balance. If it was a credit (pay-later) sale attached to a customer, the amount they owed is removed from their outstanding balance.
- Corrects the cash drawer maths. Because the sale no longer counts, it drops out of the shift's expected cash — see Shifts & cash drawer.
- Marks the sale Voided so it stays visible in history, with a clear record of who voided it and why.
How to void a sale
-
Open the sale
Find it in Sales history and click to open the detail page.
-
Click Void
Choose the Void action. A confirmation box appears asking for a short reason (so the void is explained in your records).
-
Hand back any cash yourself
Voiding does not open the drawer or pay anyone automatically. If the customer already paid cash, give it back by hand. The void simply makes the books match what really happened.
-
Confirm
Confirm the void. The sale is marked Voided, stock and balances are corrected, and you're done.
When you can void (and when you can't)
To keep your records trustworthy, a void is only allowed when all of these are true:
- The sale's status is still Completed — nothing has been returned against it yet.
- No refunds have been processed on the sale. If a customer has already returned part of it, use a return instead.
- The shift the sale belongs to is still Open. Once a shift is closed and its end-of-day report is final, its sales can no longer be voided.
Tips & best practices
- Void early. If you spot a mistake right after ringing it up, void it before the shift closes — it's the cleanest fix.
- Use returns for goods coming back. If the customer is physically returning an item, a return (not a void) is the correct tool — it handles part-sales and refund methods properly.
- Write a clear reason. "Duplicate ring-up" or "Wrong customer" helps when you or your accountant review history later.
- Filter before you scroll. A date range plus a status filter finds a sale far faster than scrolling a long list.
Notes & warnings
A void can't be undone. Once a sale is voided, that's final. If you voided the wrong one, simply ring the sale up again on the POS screen.
Cash refunds on a void are physical. The system corrects the records, but handing the money back to the customer is up to you.
Don't reach for void when you mean return. Voiding a sale that a customer has partly returned would corrupt your stock and your books — which is exactly why the system blocks it. Choose the right tool for the situation.
Related: Returns & refunds · Shifts & cash drawer · Customers · The POS screen