Users & roles
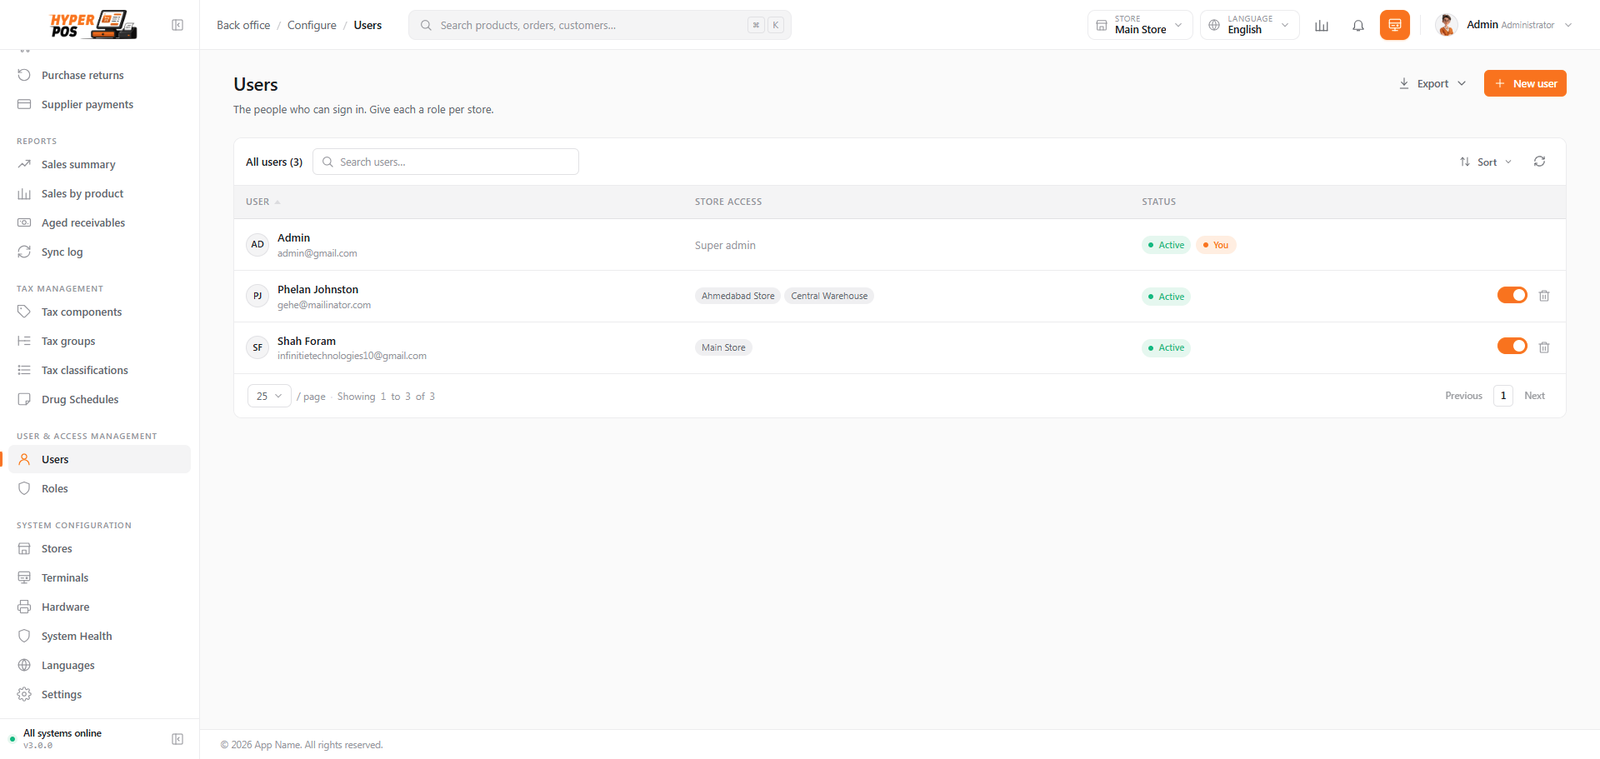
A user is a person who logs in — a cashier, a manager, you. A role is a named bundle of permissions that decides what that person is allowed to do. Together they let you give every staff member their own login while keeping sensitive actions in the right hands.
Overview
Every person who uses the system should have their own login — their own email and password. This is about accountability: when a sale, refund or void happens, the system records exactly who did it. Sharing one login makes that impossible.
Rather than tick dozens of individual permissions for each person, you give them a role. The system ships with sensible roles ready to use — Admin, Manager, Cashier, Stock Keeper and Accountant — and you can create your own.
Why it's useful
- Accountability. Each action is tied to a real person, so you always know who did what.
- Safety. A cashier can ring up sales without being able to change prices, see profit reports or alter settings.
- Speed of setup. Assign one role and the person instantly gets the right set of abilities — no fiddling with individual switches.
- Flexibility. Need a role that's halfway between Cashier and Manager? Build your own.
Users, roles and permissions
These three ideas work together:
| Term | What it means |
|---|---|
| User | A person with a login (email + password). For example, "Sara the cashier". |
| Role | A named bundle of permissions, like "Cashier" or "Manager". You give a user a role. |
| Permission | A single thing a person is allowed to do, like "give a refund", "see reports" or "change settings". Roles are made of these. |
So the chain is simple: a permission is one ability, a role groups many permissions, and a user is given a role.
Adding a staff member, step by step
-
Open Users
Click Users in the sidebar, then click Add user.
-
Enter their details
Type their name and email address (and phone, if you like). The email is their login name.
-
Set up their password
Either set a starting password yourself, or send them a setup link by email so they choose their own. Sending a link is the tidier choice.
-
Choose their store and role
Pick which store (location) they work at and which role they hold there. A person can work at more than one store, with a different role at each.
-
Save
Click Save. They can now log in with their own account. If you sent a setup link, they'll receive an email to finish setting up.
Working with roles
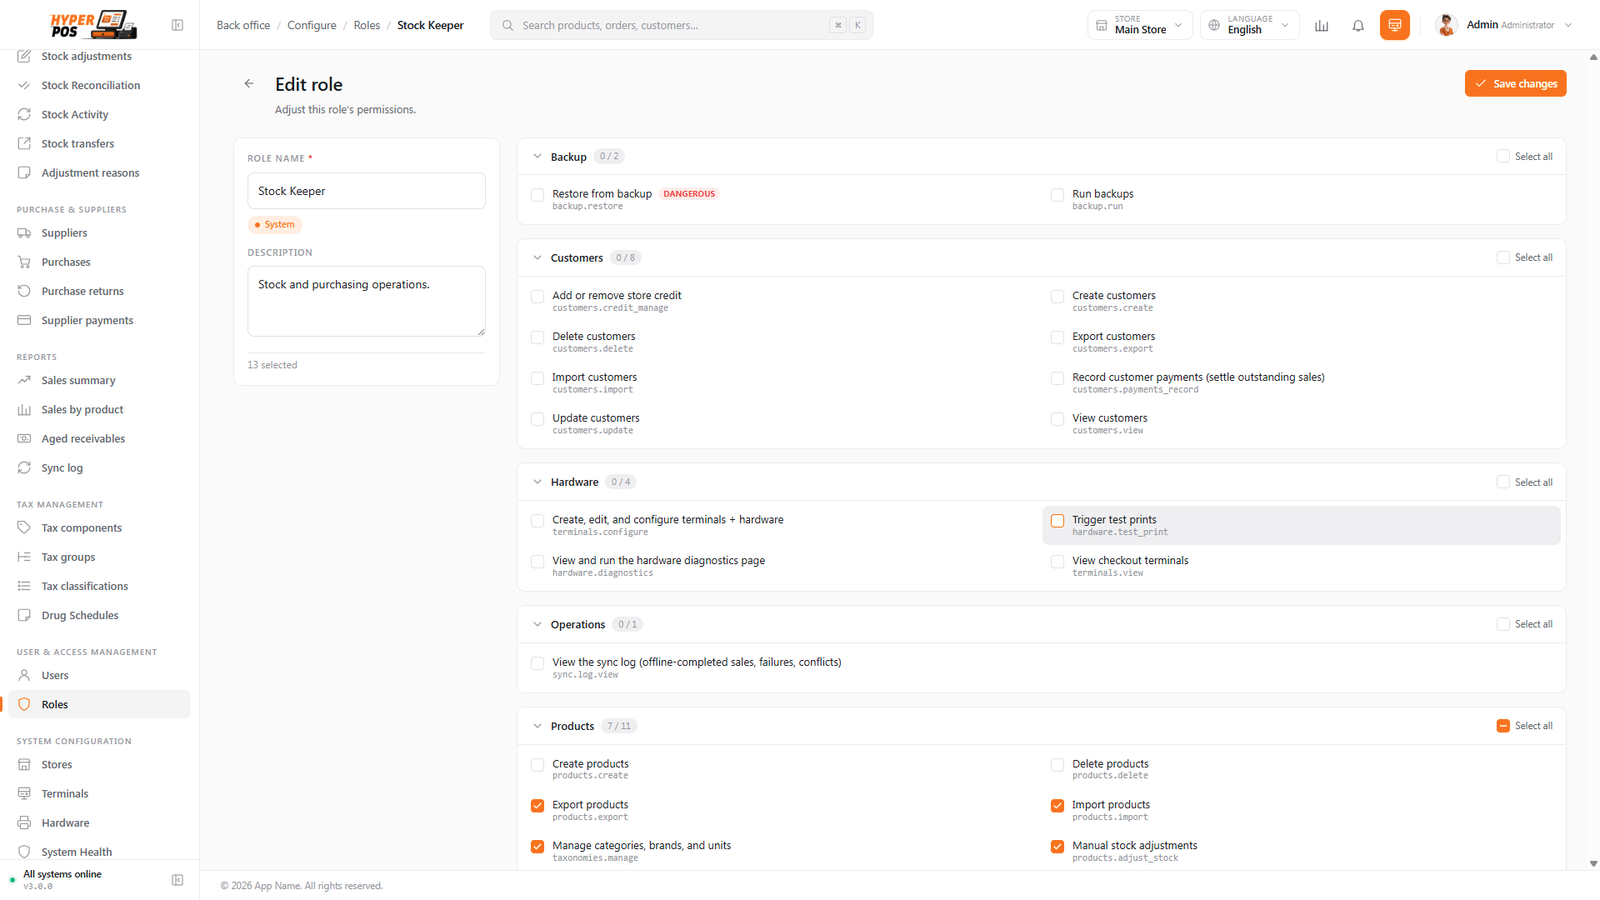
Open Roles in the sidebar to see the roles you have. Each role lists the permissions it grants. You can:
- Use a built-in role as-is. Cashier, Manager and the others are ready to assign immediately.
- Create a new role. Give it a name and tick the permissions it should include, grouped by area (Sales, Products, Reports, Settings and so on).
- Copy an existing role. Start from a role that's close to what you want, then adjust.
A handful of permissions are marked as dangerous — things like changing the license key, restoring a backup or creating another super admin. These are tucked away and clearly flagged so they're never granted by accident.
What permissions control
Some everyday examples of the kind of thing a permission decides:
- Who can give refunds or process returns.
- Who can void a completed sale.
- Who can apply a discount, and who can go above a set limit.
- Who can see reports — sales, stock or financial.
- Who can change settings or add other users.
- Who can see and edit cost prices.
Built-in guardrails
A few rules are enforced for you, so an honest mistake — or a dishonest one — can't leave your business locked out or over-exposed.
| Rule | What it means in practice |
|---|---|
| Nobody can promote themselves | You can only grant permissions you hold yourself. A manager can't quietly add "restore a backup" to their own role, or assign a role that holds permissions they don't have. |
| The last administrator can't be removed | POS refuses to deactivate, delete or demote the last active super admin, so you can never lock yourself out of your own system. |
| You can't switch yourself off | Deactivating or deleting your own account is blocked — ask another administrator to do it. |
| Deactivating takes effect immediately | Switching a user off ends the sessions they already have open. On a till, a tablet, or a browser left logged in at home, the very next thing they click signs them out and returns them to the login screen — they don't get to carry on until the session happens to expire. |
Which stores a user can see
If you run more than one store, each user is assigned to the stores they work at. That assignment is a hard boundary, not just a default: lists, reports, exports and scheduled report emails only ever include data from the stores a user is assigned to. Someone who works at one branch can't page through another branch's sales, stock or customers — and a report they schedule shows their stores, not yours.
Administrators are the exception: they see every store, and can switch between them (or view all of them together) from the store picker in the top bar.
Signing accounts out remotely
Open your own profile to review signed-in devices and choose Sign out other devices while keeping the current browser open. An administrator with the required permission can open the Users list and choose Sign out everywhere for another account—for example when a device is lost or a staff member leaves.
For a business-wide rule that automatically keeps only the newest session for each account, see Settings → Security.
Changing your sign-in email safely
- Open your profile and enter the new email
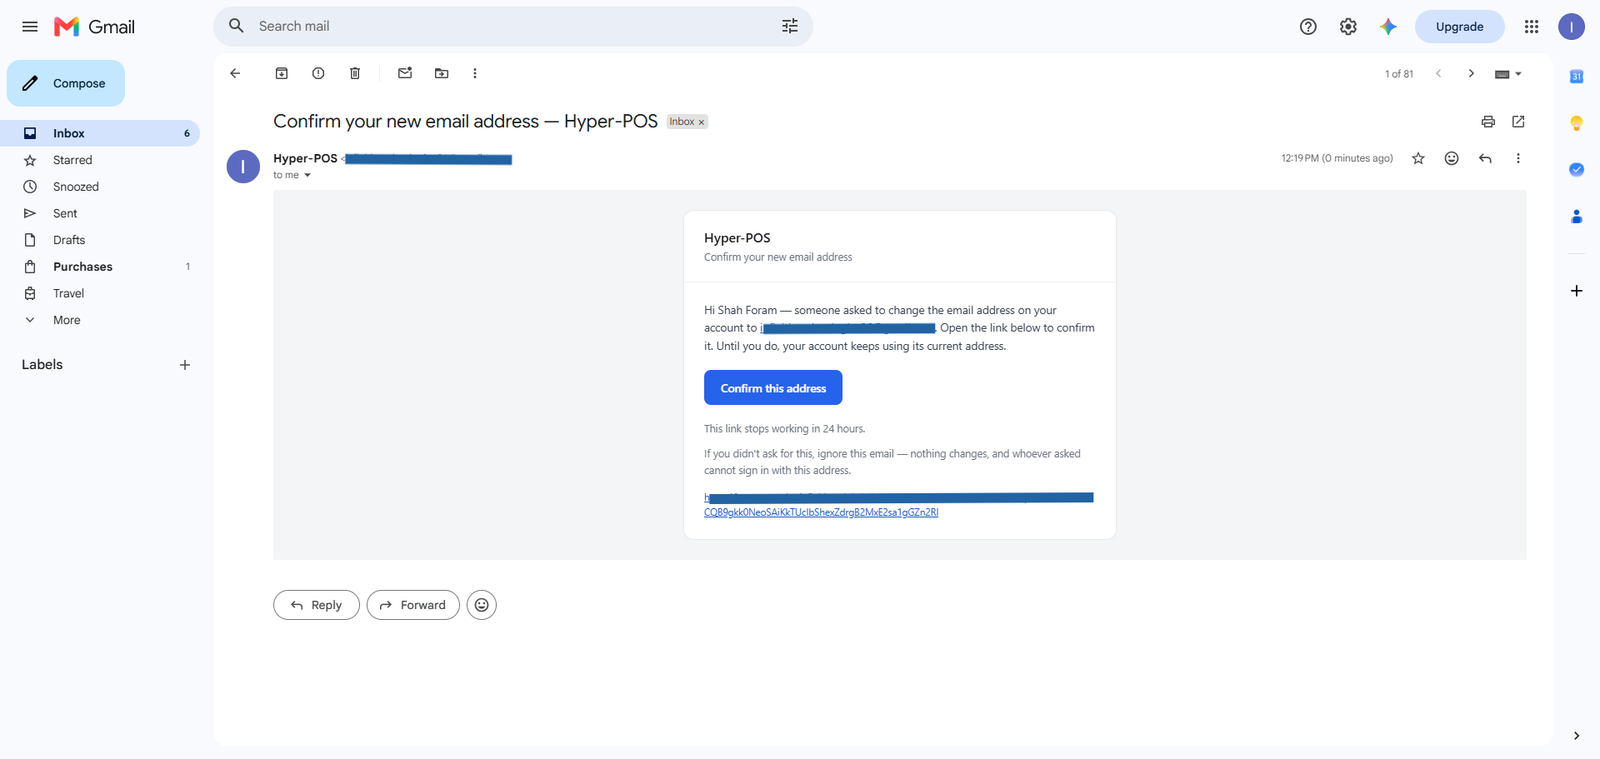
Save the profile. Hyper POS stores the request as pending and sends a single-use confirmation link to the new address.
- Keep using the current email meanwhile
Your existing sign-in email remains unchanged until confirmation. The pending address cannot yet be used to log in.
- Open the link from the new mailbox
A valid, unexpired link changes the account email and clears the pending state. If that address now belongs to another user, the change is refused rather than merging accounts.
Tips & best practices
- One login per person. Never share an account. It's the only way reports can tell you who did what.
- Give the smallest role that fits. A cashier rarely needs manager powers. Start narrow; you can always add more.
- Deactivate instead of deleting. When someone leaves, switch their account off rather than removing it, so their past sales stay attached to a name.
- Reuse roles across people. Five cashiers can all share the one Cashier role — change it once and it updates for all of them.
Notes & warnings
The built-in roles can't be deleted (though you can adjust their permissions). This makes sure there's always a working set of roles to fall back on.
You can't lock yourself out. There must always be at least one administrator who can manage users and roles, so the system won't let you remove that last bit of access.
Related: Stores & terminals · General settings · Shifts & cash drawer