Stock reconciliation (stock takes)
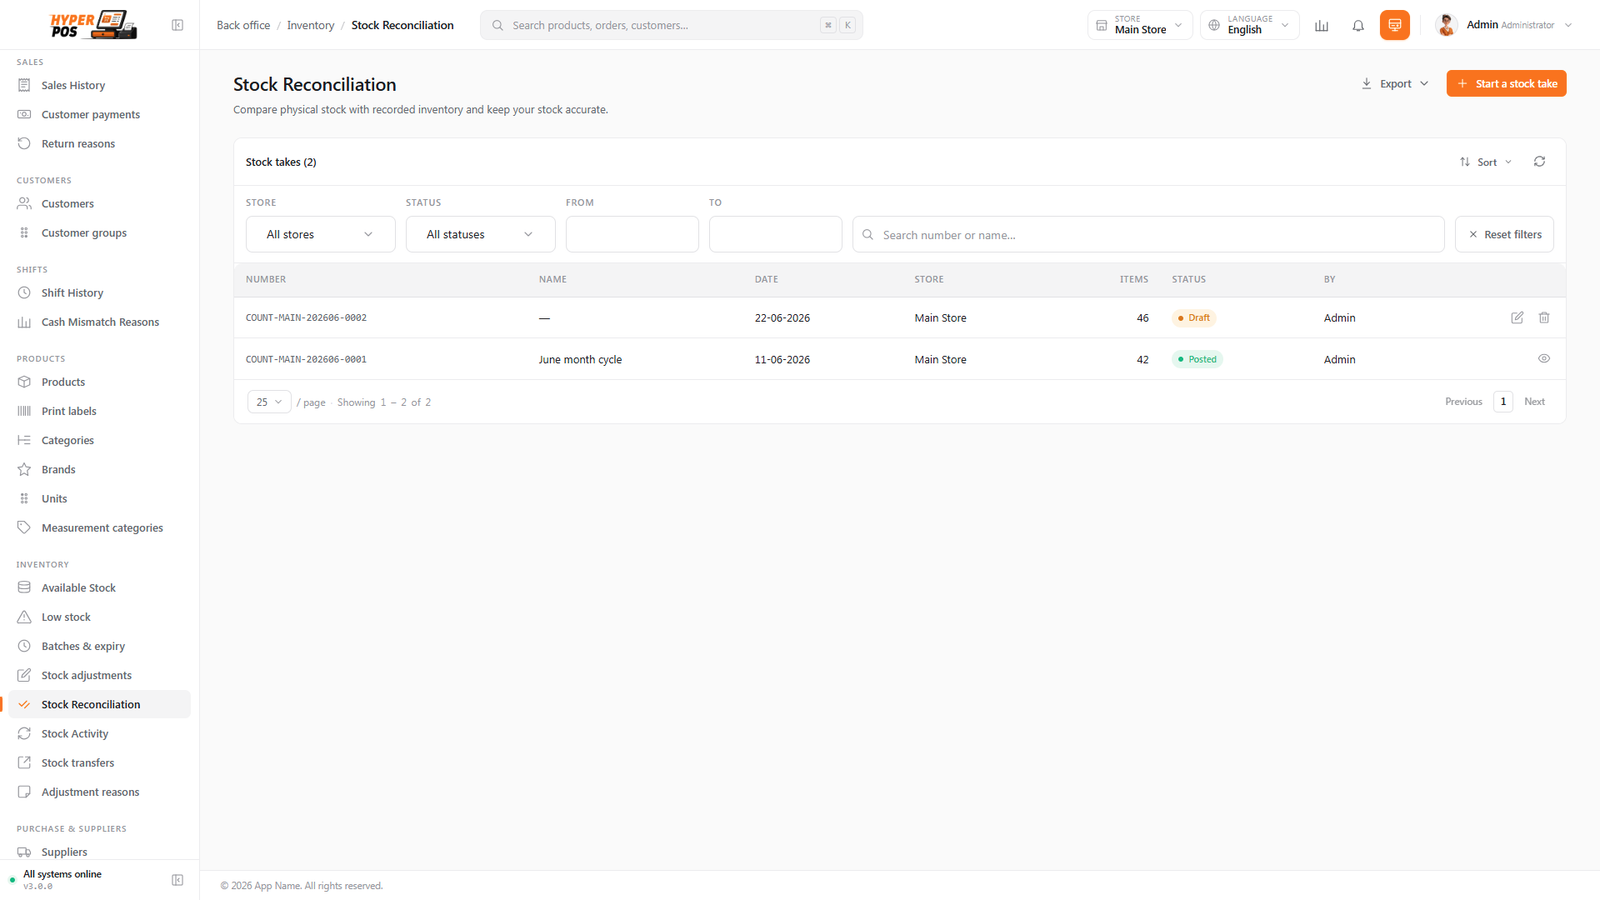
A stock reconciliation — also called a stock take or physical count — is how you bring the system into line with reality. You walk the shelves, count what's actually there, type those numbers in, and POS adjusts only the products where the count and the system disagree.
Overview
Over time, small differences creep in between what the system thinks you have and what's really on the shelf — miscounts, unrecorded breakages, the odd slip at the till. A stock reconciliation fixes them all in one go. It's a document that moves through two states: you build and count it as a Draft, then post it to become Posted, which applies the corrections.
The clever part is that posting only touches the products whose count differs from the system. Everything that already matched is left exactly as it was, so a stock take is safe to run even on a large catalog.
Why it's useful
- It catches everything at once. A single count fixes every quiet difference that's built up since the last one.
- It only changes what's wrong. Products that match are left alone, so the count is quick and low-risk.
- It freezes a snapshot. When you start, POS remembers the expected quantities, so later sales don't muddle the comparison.
- It records the variance. The differences (the "variance") flow into Stock Activity as proper movements, keeping your history complete.
Running a stock take, step by step
-
Start a new count
Open Inventory → Stock Reconciliation and start a new stock take. At that moment POS takes a snapshot of the expected quantity (what the system currently shows) for each product — this is the baseline you'll compare against.
-
Count the shelves
Go round and count what's physically there. You can count everything, or focus on one area, shelf or category at a time.
-
Enter your counted quantities
Type the number you counted next to each product. How you fill a line matters:
- Leave it blank to skip the product — it's untouched, as if you didn't count it.
- Enter 0 to record a real count of none — you checked and the shelf is empty.
-
Review the differences
The screen shows the expected quantity beside your counted quantity and highlights the variance (the difference) on each line. Use this to spot anything that looks surprising before you commit.
-
Post the count
When you're happy, post it. POS adjusts only the lines where your count differs from the expected quantity — bringing the system into line with what you counted. Skipped (blank) lines are left exactly as they were.
Scanning items in
Counting with a barcode scanner is much faster than finding each product by hand. Press F8 to jump to the scan box, then scan an item on the shelf: POS finds that product's count row and adds one to its counted quantity, then puts your cursor in that line's count field so you can type the exact number if you'd rather. Scan the same item again and the count goes up by one more — perfect for tallying a shelf by scanning each unit. A product's variant barcode finds that exact variant's row, and on a tablet or phone you can scan with the camera. It's the same scan box as on stock adjustments — see Scanning items in for the full walkthrough.
Counting in walk order
If you've recorded shelf locations for your products, the count sheet shows a Location column and sorts the lines the way you actually walk the shop — aisle by aisle, rack by rack. There's a Location filter above the list so you can narrow to a single aisle and count just that; pick No location set to see the items that haven't been placed yet. Scanning always finds the product you scanned, even if it sits outside the aisle you're filtered to, so you never get the "I scanned it and nothing happened" moment.
Printing a count sheet
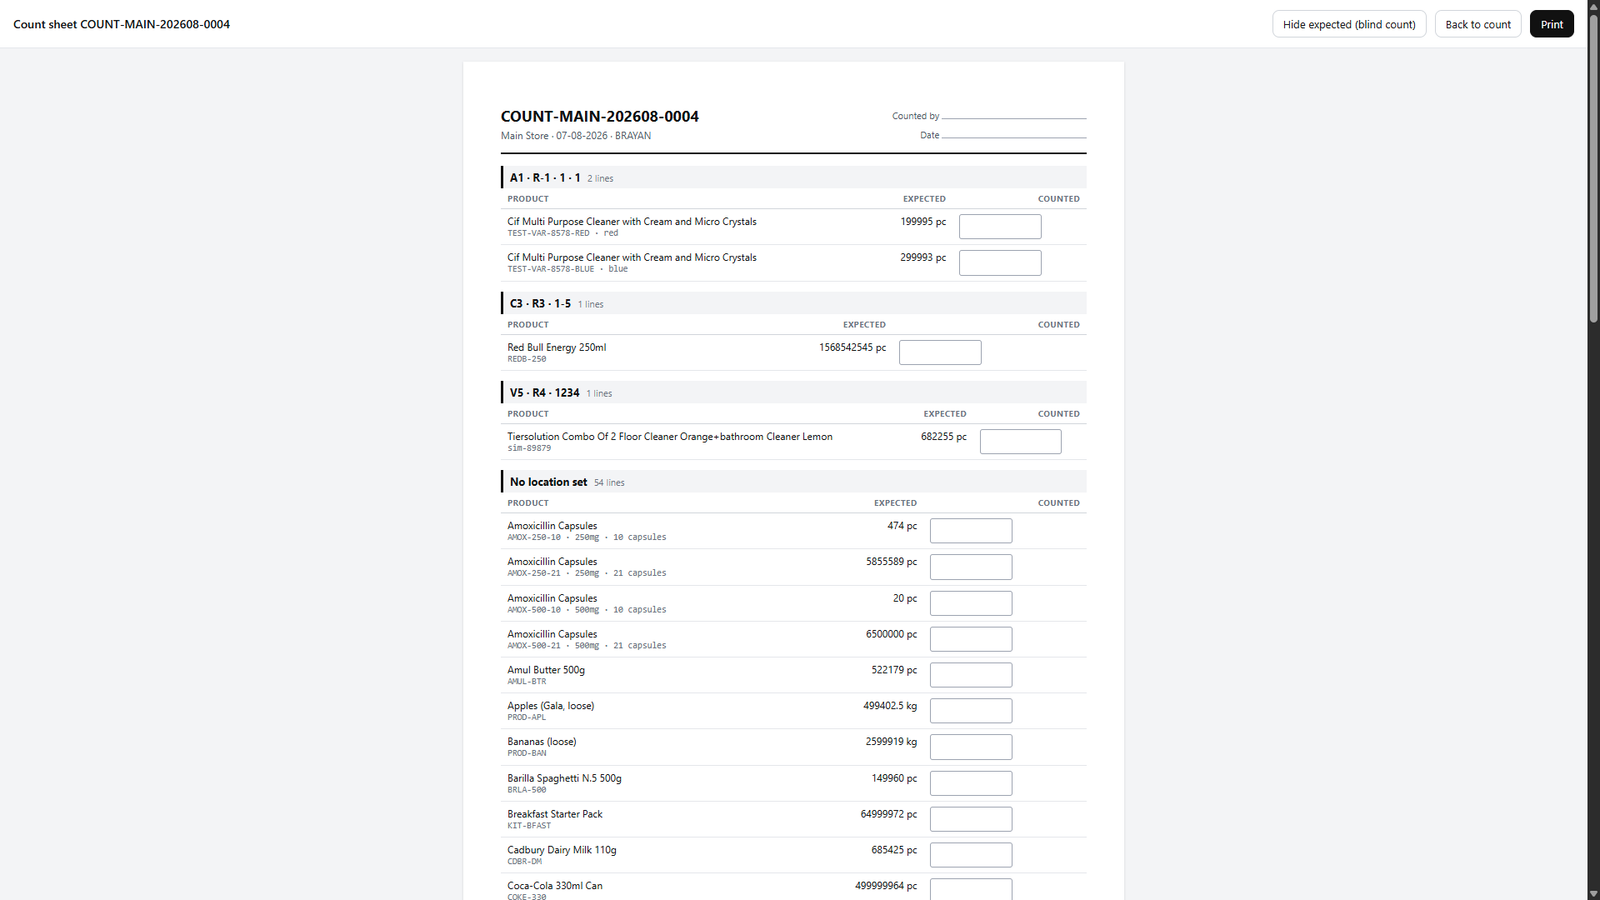
Counting on paper is still the fastest way for most shops. Open the count and choose Print count sheet — POS opens a clean, print-ready page with the lines grouped by shelf location in walk order and room to write the counted quantity beside each. Products with no location yet are grouped at the end under No location set.
Tick Hide expected (blind count) before printing and the expected quantities are left off the sheet. This is a blind count: whoever counts writes down what they genuinely see, rather than being nudged towards the number the system already believes. For any count that matters — insurance, year-end, or investigating shrinkage — blind is the honest way to do it.
A blank line means "I didn't count this" and changes nothing. A 0 means "I counted and there are none" and will bring the system down to zero. Getting these two right is the whole skill of a clean stock take.
Importing counted quantities
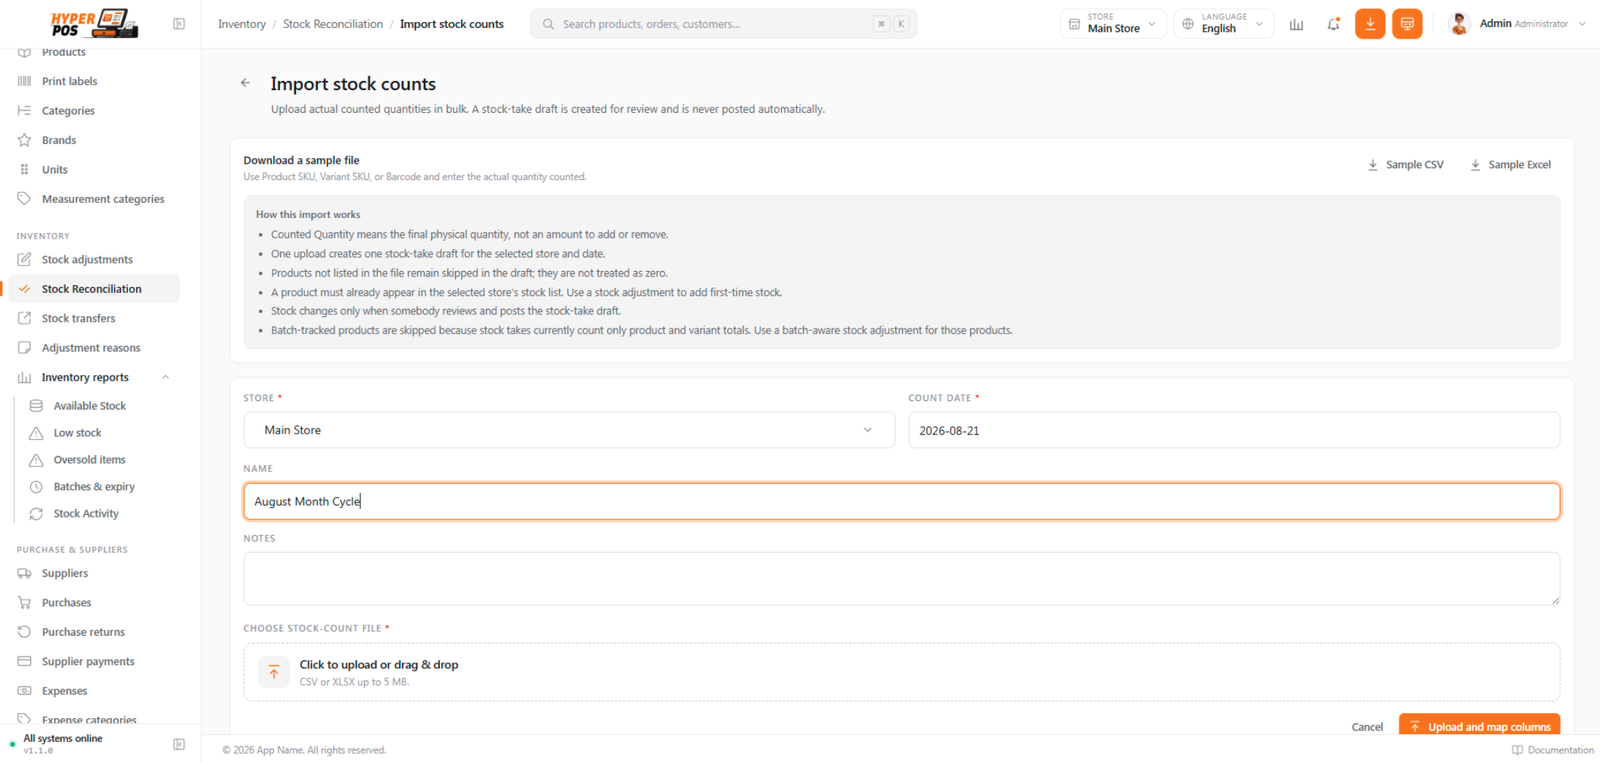
If your team records the count in a spreadsheet, open Inventory → Stock takes → Import. Download the CSV or Excel template and identify each row by Product SKU, Variant SKU or Barcode with its actual counted quantity and optional note.
- Select the store and upload
Choose an accessible store and upload the completed count file.
- Check mappings and preview
Common headers map automatically. Confirm exact simple/variant matches and review duplicate, unknown or unsupported batch-tracked rows. No variance posts during preview.
- Create the draft stock take
Confirming the import creates a draft containing the accepted counts. Current stock remains unchanged.
- Review and complete normally
Open the draft, investigate large differences and complete it. Only the accepted variance posts, once, and its stock movements link back to the stock take.
Tips & best practices
- Count when the shop is quiet. Counting outside trading hours means fewer sales happening mid-count to confuse the picture.
- Count by area. Breaking a big count into shelves or categories makes it manageable and easier to double-check — filter the sheet to one aisle at a time.
- Print blind for counts that matter. Hiding the expected quantity stops "yes, that looks about right" from creeping into your numbers.
- Only fill the lines you actually checked. Leave the rest blank so you never accidentally zero out stock you didn't count.
- Review big variances before posting. A surprising difference is worth a recount — it's easier to fix before posting than after.
Notes & warnings
Once posted, a stock take is final. Like adjustments, it can't be edited afterwards. If you find an error, correct it with a fresh stock adjustment or another count.
Don't leave a count open for days. The longer a draft stays open, the more sales happen against stock you've already counted — finish and post on the same day where you can.
Related: Stock overview · Stock adjustments · Batches & expiry · Shelf locations