Stock adjustments
A stock adjustment is how you correct a count by hand when something happens outside the normal flow of selling and receiving — a breakage, a write-off, found stock, or a small counting error. You pick a direction (stock In or Out), enter how many, and say why.
Overview
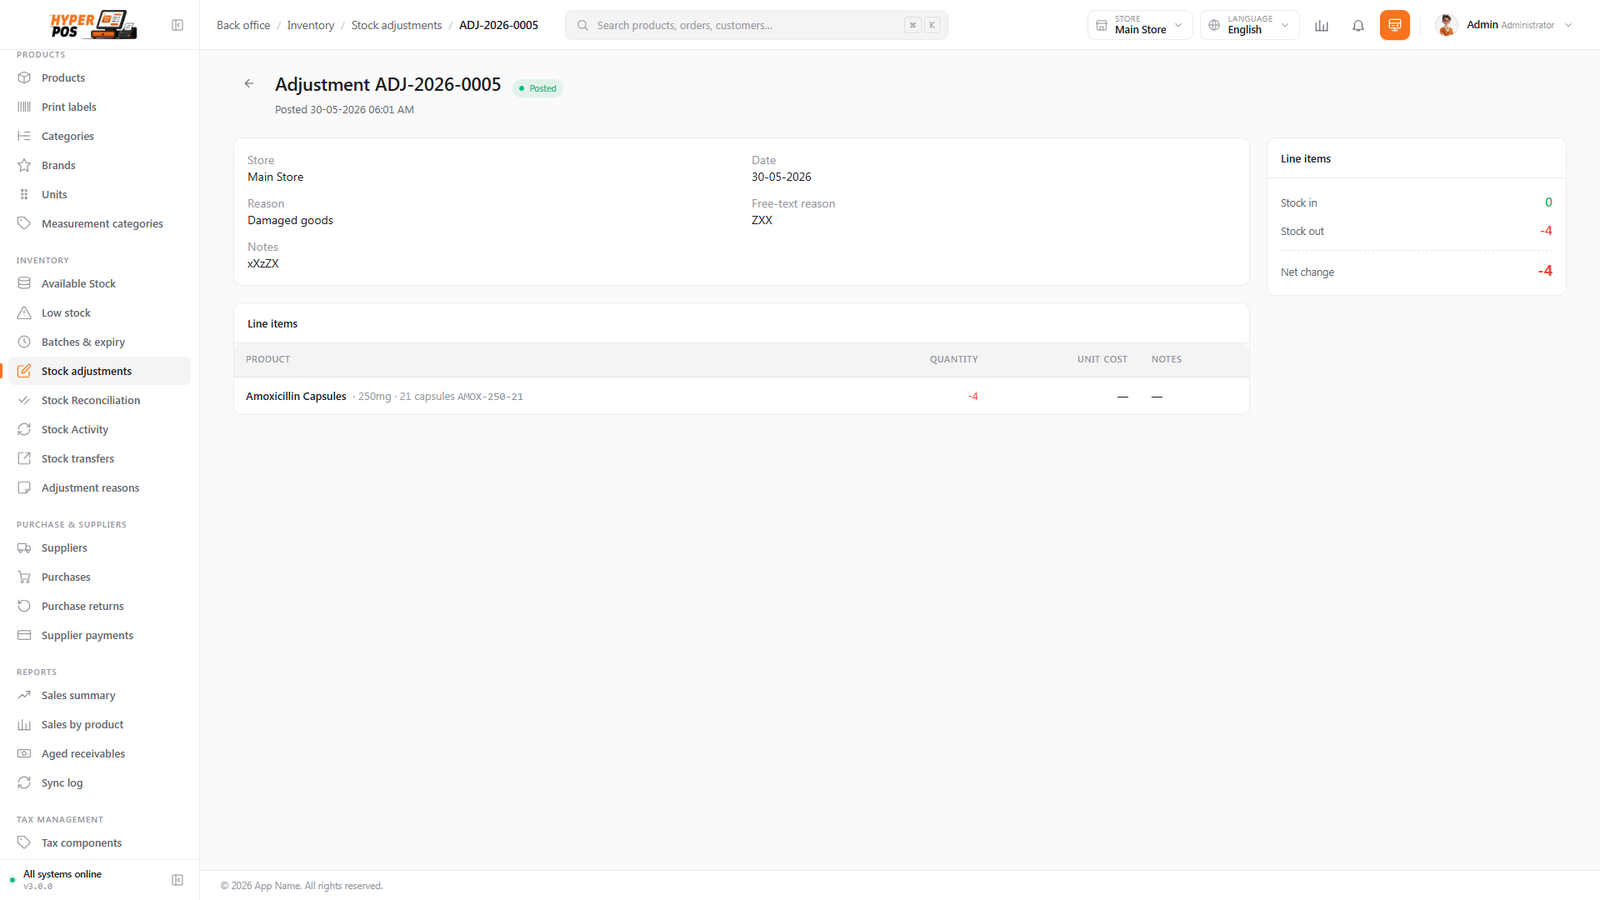
Most stock changes happen on their own — you sell, the count drops; you receive a delivery, it rises. Adjustments are for everything else: a dropped bottle, a damaged box, stock that turned up after a recount, or a giveaway. Each adjustment is a small document with one or more lines. You build it as a Draft, check it, then post it to apply the change to your stock.
To keep things clear and mistake-proof, you never type a minus sign. Instead you set each line's direction — In (add) or Out (remove) — and always enter a positive quantity.
Why it's useful
- Your counts stay honest. When stock is lost or found, you record it instead of letting the number drift.
- Every change has a reason. Choosing a reason (damage, theft, found stock, recount) makes your reports meaningful later.
- No confusing minus signs. The In/Out toggle makes the direction obvious, so it's hard to get a correction backwards.
- It leaves a clean trail. Posted adjustments appear in Stock Activity, so the history is always complete.
Making an adjustment, step by step
-
Start a new adjustment
Open Inventory → Stock adjustments and click New adjustment. A draft document opens, ready for you to add lines.
-
Add a product line
Search for the product and add it. Each line is one product you're correcting.
-
Choose In or Out
Set the direction: In if you're adding stock (for example, found stock), or Out if you're removing it (damage, breakage, write-off).
-
Enter the quantity
Type how many — always a positive number. The direction you picked tells POS whether to add or subtract it, so there's never a minus sign to worry about.
-
Pick a reason
Choose an adjustment reason from the list (for example Damaged, Lost, Found stock, Recount). Reasons come ready-made, and you can add your own under Inventory → Adjustment reasons. Add a note if it helps explain the correction.
-
Post it
When the lines look right, post the adjustment. This applies every line to your stock and records each change in Stock Activity. A posted adjustment can't be edited — see the warning below.
Scanning items in
Adding lines one search at a time is fine for a couple of products, but if you have a barcode scanner you can go much faster. The adjustment editor has a scan box that works just like the cashier screen: point your scanner at a product and it drops straight onto a line — no searching, no typing. It works with any USB or Bluetooth barcode scanner, and on a tablet or phone you can scan with the camera instead.
-
Jump to the scan box
Press F8 at any time to put your cursor in the scan box — the same key as the till, so the habit carries over. You can also just click the box.
-
Scan the barcode
Scan a product's barcode. If that product isn't on the adjustment yet, POS adds a new line for it; if it's already there, POS simply bumps that line's quantity by one — so scanning the same item three times gives you a quantity of three. The box keeps focus so you can scan item after item.
-
Scan a variant directly
If a product has variants (say a size or a flavour) and each variant has its own barcode, scanning it selects that exact variant — you don't have to pick it from a list.
-
No scanner? Use the camera
On a device with a webcam, tap the camera button next to the scan box and hold a barcode up to the lens. POS reads it the same way as a hardware scanner.
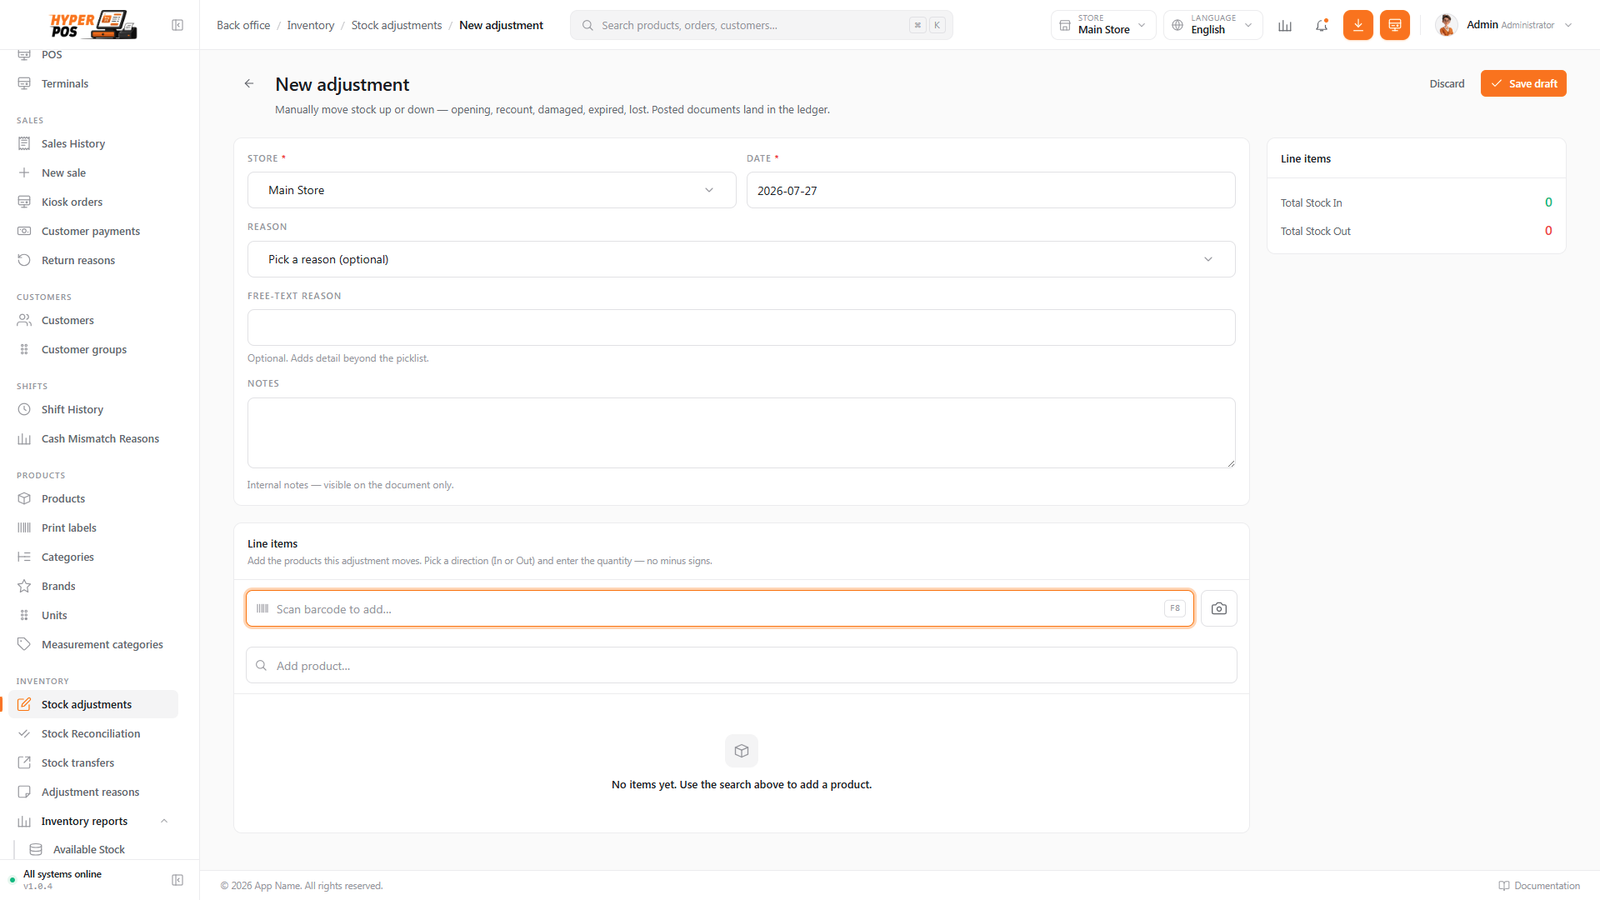
Scanning only adds and finds lines — it doesn't change the In/Out direction. Set each scanned line's direction and reason as usual before you post.
Creating a new batch on an In line
If a product is batch-tracked, the direction changes what a line can do. An Out line can only remove stock from one existing batch with enough stock on hand; it never borrows silently from another batch. An In line can go a step further and create a new batch right there: enter its batch number, manufacture date and expiry date. With Batch-wise pricing active, also enter its cost, selling price and MRP. POS creates the batch only when the adjustment is posted.
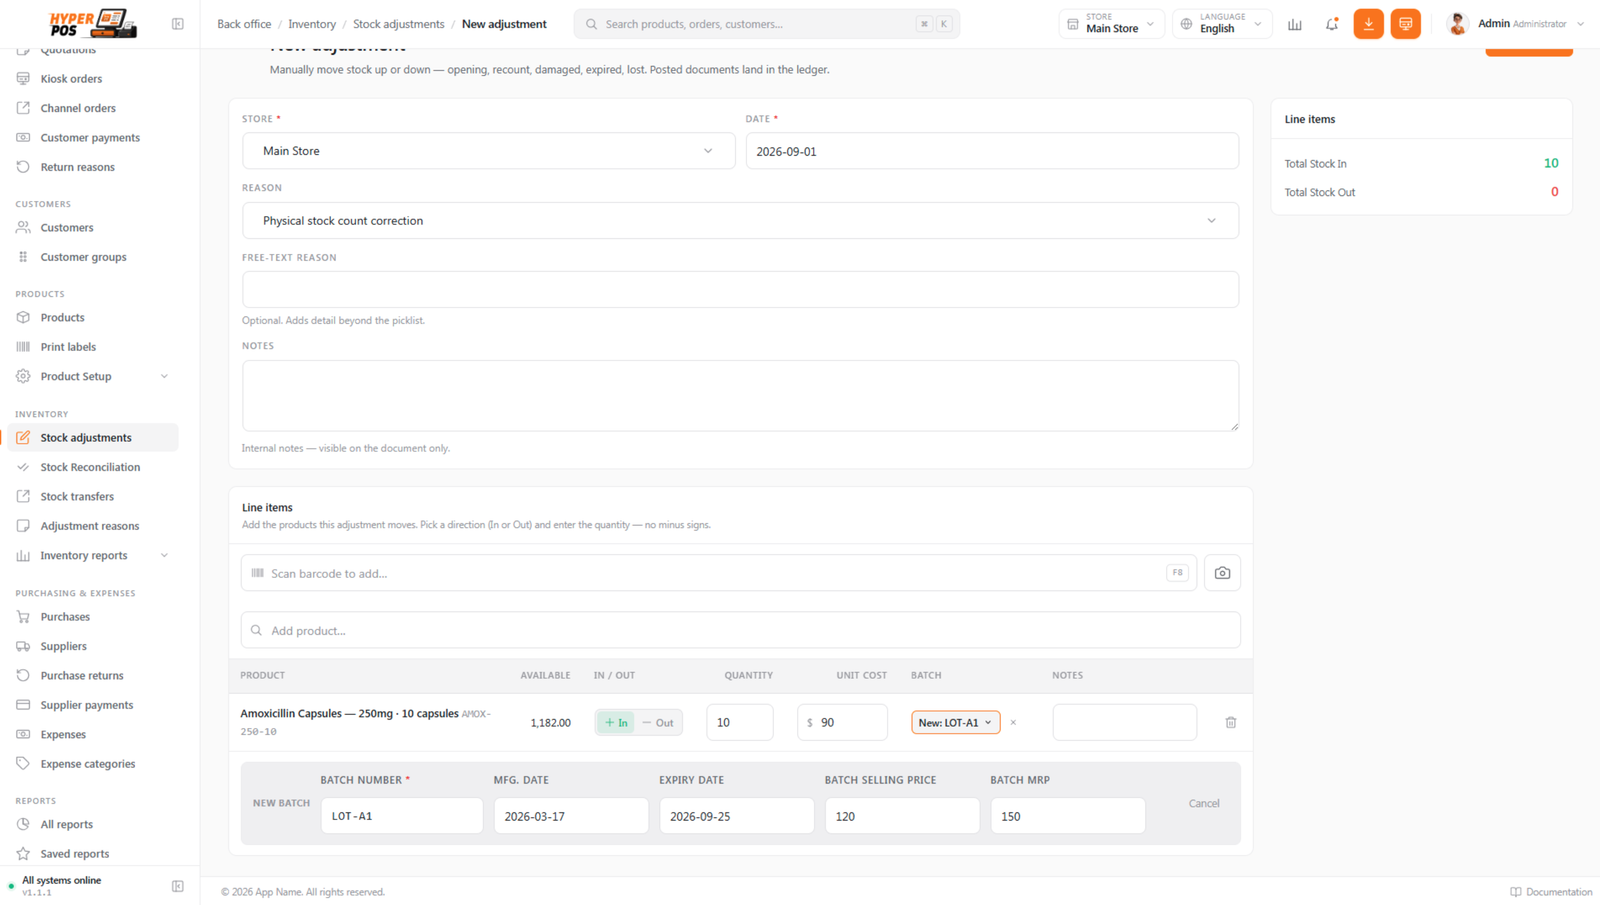
A draft adjustment is just a worksheet — your stock isn't touched. Take your time getting the lines right; the count only moves the moment you post.
Importing stock adjustments
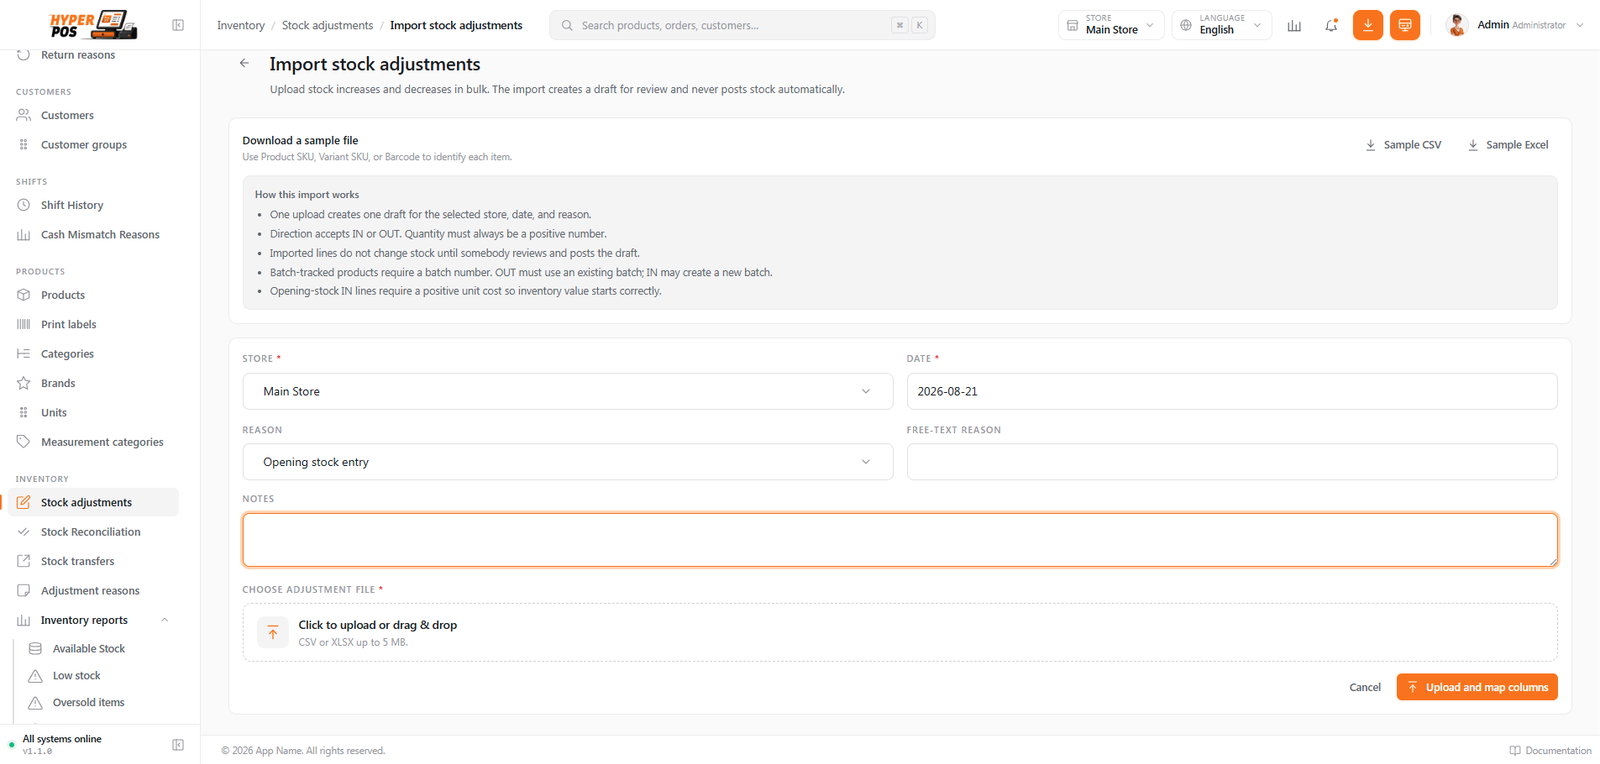
Use Inventory → Stock adjustments → Import to build a large adjustment from CSV or Excel. The import creates a draft for review; it never posts stock automatically.
- Download the template
Choose CSV or Excel. Identify each row by Product SKU, Variant SKU or Barcode, then provide direction (In or Out), quantity and any supported reason, batch, cost or note fields.
- Choose the store and upload
Select a store you can access, upload the completed file and review the suggested column mappings.
- Preview every line
Unknown identifiers, duplicate lines, zero/negative quantities and unavailable Out quantities are reported rather than guessed. Preview does not change stock.
- Create the draft
Confirm the import to create one draft adjustment. Open it, check direction, quantities, reasons and batches, then post it through the normal adjustment workflow when ready.
Tips & best practices
- Always pick the most accurate reason. "Damaged" and "Lost" tell very different stories in your reports later — choose the one that really fits.
- Group related corrections. Several damaged items found together can share one adjustment, which is tidier to review.
- For a full physical count, use a stock take instead. A stock reconciliation is built for counting everything and only correcting the differences.
- Double-check the direction. In adds, Out removes — read it back before posting.
Notes & warnings
A posted adjustment can't be edited or deleted. This is deliberate — it keeps your stock history trustworthy. If you made a mistake, post a second adjustment in the opposite direction to put it right.
Out lines for batch-tracked products need an existing batch. You can't remove stock from a batch that doesn't have any.
Related: Stock overview · Stock reconciliation · Batches & expiry