Hardware & printing
A POS counter is only as good as the kit on the desk. This page walks you through connecting the four things most shops use — a receipt printer, a cash drawer, a barcode scanner and (optionally) a label printer — and testing each one so you're confident before the first customer arrives.
Overview
The system is designed to work with the inexpensive, widely-available hardware you'll find in any shop: a small thermal receipt printer (the kind that prints on a roll of heat-sensitive paper), a cash drawer that pops open by itself, a barcode scanner, and — if you label your own stock — a label printer. None of it needs special drivers or technical installation in most cases.
Your hardware setup is saved per counter (each till is called a terminal). So if you have two checkout desks, each one remembers its own printer and scanner. Set a counter up once and every cashier who logs in there inherits the same setup — no re-configuring.
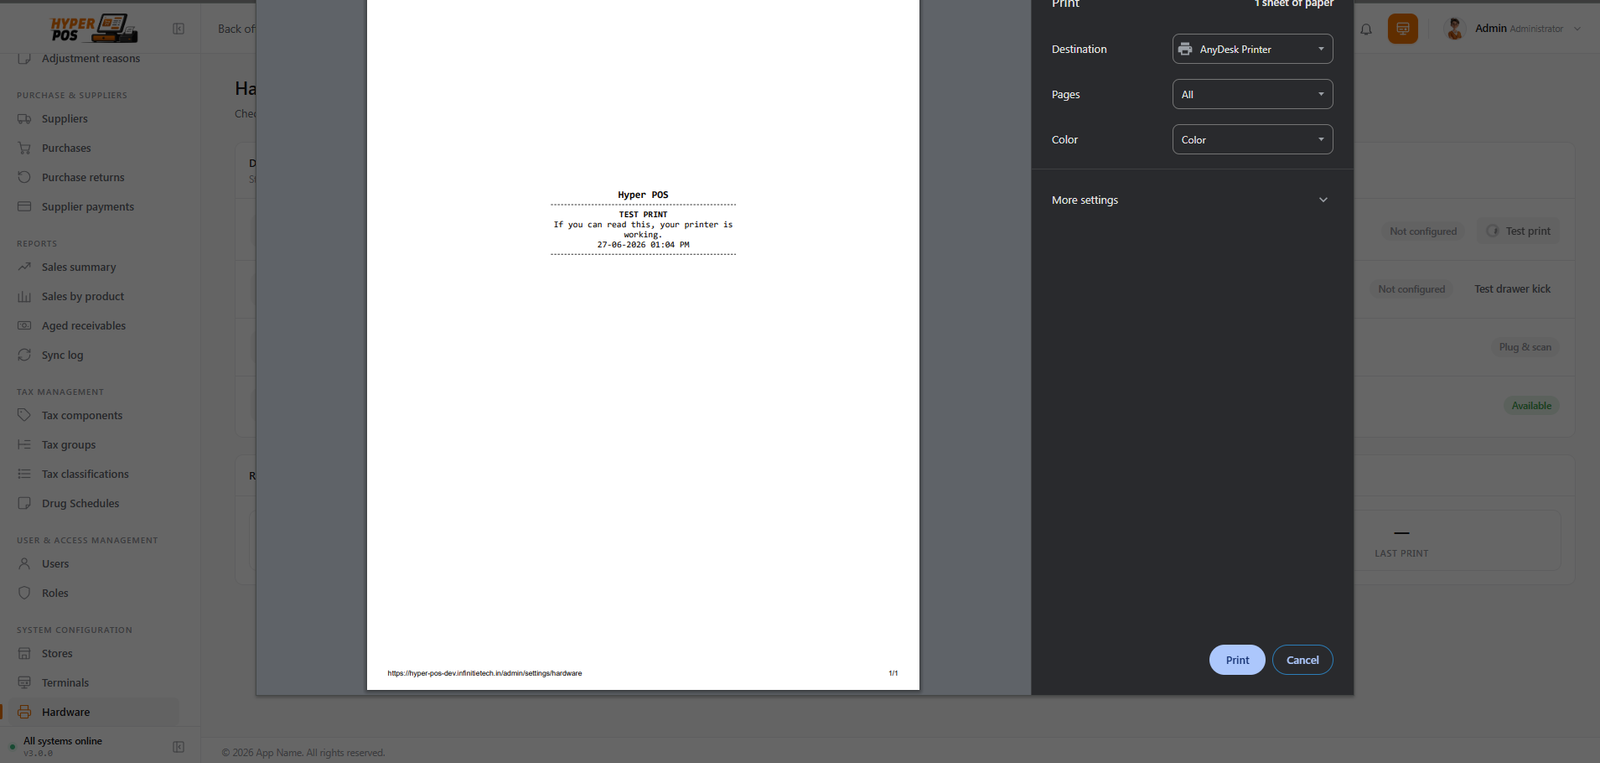
To print directly to a thermal printer, the system uses a tiny built-in helper called the print bridge. It runs inside your web browser and quietly hands each receipt to the printer. If your browser or printer can't use it, the system automatically falls back to your browser's normal Print dialog instead — you never see a broken button.
Why it's useful
- It works with cheap, common hardware. A basic thermal printer (around $50) and a USB scanner are all most shops need.
- No drivers, in most cases. Scanners behave like a keyboard, and the print bridge talks to the printer for you.
- It's set up per counter. Each till keeps its own printer and scanner, so a busy multi-till shop just works.
- Nothing gets lost. If a receipt fails to print, it's saved and retried automatically rather than disappearing.
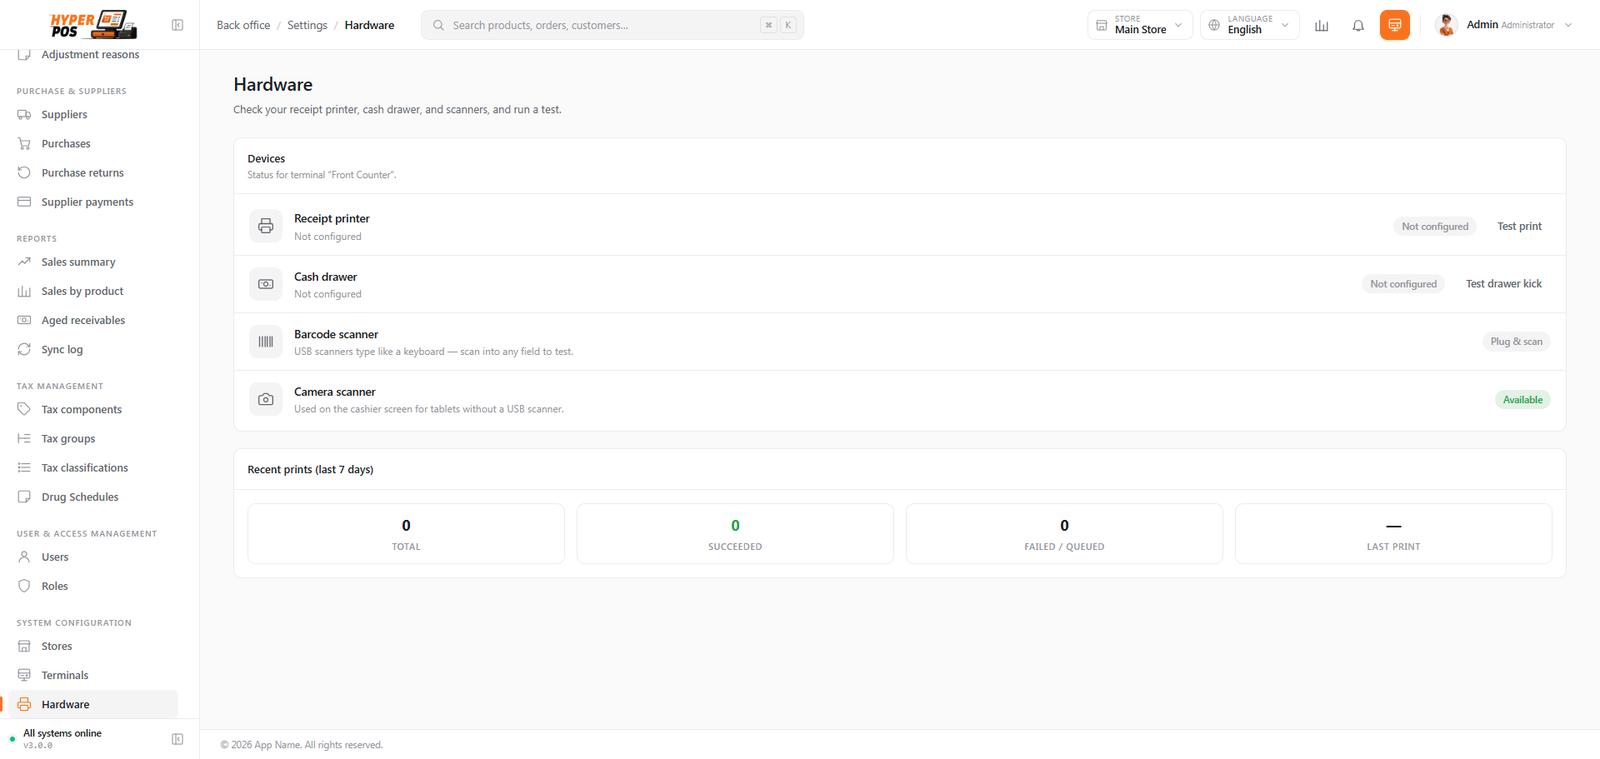
- You can test before you trade. The diagnostics page lets you fire a test print, open the drawer and check a scan in seconds.
Setting up your hardware, step by step
-
Open your counter's hardware setup
Go to Settings → Hardware. You'll see the setup for the counter (terminal) you're currently using. If you haven't created this counter yet, do that first on the Stores & terminals page, then come back.
-
Connect the receipt printer
Plug your thermal printer into the computer by USB and switch it on. Choose Thermal receipt printer, pick your paper width (80mm is the most common; small printers use 58mm), then click Pair printer. Your browser shows a short list of devices — pick your printer. The browser remembers it for next time.
-
Send a test print
Click Test print. A small sample receipt should come out of the printer. If it does, you're done with the printer. If nothing happens, see the warnings at the bottom of this page.
-
Hook up the cash drawer
Most cash drawers connect to the printer, not the computer — a phone-style cable runs from the back of the printer into the drawer. Choose Connected to receipt printer. The drawer then pops open automatically whenever a customer pays cash. Click Test kick (the term for "open the drawer") to check it.
-
Set up the barcode scanner
Plug a USB barcode scanner in. There's nothing to install — it simply types the barcode for you, exactly like a fast keyboard. To confirm it's working, scan any product barcode during setup and the system will recognise it. If you'd rather use a tablet or phone camera as a scanner, choose Camera instead (covered below).
-
Add a label printer (optional)
If you print your own price/barcode labels, choose your label printer here the same way you paired the receipt printer. No label printer? You can still print labels onto an ordinary A4 sticker sheet using your normal office printer — see Barcode labels.
-
Save and you're ready
Your choices are saved to this counter. Any cashier who logs in here gets the same setup automatically. Repeat these steps on each counter that has its own hardware.
Everything works without a thermal printer — receipts print through your browser's normal Print dialog instead, and you open the drawer by hand. A small thermal printer just makes it faster and smoother.
A closer look at each device
Receipt printers
A thermal receipt printer prints on a roll of heat-sensitive paper — there's no ink to replace. The system supports the standard "ESC/POS" printers sold everywhere (Epson, Star, Bixolon and many generic brands), in both 58mm and 80mm paper widths. When a sale finishes, the receipt prints on its own, including your shop logo and a barcode of the receipt number.
The cash drawer
The cash drawer opens via the receipt printer — when a customer pays cash, the printer sends a quick pulse down the cable to the drawer and it springs open. There's also an Open drawer button on the checkout screen (for staff who are allowed to use it) for when you need to open it without a sale, such as giving change for a phone call.
Barcode scanners
There are two ways to scan:
- A USB scanner — the most reliable choice. It plugs in and "types" each barcode straight into the screen, so there's nothing to install. Just scan and the product drops into the cart.
- A camera scanner — useful on a tablet, laptop or phone that has no USB scanner. Tap the camera button on the checkout screen, point the camera at the barcode, and it reads it. You'll be asked once for permission to use the camera.
Both methods understand the special barcodes that supermarket weighing scales print (which include the weight and price). See Weighed & scale items for that.
Label printers
If you stick price and barcode labels on your stock, a thermal label printer prints them one at a time. Don't have one? Print a whole sheet of labels onto A4 sticker paper with an ordinary printer instead. Full details are on the Barcode labels page.
If a print fails — the failed-print queue
Printers run out of paper, get switched off, or lose their cable at the worst moment. When a receipt can't print, the system doesn't lose it — it's tucked into a failed-print queue and a small message appears: "1 print failed." The system then quietly tries again every few seconds. Once you fix the printer (load paper, switch it on), the queued receipt prints by itself — or you can press Retry to push it through immediately.
The Hardware diagnostics page
The diagnostics page (Settings → Hardware) is your one-stop check-up. It shows a green, amber or red light for each device — receipt printer, label printer, cash drawer and scanner — along with a Test button for each. Run these tests after changing any hardware, or as a quick "is everything ready?" check before a busy day.
Tips & best practices
- Use Chrome, Edge or Opera on the till. These browsers can talk directly to thermal printers and the cash drawer. Safari and Firefox still work, but fall back to the slower browser-print path with no automatic drawer.
- Pair the printer once per browser. The browser remembers it. You only need to pair again if you switch computers or browsers.
- Run a test print before opening. Thirty seconds on the diagnostics page saves a queue of frustrated customers later.
- Keep a spare paper roll under the counter. A paper-out is the most common reason a print fails — and the queue will hold your receipt until you reload.
- One small thermal printer transforms the experience. If you're on browser-print only, it's the single best upgrade you can make.
Notes & warnings
The cash drawer only pops open automatically with a thermal printer. If you print receipts through the browser dialog instead, the drawer can't be opened by the system — your cashier opens it by hand or with the till key.
Apple iPads (Safari) can't print directly to thermal printers. They still work via the browser's Print dialog. For the fullest experience, use a Windows or Android device with Chrome on the till.
A test print does nothing? Check the obvious first: the printer is switched on, has paper, and its USB cable is firmly in. Then re-pair it from Settings → Hardware. If it still won't print, switch that counter to browser-print so you can keep trading while you sort it out, and see Troubleshooting.
Related: Barcode labels · The POS screen · Stores & terminals · Troubleshooting