Scheduled reports
Instead of logging in every Monday to run the same sales report, set it up once and have the POS email it to you — and anyone else you choose — automatically. It arrives as a ready-to-open Excel or CSV file, on the day and time you pick.
Overview
A scheduled report is a saved instruction that says: "take this report, with these filters, and email it to these people, this often." Once created, it runs by itself in the background. You keep an eye on your numbers without lifting a finger, and your team stays informed without needing their own logins.
It works with the reports you already use — sales summary, sales by product, and the rest. You set the filters (date range, store, and so on) the way you want them, then schedule that exact view.
Because reports are delivered by email, your shop's email (SMTP) settings must be configured for this to work. See Settings. If email isn't set up, schedules can be created but nothing will send.
Why it's useful
- Numbers come to you. Your weekly sales land in your inbox every Monday morning — no remembering, no logging in.
- Keep partners and accountants in the loop. Send month-end figures straight to people who don't use the POS.
- Ready to work with. Reports arrive as Excel or CSV files you can open, sort and share immediately.
- Set once, runs forever. Until you pause or delete it, the schedule keeps delivering.
Scheduling a report, step by step
-
Open the report you want
Go to Reports and open any report — say, the Sales summary. Set its filters (date range, store, etc.) exactly as you'd like them delivered.
-
Press "Schedule"
Use the Schedule button on the report. A short form opens.
-
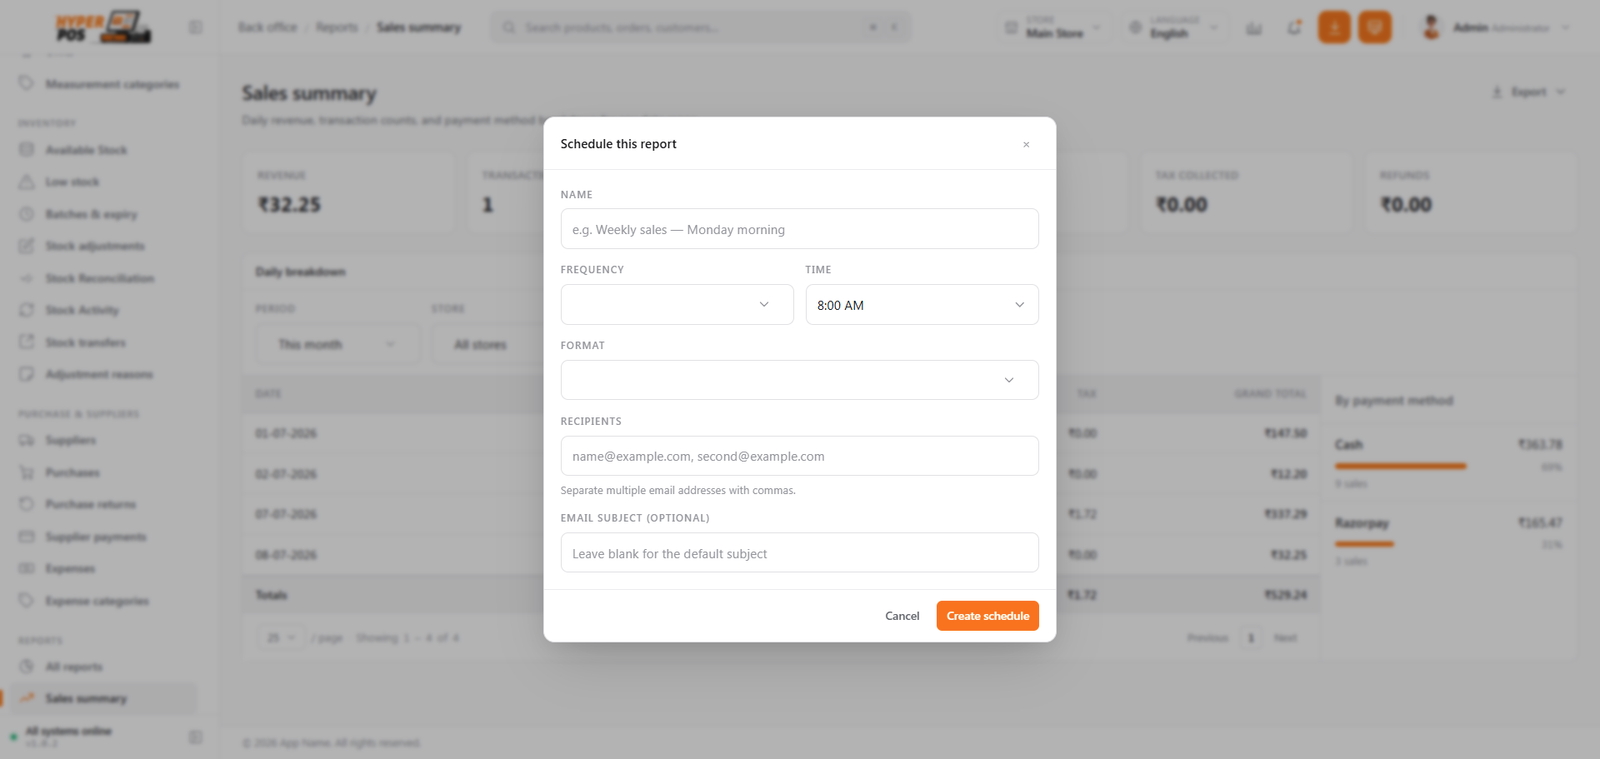
Name it and choose how often
Give the schedule a clear name (e.g. "Weekly sales — Monday morning"), pick a frequency — Daily, Weekly or Monthly — and set the day and time it should send.
-
Pick a format and recipients
Choose the file format (Excel or CSV), then enter one or more recipient email addresses, separated by commas. You can add an optional custom email subject.
-
Create the schedule
Choose Create schedule. From now on it sends automatically. You'll find it under Reports → Scheduled reports.
Managing your schedules
Open Reports → Scheduled reports to see everything you've set up. For each one you can:
| Action | What it does |
|---|---|
| Run now | Sends the report immediately — handy for a quick test that email is working. |
| Pause | Temporarily stops it sending, without deleting it. Resume any time. |
| Resume | Restarts a paused schedule. |
| Delete | Removes the schedule permanently — it stops sending straight away. |
Tips & best practices
- Test with "Run now". After creating a schedule, run it once to confirm the email arrives and looks right.
- Name schedules clearly. "Monthly stock — 1st" is easier to manage later than "Report 1".
- Set the filters before scheduling. The schedule remembers the filters that were on screen — so get them right first.
- Send month-end reports on the 1st. A monthly schedule dated the 1st captures the whole previous month cleanly.
Notes & warnings
Automatic sending relies on the scheduler running. Scheduled tasks are driven by a "cron job" on your server. If reports never arrive, check that the cron job is configured (see Setting up the cron job) and that your email settings are correct.
Double-check recipient addresses. Reports can contain sales figures — make sure you're only sending them to people who should see them.
Related: Reports · Settings (email) · Cron job setup